
How To
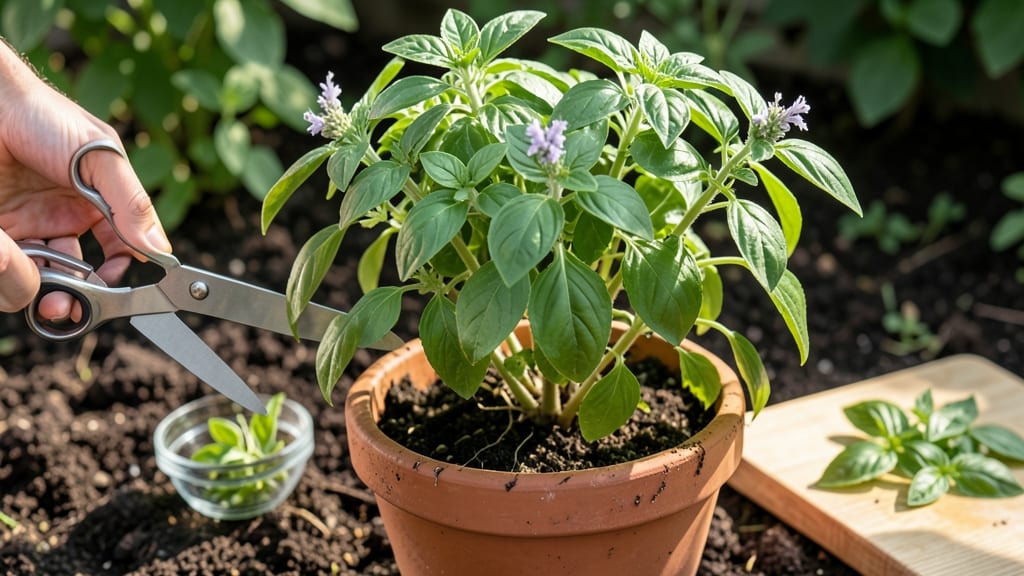
Clipping basil leaves wrong ruins your plant—and your pesto. ✂️ The right snip turns a leggy, sparse herb into a bushy, flavor-packed machine that keeps producing all season. I’ve saved dozens of basil plants from sad, woody stems by mastering this one simple technique.
Start by harvesting just the top sets of leaves—never more than ⅓ of the plant at once—using clean, sharp scissors or fingers. Pinch above leaf nodes (those little bumps where leaves grow) to encourage new branches.
Avoid cutting stems longer than 2 inches, or you’ll stunt growth. The key? Consistency—clip regularly, and your basil will stay compact, leafy, and bursting with flavor.
📚 In This Guide
- What you need
- Instructions
- Tips and common mistakes
- Wrapping up and next steps
What you need
- ● Fresh basil plant – A healthy, mature plant (at least 6–8 inches tall) with visible stems and leaves. Pro tip: Choose plants with at least 6–8 leaves for optimal harvest!
- ● Clean, sharp scissors or pruning shears – A pair of kitchen scissors (for small leaves) or bypass pruners (for thicker stems, 4–6 inches long). Warning: Dull blades crush stems—always keep them sharp!
- ● Small bowl or container – A glass jar, ceramic dish, or stainless-steel bowl (8–12 oz) to hold your clipped leaves. Avoid plastic if storing for long periods.
- ○ Water (optional but helpful) – A spray bottle (4 oz) to mist leaves if they wilt during clipping.
- ● Rubbing alcohol (70% or higher) – For sterilizing scissors between cuts (prevents bacterial spread).
- ● Labeling tape or marker – If harvesting multiple herbs, jot down the date or variety on your container.
- ● Cutting board or tray – A wooden or silicone board (12x12 inches) to protect surfaces and keep leaves organized.
- ● Glove or towel – Basil leaves can stain (especially purple varieties), so protect your hands!
Step-by-Step instructions for harvesting basil leaves
Here's how to snip basil like a pro—keeping your plant thriving while maximizing flavor.
✂️ Step 1: Identify the Right Leaves to Clip
Focus on harvesting from the top third of the plant where the largest, most mature leaves grow. These leaves have already developed their full flavor profile and won't stunt the plant's growth. Look for leaves that are at least 2-3 inches long—smaller leaves still need energy to develop.
I always check for any yellowing or damaged leaves first and remove those immediately. Basil plants direct their energy toward repairing damaged foliage, so pruning healthy leaves alongside damaged ones can stress the plant. Use your fingers to gently pinch off any leaves that aren't up to snuff before reaching for the pruners.
✂️ Step 2: Use the Right Technique for Maximum Growth
For the cleanest cut, use sharp, clean pruning shears or scissors. Never use your fingers to snap leaves off—this can tear the stem and invite disease. Hold the stem at a 45-degree angle just above a leaf node (the point where a leaf meets the stem). This angle helps water run off the cut and prevents rot.
I like to make my cuts about ¼ inch above the node. This encourages the plant to branch out rather than grow tall and leggy. If you're harvesting a stem with multiple leaves, cut just above the lowest leaf you want to keep. This preserves the plant's energy while still giving you a generous harvest.
🌿 Step 3: Harvest Strategically for Continuous Production
Never take more than one-third of the plant's foliage in a single harvest. Basil recovers well, but over-pruning stresses the plant and can lead to flower production—once basil blooms, the leaves become bitter. I aim to harvest every 2-3 weeks during the growing season to keep the plant productive.
Watch for new growth emerging from the nodes below your cuts. This is your signal that the plant is responding well to pruning. If you see flower buds forming, pinch them off immediately—they'll steal energy from leaf production. Regular harvesting actually encourages bushier growth, so you'll end up with more leaves overall.
💧 Step 4: Post-Harvest Care for a Thriving Plant
After harvesting, give your basil a light watering if the top inch of soil feels dry. The plant will need to recover from the minor stress of pruning. I always water at the base rather than from above to prevent fungal spores from landing on fresh cuts.
Place your basil in a location with 6-8 hours of sunlight daily and protect it from strong winds that can damage tender new growth. Within 5-7 days, you should see new leaves emerging from the nodes where you made your cuts. This rapid regrowth is your reward for proper harvesting technique.
Tips & tricks for perfect basil harvesting
These little details make all the difference between a basil plant that thrives and one that struggles to recover.
Timing Secret: The 2-3 week harvest interval in Step 3 is your sweet spot—this gives the plant enough time to recover while preventing flower production. I've learned the hard way that harvesting too frequently (every 1-2 weeks) stresses the plant and leads to bitter leaves. Watch for new growth emerging from the nodes within 5-7 days after each harvest—this is your confirmation you're harvesting at the right frequency.
Tool Technique: Sharp, clean pruning shears are non-negotiable in Step 2. I keep a dedicated pair just for herbs and sterilize them with rubbing alcohol between uses. Dull blades crush stems and create jagged cuts that invite disease. For small leaves, your fingers work fine, but always pinch just above the node—not through it—to preserve the plant's energy flow.
Visual Cue for Perfect Cuts: When making your 45-degree angle cut in Step 2, imagine you're slicing a wedge of cheese—equal parts flat and angled. This angle isn't just for aesthetics; it creates a larger surface area for water absorption while preventing water from pooling on the cut. I draw a quick mental line between the leaf node and the cut to ensure consistency every time.
Stress Management: The one-third foliage rule in Step 3 isn't arbitrary—it's based on plant physiology. Basil can handle up to 33% removal without stress, but exceeding this triggers survival mode. After heavy harvests, I always give the plant a light watering at the base (Step 4) to help it recover. Think of it like giving your plant a post-workout recovery drink after a tough gym session.
Pro Tips for Clip Basil Leaves
- These little details make all the difference between a basil plant that thrives and one that struggles to recover.
- Timing Secret: The 2-3 week harvest interval in Step 3 is your sweet spot—this gives the plant enough time to recover...
- Tool Technique: Sharp, clean pruning shears are non-negotiable in Step 2. I keep a dedicated pair just for herbs and ...
Frequently asked questions
Got questions about clipping basil like a pro? You’re not alone—here are the answers to the most common queries to keep your basil thriving and your kitchen bursting with flavor!
How often should I clip basil leaves?
Clip basil every 2–3 weeks to encourage bushier growth. Regular pruning prevents legginess and keeps the plant producing fresh leaves. Just avoid over-trimming—never take more than ⅓ of the plant at once!
Can I clip basil leaves too early?
Yes! If you clip basil too early (before it’s 6–8 inches tall), you’ll stunt its growth. Wait until the plant has a few sets of mature leaves before your first snip. Patience pays off with a stronger, more flavorful plant!
What if my basil leaves turn yellow after clipping?
Yellowing leaves after clipping usually mean over-trimming or stress. If it’s mild, trim less aggressively next time. For severe yellowing, check for overwatering or nutrient deficiency. A balanced fertilizer can help revive it!
Is it better to pinch or cut basil leaves?
Both work, but cutting with clean scissors is ideal for precision and hygiene. Pinching (using fingers) can work for small leaves, but it risks bruising the stems. Always cut just above a leaf node for best results.
Can I use kitchen scissors to clip basil?
Kitchen scissors can work in a pinch, but sterilized pruning shears are best to avoid disease. If using scissors, wash them thoroughly with rubbing alcohol before and after clipping to prevent bacterial spread.
How do I store clipped basil leaves?
For short-term use, store leaves in a jar of water (like flowers) in the fridge for 3–5 days. For longer storage, blanch and freeze or dry them. Avoid washing before storage—moisture speeds up spoilage!
Wrapping up and next steps
Clipping basil leaves is a simple yet rewarding skill that keeps your plants thriving while boosting your dishes with fresh, vibrant flavor. Whether you’re a seasoned gardener or a kitchen newbie, mastering the art of the snip ensures you’ll always have a steady supply of aromatic basil—no matter the season.
Now that you’re armed with the right techniques, go ahead and give it a try!
Ready for more? Experiment with infused oils, pesto recipes, or even growing basil indoors—your culinary adventures are just a snip away! 🌿✨