
Container Gardens
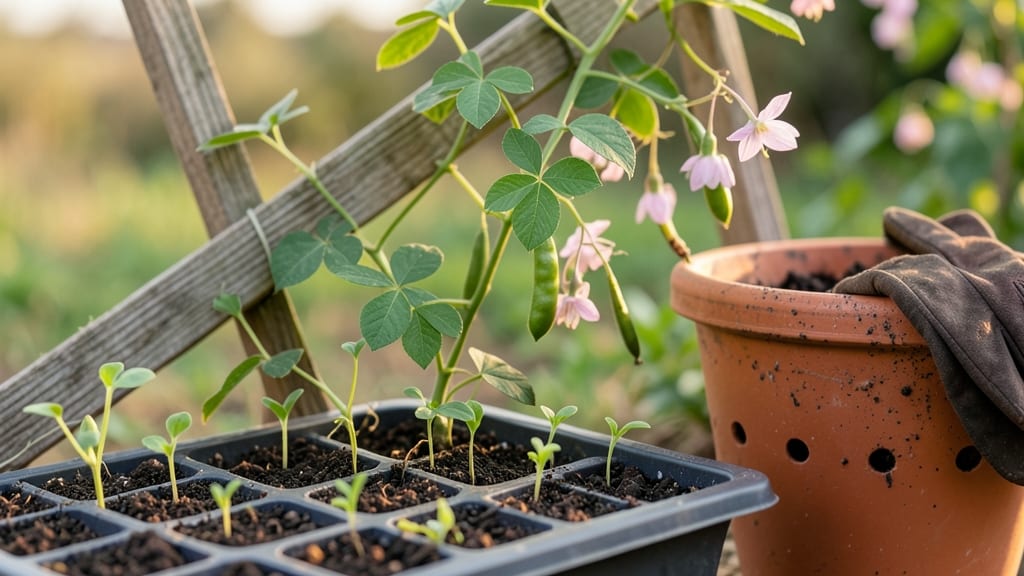
How to grow black-eyed peas in containers proves you don’t need a yard for fresh, protein-packed harvests. 🌱 My first attempt in a 5-gallon pot yielded more peas than my neighbor’s in-ground row—and it took up just 12 inches of space. The secret? Matching their tropical roots to the right container setup.
You’ll need at least 5-gallon containers (bigger for bush varieties), well-draining soil mixed with compost, and a sunny spot getting 6-8 hours of light daily. Black-eyed peas thrive when their roots stay warm—so dark-colored pots help.
Trellising isn’t required, but vining types (like 'Purple Hull') climb better with a simple metal cage or stakes.
Water when the top inch feels dry, but never let them soggy—root rot shuts them down fast. Within 6-8 weeks, you’ll see those familiar purple flowers, followed by pods ready to pick in 80-90 days. The flavor? Richer than store-bought, with a satisfying crunch that disappears when canned.
Watch for spider mites in dry heat (spray with water to deter them) and powdery mildew in humidity (space plants for airflow). Containers let you move them to avoid pests—just don’t forget to rotate them weekly for even growth.
Once you master this, try growing them year-round in a greenhouse or under grow lights.
📚 In This Guide
- What you need
- Instructions
- Tips and common mistakes
- Wrapping up and next steps
What you need
- ● Container(s): At least one 5-gallon container per plant (or larger for multiple plants).
- ● Containers with drainage holes (or drill your own!).
- ● Depth of 12–18 inches to accommodate root growth.
- ● Potting Mix: High-quality, well-draining container mix (avoid garden soil—it compacts too easily!).
- ● Black-Eyed Pea Seeds: 3–5 seeds per container (they germinate quickly!).
- ○ Compost or Organic Fertilizer: Balanced 10-10-10 or legume-specific fertilizer (optional but helpful).
- ● Watering Can or Spray Bottle: For gentle, consistent hydration.
- ○ Trellis or Cage (Optional): If growing vining varieties, use a 3–4 ft tall trellis to support climbing plants.
- ○ Mulch (Optional): Straw or shredded leaves to retain moisture and suppress weeds.
- ● Sunlight: 6–8 hours of full sun daily (black-eyed peas are sun-lovers!).
- ● Warmth: Soil temperature should be at least 60°F (15°C) for germination.
- ● Patience: Seeds sprout in 7–14 days—stay consistent with care!
Step-by-Step instructions for growing black eyed peas in containers
Here’s how to cultivate these nitrogen-fixing powerhouses in limited space—no yard required.
🪴 Step 1: Select Containers and Prepare the Growing Medium
Black eyed peas thrive in 5-gallon containers or larger, with drainage holes to prevent root rot. I use fabric grow bags for their breathable sides, which help roots establish faster. Fill each container with a lightweight potting mix blended with 20% compost—this ensures drainage while retaining moisture. Avoid garden soil; it compacts and suffocates roots.
Tap the container gently after filling to settle the mix, but don’t compact it. The ideal texture should resemble crumbled cake—firm enough to hold shape but loose enough for roots to penetrate. Add a slow-release fertilizer (5-10-5 ratio) to the top inch of soil to give seedlings a nutrient boost without burning tender roots.
🌱 Step 2: Plant Seeds at the Right Depth and Spacing
Sow 4-5 seeds per container, placing them 1 inch deep and 2-3 inches apart. Black eyed peas germinate best in warm soil (70-85°F), so preheat the soil by setting containers in a sunny window or on a seedling heat mat for 24 hours before planting. This speeds up germination, which can take 7-14 days depending on your climate.
Once seedlings emerge, thin to 2-3 strongest plants per container. Gently snip the weakest stems at the base with clean scissors—don’t pull, or you’ll disturb the roots of remaining plants. Watch for first true leaves (the second set after the initial cotyledons) before thinning; this ensures you’re removing only true weaklings.
☀️ Step 3: Provide Support and Optimal Sunlight
Black eyed peas are vining plants that need 6-8 hours of direct sunlight daily. Install 5-foot tall trellises or stakes in each container before planting to avoid root disturbance later. I use bamboo stakes for their natural grip—simply tie vines loosely with soft plant ties every 4-6 inches as they grow.
If your space lacks full sun, supplement with a grow light positioned 6-12 inches above the plants for 14-16 hours daily. Leggy growth (stems stretching toward light) is your cue to adjust. Keep containers in a sheltered spot if winds exceed 10 mph; young vines snap easily when whipping in gusts.
💧 Step 4: Water and Fertilize for Consistent Growth
Water when the top 2 inches of soil feel dry—about 1-2 times weekly in warm weather. I use a drip irrigation system or watering can with a rose attachment to deliver moisture directly to the soil, avoiding wet foliage (which invites fungal diseases). Mulch with 1 inch of straw to retain moisture and suppress weeds, but keep it 2 inches away from stems to prevent rot.
After the first true leaves appear, side-dress with compost tea every 4 weeks to replenish nitrogen. Black eyed peas fix their own nitrogen, but container-grown plants benefit from occasional feeding. Stop fertilizing 4 weeks before harvest to improve pod flavor and prevent bitterness.
✂️ Step 5: Harvest and Encourage Continuous Production
Harvest begins 60-70 days after planting, when pods are firm but plump. Pick every 2-3 days to encourage more flowers and pods. Use clean pruning shears to snip stems just above a leaf node—this redirects energy to new growth. Avoid harvesting in direct sunlight or rain; pods bruise easily and can absorb excess moisture.
If plants stop producing after the first flush, prune back 50% of the vine after harvest. This rejuvenates growth and often yields a second crop. Watch for yellowing leaves—this signals either overwatering (check drainage) or nutrient deficiency (add compost tea). With proper care, container-grown black eyed peas produce well into fall in most climates.
Tips & tricks for thriving black eyed peas in containers
Container gardening with black eyed peas is all about creating the right conditions—here's how to avoid common pitfalls and maximize your harvest.
Container Selection: Fabric grow bags are my go-to because their breathable sides prevent root circling, which is a common issue with traditional pots. If you use rigid containers, make sure they're at least 5 gallons—smaller containers will restrict root growth and limit your harvest. I've seen black eyed peas thrive in repurposed buckets with drainage holes drilled in the bottom, but avoid anything narrower than 12 inches in diameter.
Soil Prep Strategy: The 20% compost blend mentioned in Step 1 is non-negotiable for container gardening. I like to add a handful of perlite to the mix to improve aeration—this prevents that dreaded compacted soil feeling. For the slow-release fertilizer, I mix in an extra teaspoon of bone meal with the 5-10-5 blend to give roots a phosphorus boost during early development. This helps establish stronger root systems before vining begins.
Germination Boost: That 24-hour soil warming period in Step 2 makes all the difference. I've found that placing containers on a seedling heat mat for 12 hours, then moving them to a sunny windowsill for the remaining 12 hours gives more consistent results than just using a warm window. If you don't have a heat mat, try placing the containers in a dark closet with a lamp nearby—just monitor the soil temperature with a thermometer to keep it between 70-85°F.
Sunlight Optimization: The 6-8 hours of sunlight requirement can be tricky in apartments. I've had success using a south-facing windowsill combined with a small LED grow light on a timer for the remaining hours. Position the light 8-10 inches above the plants during the 14-16 hour supplement period—closer than 6 inches can scorch delicate vines. Rotate containers daily to prevent lopsided growth toward the light source.
Pro Tips for Grow Black Eyed Peas In Containers
- Container gardening with black eyed peas is all about creating the right conditions—here's how to avoid common pitfal...
- Container Selection: Fabric grow bags are my go-to because their breathable sides prevent root circling, which is a c...
- Soil Prep Strategy: The 20% compost blend mentioned in Step 1 is non-negotiable for container gardening. I like to ad...
Frequently asked questions
Got questions about growing black-eyed peas in containers? You’re not alone! Here are answers to the most common concerns to help you succeed with your container garden.
How deep should my container be for black-eyed peas?
Black-eyed peas thrive in containers that are at least 12–18 inches deep. This ensures enough root space for their vining habit. If your container is shallower, opt for bush varieties like ‘Purple Hull’ or ‘Crowder’—they stay compact and still produce well!
When is the best time to plant black-eyed peas in containers?
Plant seeds 2–3 weeks after your last frost date when soil temps reach 60–65°F. They’re heat-loving plants, so avoid early spring planting unless you’re in a warm climate. For cooler regions, wait until late spring or early summer for optimal growth.
Can I grow black-eyed peas in hanging baskets?
Hanging baskets work for bush varieties (like ‘Texas Purple Hull’), but avoid vining types—they’ll sprawl uncontrollably. Use a 12-inch basket with drainage holes, fill it with lightweight potting mix, and train vines gently with soft ties if needed.
Why are my black-eyed peas leaves turning yellow?
Yellow leaves often signal overwatering, nutrient deficiency, or pests. Check soil moisture—containers dry faster! Amend soil with compost or use a balanced fertilizer (like 10-10-10) every 4–6 weeks. Inspect for aphids or spider mites; blast off pests with water or use neem oil if severe.
Can I grow black-eyed peas with other container plants?
Yes! Pair them with companion plants like okra, peppers, or herbs (basil, cilantro). Avoid planting near potatoes or fennel—they stunt growth. Just ensure your container has enough space (12+ inches deep) and your peas get 6–8 hours of sunlight daily.
Wrapping up and next steps
Growing black-eyed peas in containers is a rewarding way to enjoy fresh, homegrown legumes—even in small spaces! With the right soil, sunlight, and care, you’ll harvest flavorful peas perfect for soups, salads, or snacks. Start small, stay consistent, and soon you’ll be reaping the benefits of your green thumb!
Ready to take the next step? Try planting a few seeds today and watch your container garden thrive! 🌱✨