
Aphids
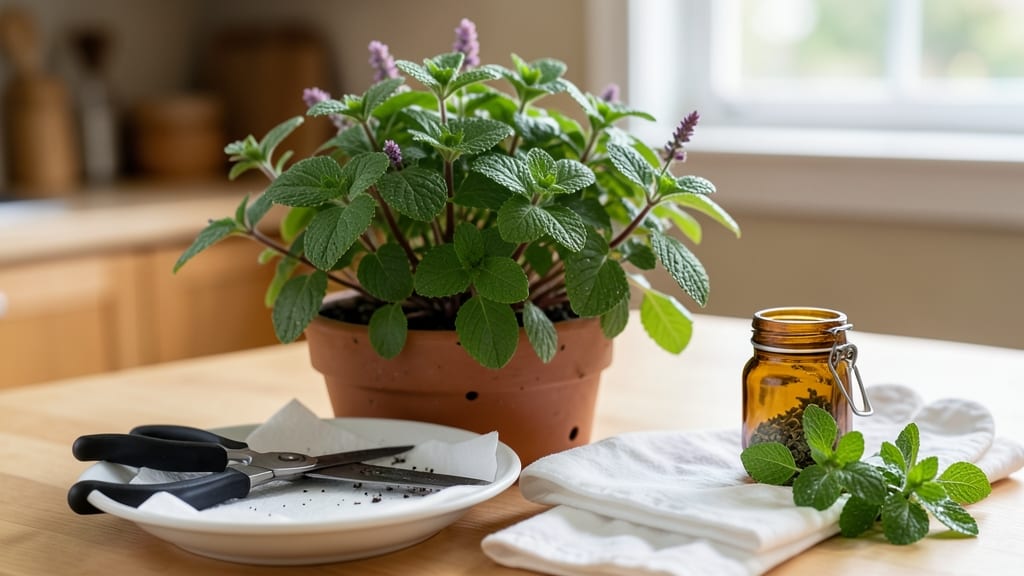
How to dry mint in the microwave—it’s the fastest way to preserve that bright, fresh flavor without losing potency. Fresh mint loses its punch fast—but a microwave preserves its vibrant green power in just 90 seconds. I’ve dried mint this way for years, and the difference between store-bought dried leaves and my homemade stash is night and day. The key? Short bursts, not overcooking, and controlling moisture so it stays potent for months.
You’ll need just three things: fresh mint sprigs (washed and dried), a microwave-safe plate, and paper towels. Skip the fancy equipment—this method works in any kitchen. The goal is to dry the leaves gently, not crisp them into dust.
Too much heat kills the oils that make mint taste fresh, so we’re playing it smart with 10-second intervals.
By the end, you’ll have crumbly, fragrant dried mint that smells like summer in a jar. It’s perfect for teas, cocktails, or cooking—no more buying weak, dusty dried herbs from the store.
Store it in an airtight container away from light, and it’ll keep its flavor for up to a year. That’s 12 months of garden-fresh mint from a single harvest.
If you’re worried about losing flavor, try air-drying as a backup—it’s slower but just as effective. The microwave method just saves time when you need dried mint fast. Either way, your pantry’s about to get a whole lot more aromatic.
📚 In This Guide
- What you need
- Instructions
- Tips and common mistakes
- Wrapping up and next steps
What you need
- ● Fresh mint leaves – A small handful (about 1 cup) of clean, healthy leaves (avoid wilted or yellowing ones!).
- ● Paper towels – 2-3 sheets for patting dry excess moisture.
- ● Microwave-safe plate or dish – A flat, microwave-safe container (ceramic, glass, or microwave-safe plastic).
- ○ Microwave-safe cover or microwave-safe cling wrap – Optional but recommended to prevent splatters.
- ● Air-tight container or resealable bag – Small jars, glass containers, or zip-top bags for storage.
- ○ Fine-mesh strainer or colander – Optional, for rinsing leaves if needed.
- ○ Spoon or spatula – Optional, for gently breaking up leaves post-drying.
Step-by-Step instructions for drying mint in the microwave
Preserving fresh mint has never been faster—just follow these simple steps to keep its vibrant flavor for months.
Harvest and Prep the Mint
Pick fresh mint stems when they’re fully mature but before flowering—this ensures maximum oil content and flavor. Rinse the stems under cool water to remove dirt, then gently pat them dry with a clean kitchen towel. Avoid shaking off leaves too roughly; you want them intact for even drying.
Snip the stems into 3-4 inch sections, removing any yellowed or wilted leaves. Bundle 5-6 stems together at the base and secure them with a rubber band. This keeps the leaves from scattering during drying and helps them dry uniformly. I like to hang a few bundles upside down in my kitchen while I prep the rest for the microwave—it’s a great way to dry a small batch quickly.
Arrange Mint for Even Drying
Spread the mint bundles on a microwave-safe plate lined with a paper towel. The paper towel absorbs excess moisture and prevents steam buildup, which can make the leaves soggy. Arrange the bundles in a single layer, leaving ½ inch of space between each one. This ensures hot air circulates evenly, so no part of the mint stays damp.
If you’re drying a large quantity, work in batches—overcrowding the plate leads to uneven drying and can cause some leaves to stay moist while others crisp up too much. For 4 servings, I find a 12-inch plate works perfectly, holding about 20 stems at once without overpacking.
Microwave in Short Bursts
Place the plate in the microwave and dry the mint in 30-second intervals on high heat. After each burst, open the door slightly to release steam and check the leaves. You’re looking for them to turn a dull green and feel slightly crisp to the touch—this means they’re dry enough to crumble but not yet brittle.
Repeat the 30-second bursts until the leaves are fully dry, usually 2-3 minutes total. Over-drying turns the leaves brown and loses flavor, so stop as soon as they’re dry. I always set a timer to avoid burning them—microwaves vary, and some dry faster than others. If you’re unsure, err on the side of slightly under-drying; you can always finish them off later.
Crumble and Store for Long-Term Use
Once the mint is dry, gently rub the stems between your fingers to release the leaves. Discard the woody stems or save them for tea blends—they still hold some flavor. For 4 servings, you should end up with about ¼ cup of dried leaves. Store them in an airtight container, like a small jar or resealable bag, and keep it in a cool, dark place. Properly stored, dried mint retains its flavor for up to 6 months.
Label your container with the date—this helps track freshness. If you notice the leaves losing potency before then, simply crush them lightly before use to release more aroma. Dried mint works beautifully in teas, cocktails, and cooking, so you’ll want to keep it handy for quick flavor boosts.
Tips & tricks for perfect microwave-dried mint
Microwave drying is the fastest way to preserve mint's vibrant flavor—but these little tricks make all the difference between good and great results.
Timing Secret: Those 30-second bursts are non-negotiable for even drying. I set my microwave timer for 28 seconds instead of 30 to account for the few seconds it takes to open the door and check the leaves. This ensures you're hitting the full 30 seconds of high heat each time without overdoing it. Every microwave behaves differently—if your leaves dry faster, reduce to 25-second bursts.
Visual Cue: In Step 3, look for two key signs: the leaves should turn from bright green to a dull, matte green, and they should feel crisp but not brittle when you gently rub them between your fingers. If they're still shiny or pliable, they need more time. The 2-3 minute total is just a guideline—your microwave's power level determines the exact time, so always check visually rather than relying on the clock.
Make-Ahead Move: You can actually prep the mint bundles up to 24 hours in advance and store them in a sealed plastic bag in the fridge. When you're ready to dry, just remove them from the fridge 30 minutes before microwaving to let them come to room temperature. This works especially well if you're drying multiple batches over a weekend—no last-minute prep needed.
Storage Wisdom: For maximum flavor retention, store your dried mint in a small glass jar with an airtight lid and add a bay leaf or two. The bay leaf adds subtle flavor and acts as a natural preservative. I also like to crush the dried leaves lightly right before storing—this releases more of the essential oils and keeps the flavor vibrant for longer. The cool, dark pantry is ideal, but a cupboard away from the stove works too.
Pro Tips for Dry Mint In Microwave
- Microwave drying is the fastest way to preserve mint's vibrant flavor—but these little tricks make all the difference...
- Timing Secret: Those 30-second bursts are non-negotiable for even drying. I set my microwave timer for 28 seconds ins...
- Visual Cue: In Step 3, look for two key signs: the leaves should turn from bright green to a dull, matte green, and t...
Frequently asked questions
Can I dry mint in the microwave if it’s wet or damp?
Yes! Just pat the leaves dry with a paper towel first to remove excess moisture. Wet mint can create steam in the microwave, which may affect drying efficiency. If your mint is very damp, spread it out on a clean towel for 5–10 minutes before microwaving.
How do I know when the mint is fully dried?
The mint is ready when it’s crispy, fragrant, and crumbles easily between your fingers. Overdrying can turn it brittle, so check every 15–30 seconds after the initial 30-second intervals. Store it in an airtight container once fully dried to preserve its potency.
What if my microwave isn’t powerful enough to dry mint?
If your microwave struggles with the task, try these fixes: Use a smaller batch of leaves, increase the power level (if adjustable), or extend drying time in 10-second increments. Alternatively, finish drying in a low oven (200°F/93°C for 10–15 minutes) for extra crispiness.
Can I dry other herbs (like basil or cilantro) the same way?
The microwave method works for most leafy herbs, but timing varies. Basil and cilantro dry faster (20–40 seconds total), while heartier herbs like rosemary may need slightly longer. Always test a small batch first to avoid overheating.
What should I do if my mint smells burnt?
Burnt-smelling mint usually means it was overheated. Reduce power next time or use shorter bursts (e.g., 15 seconds at a time). If it’s already burnt, toss it—heat destroys flavor and aroma. For future batches, spread leaves in a single layer to ensure even drying.
Wrapping up and next steps
Drying mint in the microwave is a quick, efficient, and flavor-packed way to preserve freshness without sacrificing quality!
Whether you’re prepping for pest control, teas, or cooking, this method ensures your herbs stay potent for months. Now that you’ve mastered the technique, why not experiment with other herbs or share your newfound skills with friends? Grab your dried mint and start creating—your kitchen (and garden!) will thank you. 🌿✨
- Next step: Try infusing your dried mint into homemade remedies or recipes!