
Size
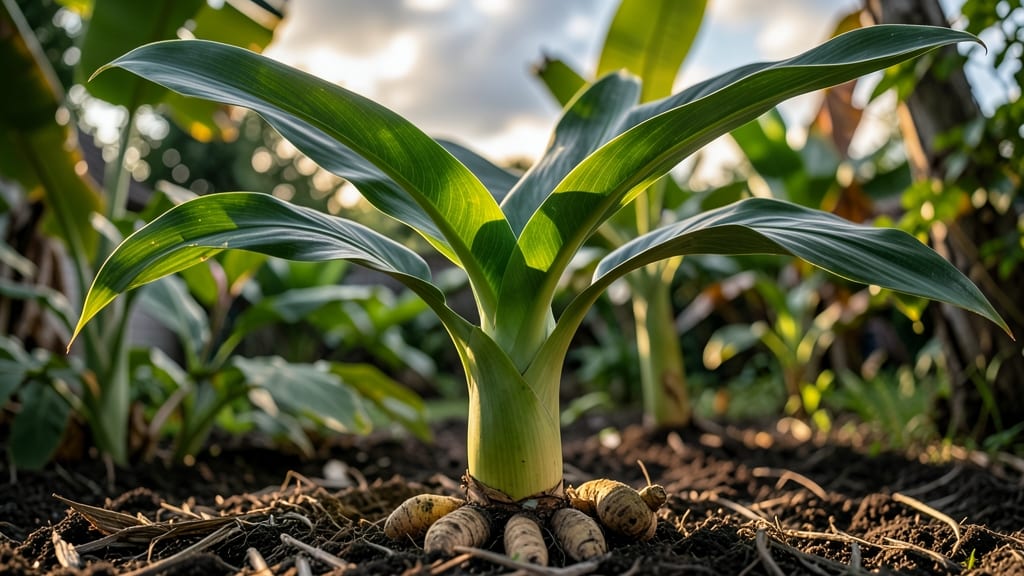
How to grow a curcuma ginger plant feels like unlocking a tropical secret in your garden. 🌱 The golden harvest you’ll pull from the earth in just six months is worth every bit of patience—especially when you realize store-bought turmeric can’t compare to the vibrant, earthy rhizomes you’ll grow yourself.
Start with healthy rhizomes (not powder), a sunny spot, and well-draining soil. Most people overlook the soil prep—turmeric hates soggy roots, so mix in compost and sand for that perfect airy texture. Plant the rhizomes just below the surface, about 2-3 inches deep, with the "eyes" facing upward.
By month three, you’ll spot those signature turmeric leaves—long, lance-shaped, and slightly waxy. Keep the soil consistently moist but not drenched, and watch as the rhizomes thicken underground.
Harvest when the leaves yellow and die back, typically around 8-10 months, but you can dig up a few at a time once they’re pencil-sized.
Troubleshooting slow growth? Check your watering—too much or too little stunts progress. Yellow leaves? It’s often overwatering or poor drainage. With the right care, you’ll end up with rhizomes so vibrant they’ll make your kitchen smell like sunshine. Ready to grow your own spice gold?
📚 In This Guide
- What you need
- Instructions
- Tips and common mistakes
- Wrapping up and next steps
What you need
- ● Curcuma ginger rhizomes: 3–5 healthy, plump rhizomes (each with 2–3 "eyes" or buds). Pro tip: Choose organic, untreated rhizomes from a trusted nursery!
- ● Well-draining potting mix: 5–10 gallons of a blend of 60% coconut coir/peat moss, 30% perlite or coarse sand, and 10% compost.
- ● Containers: For pots: 5–7" diameter containers (1 per rhizome) with drainage holes.
- ● For ground planting: A sunny, sheltered spot with loose, well-draining soil (pH 6.0–7.5).
- ● Watering can or hose: With a gentle spray nozzle for even moisture.
- ● Fertilizer: Balanced liquid fertilizer (10-10-10 or 20-20-20): 1 tbsp per gallon of water, applied every 4–6 weeks.
- ● Organic option: Compost tea or worm castings (monthly).
- ● Mulch: Straw or shredded leaves (2–3 inches) to retain moisture.
- ● Pruning shears: For trimming yellow or dead leaves.
- ● Grow lights: LED full-spectrum lights (12–14 hours/day) if growing indoors.
- ● Humidity tray: A shallow tray with pebbles and water to boost humidity (especially for indoor setups).
- ● Soil moisture meter: To avoid over/under-watering.
- ● Turmeric powder (for reference): To compare your harvest’s color and potency!
Step-by-Step instructions for growing curcuma ginger plants
Here's how to turn a single rhizome into a thriving tropical harvest in just six months.
🌱 Step 1: Select and Prepare Your Rhizome
Curcuma ginger (Curcuma domestica) grows from thick, knobby rhizomes—not the same as regular ginger. Choose a healthy, firm rhizome with at least 3-4 buds (eye-like nodes). These buds are where new shoots will emerge. I like to look for rhizomes with 2-3 inches of length and a smooth, tan-colored surface.
Before planting, soak the rhizome in warm water for 24 hours. This softens the outer skin and kickstarts root growth. After soaking, let it dry slightly so it doesn’t rot in wet soil. Here’s the thing—don’t cut the rhizome unless you’re dividing a large one. Each piece needs at least one bud to sprout.
☀️ Step 2: Plant in Warm, Well-Draining Soil
Curcuma ginger thrives in loose, fertile soil with good drainage. Mix equal parts potting soil and perlite (or coconut coir) to create a light, airy medium. Fill a 6-inch pot (or larger) with this mix, leaving 1 inch of space at the top. The rhizome should sit 1-2 inches deep, with the buds facing upward.
Ginger loves warmth—keep soil temperatures above 70°F. If planting outdoors in cooler climates, wait until after the last frost or use a heat mat to keep roots cozy. I’ve found that placing pots in a south-facing window or under grow lights helps speed up early growth. Water lightly after planting, just enough to settle the soil around the rhizome.
💧 Step 3: Water and Maintain Humidity
Water your curcuma ginger once a week, letting the top 2 inches of soil dry out between waterings. Overwatering is the fastest way to kill it—ginger rhizomes rot easily. After watering, I like to mist the leaves with a spray bottle to keep humidity high, especially in dry indoor environments. A humidity tray (pebble tray with water) works great if your home is dry.
You’ll see first shoots emerge in 3-6 weeks, depending on warmth. Once leaves appear, move the plant to a bright, indirect light spot (avoid harsh midday sun, which can scorch tender foliage). If growing outdoors, choose a sheltered, partially shaded area—ginger prefers dappled sunlight over full sun.
🌿 Step 4: Fertilize and Encourage Growth
After 8-10 weeks, when the plant has 4-6 leaves, start fertilizing with a balanced liquid fertilizer (10-10-10) diluted to half strength. Feed every 4-6 weeks during the growing season. Ginger is a heavy feeder, so don’t skimp—this is how you get those thick, aromatic rhizomes. I also add a handful of compost to the soil every few months for extra nutrients.
Watch for new shoots emerging from the rhizome—these are your plant’s way of multiplying. If you have space, you can carefully separate these smaller rhizomes after 4-5 months and replant them. Just be gentle—ginger roots are delicate. By month six, your plant should be lush with long, lance-shaped leaves and a sturdy stem.
⏰ Step 5: Harvest and Store for Future Use
Harvest your curcuma ginger 6-8 months after planting, when the leaves start to yellow and die back. Gently dig up the rhizome, brush off excess soil, and let it dry in a warm, dry place for 2-3 days. The outer skin will harden, making it easier to store. You can use it fresh, dried, or even make turmeric-like powder from the rhizome.
Save a portion of the rhizome for replanting next season. Store the rest in a cool, dark place (like a pantry) for up to 6 months. Real talk: The first harvest might be small, but each year, your plant will grow bigger and more productive. With patience, you’ll have a steady supply of this tropical treasure.
Tips & tricks for perfect curcuma ginger growth
Here's what I've learned from growing curcuma ginger that'll help you avoid common pitfalls and get the best harvest.
Bud Selection: When choosing your rhizome in Step 1, focus on buds that are slightly raised and firm to the touch. Avoid any that look shriveled or mushy—these won't sprout properly. I've found that rhizomes with 3-4 buds produce the most vigorous plants, but even a single bud can work if the rhizome is healthy. The key is ensuring each planting piece has at least one viable bud pointing upward.
Soil Temperature Secret: That 70°F minimum soil temperature in Step 2 is non-negotiable for root development. If you're in a cooler climate, consider using a seedling heat mat (available at garden centers) to maintain warmth during the critical first 4-6 weeks of growth. I once planted in 60°F soil and waited weeks for sprouts—don't make that mistake! For indoor growers, place your pot on top of your refrigerator (not inside) to create a warm microclimate.
Light Transition Strategy: The shift from bright indirect light to outdoor conditions in Step 3 deserves special attention. When moving your plant outdoors, do it gradually over 7-10 days—start with just 1-2 hours of morning sun, then increase daily exposure. Sudden full sun can cause leaf scorch, and you'll lose that precious foliage you've nurtured. I've seen plants go from lush green to crispy brown overnight when moved too quickly.
Fertilizer Timing: The 8-10 week mark for starting fertilizer in Step 4 is perfect because that's when your plant has established enough roots to handle nutrients. I recommend using a fish emulsion (another option) instead of chemical fertilizers for the first feeding—it's gentler on new root systems. After that initial feeding, stick with your 10-10-10 fertilizer every 4-6 weeks to maintain steady growth.
Pro Tips for Grow Curcuma Ginger Plant
- Here's what I've learned from growing curcuma ginger that'll help you avoid common pitfalls and get the best harvest.
- Bud Selection: When choosing your rhizome in Step 1, focus on buds that are slightly raised and firm to the touch. Av...
- Soil Temperature Secret: That 70°F minimum soil temperature in Step 2 is non-negotiable for root development. If you'...
Frequently asked questions
Got questions about growing your own curcuma ginger (Curcuma longa)? You’re not alone! Here are answers to the most common queries—from beginners to seasoned gardeners—to help you cultivate this golden root with confidence.
How long does it take for curcuma ginger to grow?
With ideal conditions, you can harvest fresh rhizomes in 6–8 months after planting. The first shoots (leaves) appear in 4–6 weeks, but the rhizome (the edible part) thickens over time. Patience is key—rushing harvests can stunt growth!
Can I grow curcuma ginger in cold climates?
Curcuma ginger thrives in warmth (70–85°F) and cannot tolerate frost. If you live in a cold zone, grow it in containers and move them indoors during winter or plant in greenhouses. Alternatively, try turmeric varieties bred for cooler climates (like 'Golden Harvest').
Why are my curcuma ginger leaves turning yellow?
Yellowing leaves usually signal overwatering or poor drainage. Ensure the soil stays moist but not soggy—curcuma ginger hates "wet feet." Check for root rot (mushy rhizomes) and repot if needed. Pro tip: Use a well-draining mix with perlite or coconut coir to prevent soggy soil.
Can I use regular ginger rhizomes to grow curcuma ginger?
No—regular ginger (Zingiber officinale) and curcuma ginger are different plants. For turmeric, buy certified organic turmeric rhizomes from nurseries or online. If you’re experimenting, try ginger varieties like Galanga (Alpinia galanga), which are closer relatives but still distinct!
How do I know when curcuma ginger rhizomes are ready to harvest?
Harvest when the leaves turn yellow and die back (usually 8–10 months in). The rhizomes should be 2–3 inches long and firm. Dig carefully with a fork, avoid cutting (this can cause bleeding), and let them dry in the sun for 3–5 days before storage. Bonus: Save a small piece to replant!
What’s the best temperature for growing curcuma ginger?
Curcuma ginger loves warmth—ideal temps are 70–85°F (21–29°C). Below 50°F (10°C), growth slows or stops. Use row covers in early spring or a heat mat for indoor pots to maintain warmth. Hot tip: A sunny windowsill or greenhouse works wonders!
Wrapping up and next steps
Growing curcuma ginger is a rewarding journey that brings vibrant color, rich flavor, and medicinal benefits right to your garden! With the right climate, soil, and care, you’ll enjoy a thriving harvest in just 6 months.
Start small, stay patient, and let nature do the rest—your kitchen (and health) will thank you!
Ready to harvest your first batch? Share your progress with fellow gardeners or dive deeper into organic pest control tips to keep your plants flourishing. Happy growing! 🌱✨