
How To
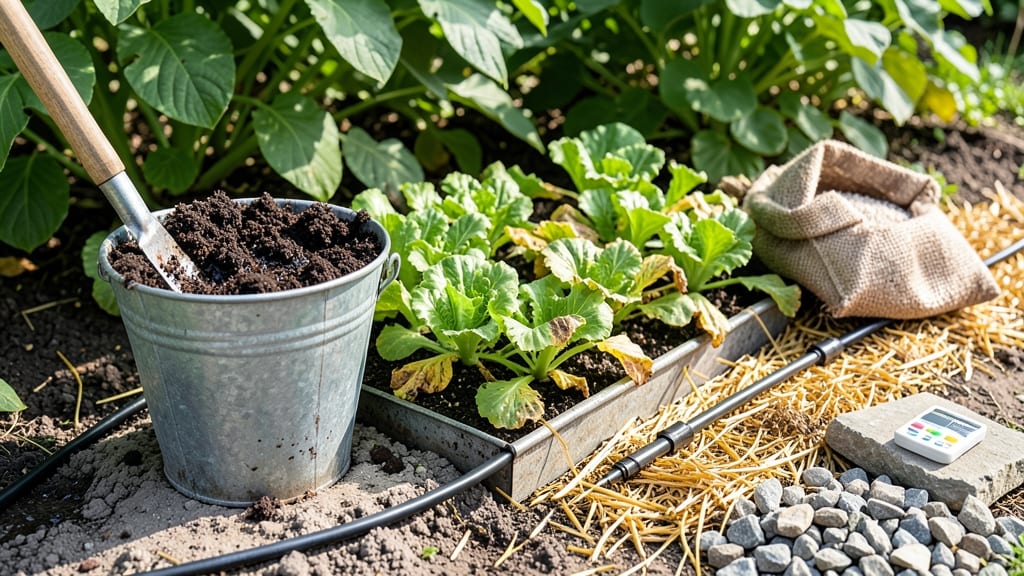
Your soggy garden soil isn’t just a nuisance—it’s suffocating your plants. 🌱 I’ve turned my waterlogged patch into a thriving space by focusing on three key fixes: improving drainage, amending the soil, and choosing the right plants for wet conditions.
The first step is diagnosing the problem—is it heavy clay, poor slope, or too much rain? Once you know, you can tackle it. Adding organic matter like compost or coconut coir loosens compacted soil, while sand or gravel helps break up clay.
For extreme cases, raised beds or French drains can work wonders.
With the right approach, you’ll see roots breathing again within weeks. Plants will grow stronger, flowers will bloom more freely, and you’ll finally get the healthy garden you’ve been dreaming of—no more wilting or yellowing leaves.
This works for vegetable gardens, flower beds, and even lawns. The key is patience and consistent care. Let’s get your soil back in shape!
📚 In This Guide
- What you need
- Instructions
- Tips and common mistakes
- Wrapping up and next steps
What you need
- ● Organic matter: Compost (5–10 gallons, well-aged and nutrient-rich)
- ● Peat moss or coconut coir (2–3 bags, 2–3 cubic feet each)
- ● Leaf mold or well-rotted manure (3–5 gallons, for structure)
- ● Amendments for drainage: Coarse sand (5–10 gallons, not fine sand—think builder’s sand or horticultural sand)
- ● Perlite or vermiculite (2–3 bags, 2–3 cubic feet each, to aerate)
- ● Gravel or small rocks (1–2 bags, ½-inch to 1-inch size, for deeper drainage layers)
- ● Tools for the job: Garden fork or digging spade (for aerating and mixing)
- ● Garden trowel (for smaller areas or precision work)
- ● Wheelbarrow or large bucket (to haul materials)
- ● Gloves (heavy-duty, to protect your hands from sharp rocks and debris)
- ● Watering can or hose (for post-amendment watering)
- ● Soil test kit (to check pH and nutrient levels before amending)
- ● Mulch (straw, wood chips, or pine needles, 2–3 inches thick, to retain moisture after drainage improves)
- ● Drainage pipes or French drain materials (for severe waterlogging—4-inch corrugated pipes + gravel)
- ● Biochar (1–2 bags, to improve soil structure and microbial activity)
- ● Plant markers (to track progress if testing different amendments)
Step-by-step instructions for improving waterlogged soil
Here’s my go-to method for transforming soggy soil into a well-draining garden haven.
🌱 Step 1: Test and Identify the Problem
Before digging in, check how bad the waterlogging is. Press your finger into the soil—if water pools within an hour or the surface stays squishy for days, drainage is the issue. I like to do a simple "percolation test": Dig a small hole about 6 inches deep, fill it with water, then time how long it takes to drain. If it’s still wet after 24 hours, you’ve got compacted or clay-heavy soil.
Look for signs like yellowing leaves, moldy mulch, or roots exposed at the surface. These are red flags that roots can’t breathe. Waterlogged soil often smells musty or sour—your nose will tell you before your plants do. The goal here is to assess whether you need structural changes (like amending) or just better surface drainage.
💧 Step 2: Break Up Compacted Soil
Use a broadfork or digging fork to loosen the top 12-18 inches of soil. I avoid tilling because it can make compaction worse over time. Instead, I work the fork in vertically, wiggling it gently to create air pockets. This mimics how roots naturally break up soil and lets water move downward instead of pooling.
If the soil is extremely dense, like clay, add 2-3 inches of coarse sand (like builder’s sand, not fine beach sand) or composted bark fines to the top 6 inches. Mix it in lightly—just enough to improve texture without smothering existing roots. Water the area lightly after amending to help the amendments settle into place.
☀️ Step 3: Add Organic Matter for Long-Term Fixes
Spread a 3-inch layer of compost or well-aged manure over the amended area. This isn’t just about nutrients—it’s about improving soil structure. Organic matter breaks down, creating tiny channels that let water drain faster. For heavier clay soils, I mix in peanut hulls or shredded leaves to add bulk and encourage aeration.
Top this with a 1-inch layer of mulch (straw, wood chips, or pine needles work well). Mulch slows evaporation and prevents water from pooling on the surface. Avoid thick layers of fresh wood chips, though—they can rob nitrogen as they decompose. Instead, choose mulch that’s already broken down or labeled "shredded hardwood."
✂️ Step 4: Install Surface Drainage Solutions
For areas prone to standing water, create a slight slope (1-2 inches over 6 feet) away from foundations or low spots. Use a rake to shape the grade gently—steep slopes can cause erosion. If you’re working with a raised bed or container garden, ensure the bottom has drainage holes and elevate it on bricks or cinder blocks.
For problem spots, install French drains: Dig a trench 12 inches deep and 6 inches wide, fill it with gravel, then top with landscape fabric to keep soil out. Cover with soil and plant shallow-rooted ground covers like creeping thyme or clover to disguise it. This redirects water underground instead of letting it pool.
🪴 Step 5: Monitor and Maintain Drainage
After amending, keep an eye on how water behaves. If puddles form after rain, you may need to add more organic matter or adjust the slope. I check soil moisture by digging down 4 inches—if it’s still soggy after a few days, repeat the aeration step. Healthy soil should feel damp but not waterlogged; it should crumble easily when dry.
Every 6-12 months, top-dress with another 1-2 inches of compost to maintain structure. Avoid heavy foot traffic on amended areas until the soil settles (usually 2-4 weeks). If you notice plants wilting despite good watering, it’s a sign roots are still struggling—time to revisit the drainage fixes.
Tips & tricks for perfect soil drainage solutions
These practical strategies will help you transform soggy soil into a thriving garden space with proper drainage.
The Percolation Test: The 24-hour mark in your percolation test is crucial—this tells you whether you're dealing with clay or just surface compaction. If water drains within 4-6 hours, you likely only need surface solutions like better mulching. If it's still wet after 24 hours, you'll need deeper amendments like sand or composted bark fines. I always double-check by pressing my finger into the soil after 24 hours—if it leaves a deep imprint that doesn't spring back, you know you've got serious compaction to address.
Tool Selection: Don't settle for a basic garden fork—look for a broadfork with sturdy tines that can penetrate 12-18 inches without bending. I've ruined three good forks trying to force them through stubborn clay. The key is to wiggle the fork gently while pushing down, creating vertical channels rather than just stabbing. This mimics natural root growth patterns and prevents soil from resealing around the holes.
Organic Matter Layering: When adding your 3-inch layer of compost, don't just dump it on top—work it into the top 6 inches of soil. This creates the most dramatic improvement in drainage. For heavy clay soils, I like to mix in equal parts compost and shredded leaves first, then add the compost layer on top. The leaves add bulk while breaking down slowly, creating better air pockets than compost alone.
Mulch Matters: That 1-inch layer of mulch you're adding isn't just decoration—it's your first line of defense against water pooling. I've seen gardeners use thick layers of fresh wood chips that actually make drainage worse by creating a waterproof barrier. Instead, use a thinner layer of well-decomposed mulch and keep it 2-3 inches away from plant stems to prevent rot. For problem areas, consider using straw or pine needles which break down more slowly than wood chips.
Pro Tips for Improve Waterlogged Soil
- These practical strategies will help you transform soggy soil into a thriving garden space with proper drainage.
- The Percolation Test: The 24-hour mark in your percolation test is crucial—this tells you whether you're dealing with...
- Tool Selection: Don't settle for a basic garden fork—look for a broadfork with sturdy tines that can penetrate 12-18 ...
Frequently asked questions
Got questions about fixing waterlogged soil? You’re not alone!
Here are answers to the most common concerns—from quick fixes to long-term strategies—to help you get your garden back on track.
How fast can I improve waterlogged soil?
Improving drainage takes time, but you’ll see progress in weeks with the right steps. Amending soil with organic matter (like compost or sand) starts working immediately, while deeper fixes (like installing drainage pipes) may take months to fully resolve saturation issues. Consistency is key—don’t rush!
Can I plant anything in waterlogged soil right away?
Not all plants thrive in soggy conditions, but some tolerate it temporarily. Fast-draining crops like radishes, lettuce, or carrots can go in while you work on soil fixes. Avoid heavy feeders (tomatoes, peppers) until drainage improves. For now, focus on drainage solutions before replanting.
What’s the difference between sand and gravel for drainage?
Both help, but they serve different purposes. Sand (especially coarse) improves soil structure and aeration, blending into the soil over time. Gravel (like crushed stone) creates a physical drainage layer but doesn’t mix—ideal for slopes or under raised beds. Use sand for general soil, gravel for targeted fixes.
Why does my soil stay waterlogged even after adding compost?
Compost helps, but if water still pools, you may need a multi-step approach:
- Check for clay-heavy soil—mix in sand or gypsum to break compaction.
- Ensure slope or grading directs water away from roots.
- Install French drains or downspout extensions if surface water is the issue.
Will mulch help with waterlogged soil?
Mulch won’t fix drainage on its own, but it reduces evaporation and protects soil structure. Use straw or wood chips (not thick layers) to let excess water escape while keeping roots moist. Pair it with other fixes like raised beds or sand amendments for the best results.
Wrapping up and next steps
Improving waterlogged soil is all about patience, persistence, and the right techniques—but the results are worth it! 🌱 By amending your soil with organic matter, adjusting drainage, and choosing the right plants, you’ll create a thriving garden that even soggy conditions can’t stop.
Start small, test your progress, and soon you’ll see healthier roots and happier plants.
Ready to take action? Pick one method from this guide and give it a try this weekend! Your future harvest (or lush lawn) will thank you. 💧✨