
Planting
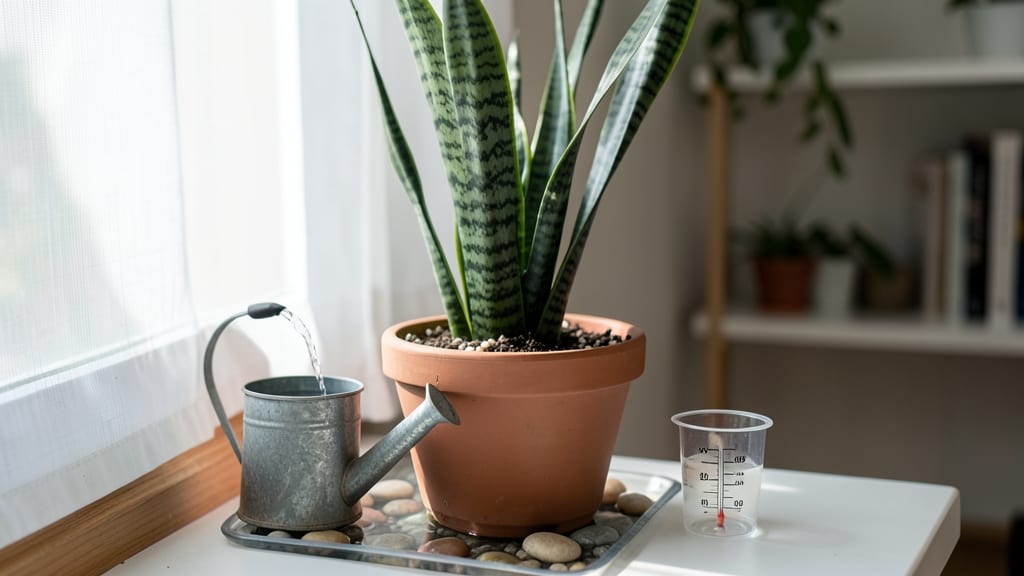
How to keep a plant alive isn’t about luck—it’s about understanding their basic needs. 🌱 I've revived more dying plants than I've lost, and the secret isn't complicated: light, water, and airflow. Most plants fail because we overthink or ignore these fundamentals, not because they're high-maintenance.
Start with the soil moisture test: stick your finger in the soil—if the top inch feels dry, water it. Yellow leaves? Too much water. Brown, crispy edges? Too little.
And don't forget light: most houseplants need bright, indirect light, not dim corners. A simple leaf check (wipe the leaves occasionally) keeps pests and dust from suffocating your plant.
You'll notice the difference within 2-4 weeks: stronger stems, glossier leaves, and roots that grip the soil instead of rotting. The key is consistency—plants thrive on routine, not sporadic care. Even my black thumb can't kill these with this approach.
Works for every plant, from ferns to fiddle-leaf figs. Here's how to diagnose and fix the most common issues before they become fatal—no green thumb required.
📚 In This Guide
- What you need
- Instructions
- Tips and common mistakes
- Wrapping up and next steps
What you need
- ○ Plant pot: Choose one with drainage holes (size depends on plant—start with 6–12 inches for most houseplants). Optional: Self-watering pots for low-maintenance care.
- ● Potting soil: Use a well-draining mix (avoid garden soil—it compacts!). Pro tip: Add perlite or orchid bark (20–30%) for aeration.
- ● Watering can: A narrow-spout can (or spray bottle for misting) to avoid overwatering.
- ○ Fertilizer: A balanced liquid fertilizer (10-10-10 or 20-20-20) or slow-release granules. Optional: Organic options like compost tea.
- ● Pruning shears: Small, sharp scissors for trimming dead leaves or leggy growth.
- ● Gloves: Protect your hands from soil and thorns (e.g., cacti or succulents).
- ● Humidity tray: A shallow tray with pebbles and water to boost humidity for tropical plants.
- ● Grow lights: LED or fluorescent lights (12–14 hours/day) if natural light is limited.
- ○ Moisture meter: Digital or analog to check soil moisture accurately. Optional: A wooden stick test (poke and feel!).
- ● Plant labels: Writeable tags to track watering schedules and plant names.
- ● A sunlight assessment: Identify a spot with the right light conditions (low, medium, or bright indirect light).
- ● Research your plant: Know its native habitat (e.g., desert vs. rainforest) to mimic its needs.
- ● Patience: Plants thrive on consistency—avoid over-tinkering!
Step-by-Step instructions for keeping your plant alive
Here's my foolproof method for keeping plants thriving—no green thumbs required.
🌱 Step 1: Understand Your Plant’s Basic Needs
First, figure out if your plant is a sun-lover or shade dweller. Most houseplants like bright, indirect light, while succulents and cacti need full sun. Place your plant near a window and observe how the light hits it for at least a day. If leaves start stretching toward the light, it’s not getting enough.
Next, check the soil. Stick your finger 1 inch deep—if it feels dry, it’s time to water. If it’s still damp, wait a few more days. Overwatering kills plants faster than underwatering, so I always err on the side of caution. Most plants prefer slightly dry soil over soggy roots.
💧 Step 2: Master the Watering Routine
Water deeply but infrequently. When you do water, soak the soil until water runs out the drainage hole at the bottom of the pot. This encourages roots to grow deeper instead of staying shallow. I like to water in the morning so the plant can drink up moisture before the evening.
Use room-temperature water—cold water can shock roots. If your plant’s leaves start yellowing, it’s usually a sign of overwatering. Let the soil dry out completely before watering again. For tropical plants like ferns or calatheas, mist the leaves occasionally to mimic humidity, but avoid soggy soil.
☀️ Step 3: Position for Optimal Light
Rotate your plant a quarter turn every few days so it grows evenly instead of leaning toward the light. If your plant’s leaves look pale or stretched, it’s not getting enough light. Move it closer to a window or supplement with a grow light. Avoid harsh direct sunlight, which can scorch leaves.
Watch for signs of stress: crispy edges mean too much sun, while droopy leaves usually mean it’s thirsty. If you notice brown spots, it could be from fluoride in tap water—let tap water sit out overnight before using it. A simple pebble tray with water underneath can add humidity for dry-air-loving plants.
✂️ Step 4: Prune and Maintain Health
Dead or yellow leaves should be trimmed off with clean scissors to keep the plant focused on new growth. Snip just above a leaf node (the bump where a leaf or stem grows out) to encourage branching. This also prevents pests from hiding in dead foliage.
Dust the leaves occasionally with a damp cloth—dust blocks light and weakens the plant. If you spot pests like spider mites or aphids, isolate the plant and treat it with neem oil or insecticidal soap. Prevention is key, so always inspect new plants before bringing them home.
🪴 Step 5: Repot When Needed
If roots are circling the bottom of the pot or poking out of the drainage holes, it’s time to repot. Choose a container that’s only 1-2 inches wider than the current one—bigger pots hold too much moisture and can rot roots. Use fresh potting soil and gently loosen the root ball before placing it in the new pot.
After repotting, water lightly and place the plant in a shady spot for a week to reduce stress. This gives the roots time to adjust without competing with new growth. I repot most plants every 1-2 years, or when they’ve outgrown their current home.
Tips & tricks for thriving indoor plants
Real talk: Even the simplest plant care routine can go wrong if you miss these key details.
Light Observation: That one-day observation window in Step 1 is non-negotiable. I learned this the hard way after my snake plant stretched into a sad, leggy mess. Watch for at least 24 hours—morning sun might be gentle, but afternoon light can be intense. Move your plant gradually if you notice leaves curling or turning yellow. A simple trick: Place your plant near the window at different times of day to see how light shifts throughout the day.
Soil Test Technique: When checking soil moisture in Step 1, don't just glance—go all the way to your first knuckle (about 1 inch). The top layer can be misleadingly dry while moisture lingers below. I use a wooden skewer instead of my finger to avoid transferring bacteria. If the skewer comes out clean, wait another day. If it's damp but not soggy, that's your sweet spot.
Watering Rhythm: The morning watering routine in Step 2 works wonders, but here's what nobody tells you—your plant's thirst changes with seasons. In winter, most houseplants need half the water they do in summer. I set a reminder on my phone every 7-10 days as a gentle check-in, even if I think I remember. And always water at the base, never from above—wet leaves can lead to fungal issues.
Repotting Recovery: That one-week shady spot after repotting in Step 5 is your plant's chance to recover. Think of it like convalescence—no stress, just gentle care. I place mine on a bookshelf away from drafts and avoid watering until new growth appears. Pro tip: Add a handful of perlite to your fresh potting soil to improve drainage and prevent root rot.
Pro Tips for Keep Plant Alive
- Real talk: Even the simplest plant care routine can go wrong if you miss these key details.
- Light Observation: That one-day observation window in Step 1 is non-negotiable. I learned this the hard way after my ...
- Soil Test Technique: When checking soil moisture in Step 1, don't just glance—go all the way to your first knuckle (a...
Frequently asked questions
Got questions? You’re not alone—keeping plants alive can feel like solving a puzzle! Here are answers to the most common concerns, so you can troubleshoot like a pro and give your green friends the best shot at thriving.
How often should I water my plant?
Most plants need water when the top 1-2 inches of soil feel dry to the touch. Overwatering is a bigger killer than underwatering—stick your finger in the soil before grabbing the watering can! For tropical plants (like pothos or ferns), water every 7-10 days, while succulents may only need a drink every 2-3 weeks. When in doubt, less is more.
Why are my plant’s leaves turning yellow?
Yellow leaves usually signal overwatering or nutrient deficiencies. Check the soil first—if it’s soggy, let it dry out. If the yellowing starts at the bottom leaves, it’s often natural aging. For crispy yellow edges, your plant might need more humidity or less direct sun. Brown spots? That’s likely sunburn—move it to indirect light ASAP!
Can I save a dying plant?
Act fast: trim dead leaves, check for pests (like spider mites or fungus gnats), and adjust care. If the roots are mushy (a sign of rot), repot in fresh, dry soil and avoid watering for a week. Some plants bounce back with proper light and hydration—don’t give up until you’ve ruled out reversible issues!
What’s the best light for indoor plants?
Most houseplants thrive in bright, indirect light (think near an east- or north-facing window). Avoid harsh direct sun, which can scorch leaves. Low-light plants (like snake plants or ZZ plants) can survive in dim corners, but they’ll grow slower. Rotate your plant occasionally so it grows evenly toward the light!
What’s an easy first plant for beginners?
Start with low-maintenance champions like:
- Snake Plant – Tolerates neglect, thrives in low light.
- Pothos – Grows fast, forgives watering mistakes.
- ZZ Plant – Nearly indestructible, drought-resistant.
- Spider Plant – Hardy, produces "pups" (baby plants!).
Wrapping up and next steps
Keeping a plant alive is all about understanding its needs—light, water, soil, and a little patience! 🌱 With the right care, even beginners can nurture thriving greenery. Start small, observe your plant’s reactions, and adjust as needed.
Ready to give it a try? Pick a low-maintenance plant and follow the steps above—your green thumb is closer than you think! 🌟 For extra confidence, join a plant care community or grab a beginner’s guidebook to keep learning.