
Tools
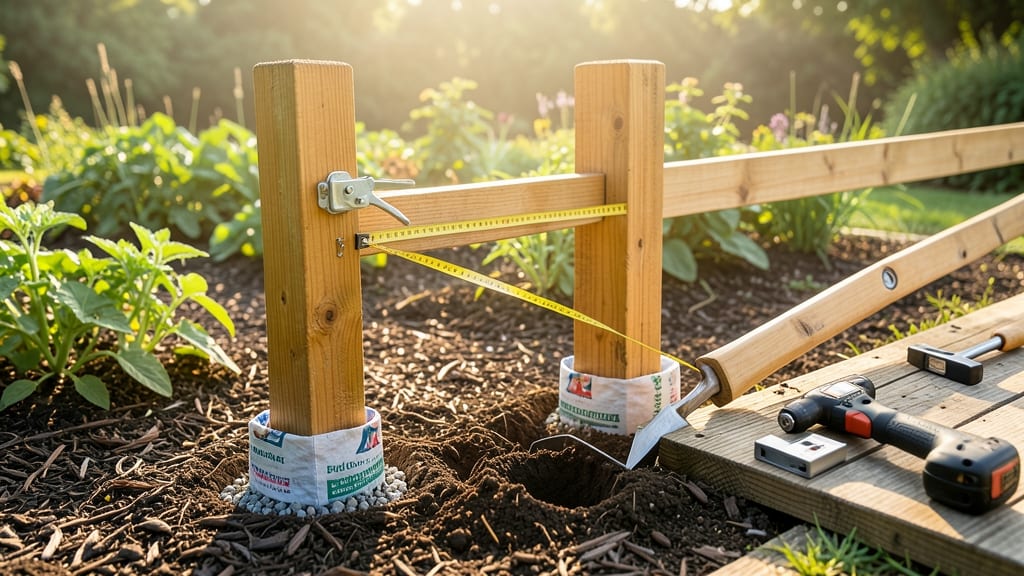
Building a fenced garden transforms chaos into control. 🌱 Last spring, my neighbor's rabbits decimated my lettuce—until I installed a simple wooden fence that kept them out and made the space feel like a private sanctuary.
The right fence doesn't just contain; it protects, organizes, and even enhances your garden's beauty. You'll need basic tools—a tape measure, post hole digger, and circular saw—and materials like treated lumber or metal posts.
The key is matching fence height to your needs: 3 feet stops rabbits, 6 feet keeps out deer, while 8 feet offers full privacy. I opted for cedar planks because they resist rot and blend seamlessly with the landscape.
By the end, you'll have a defined growing space that stays clean, secure, and productive year-round. No more losing crops to critters or struggling to reach every corner. The fence also doubles as a trellis for climbing plants, creating a lush, enclosed garden oasis.
Works for any yard size, from small urban plots to sprawling rural gardens. Let's get those posts in the ground!"
📚 In This Guide
- What you need
- Instructions
- Tips and common mistakes
- Wrapping up and next steps
What you need
- ● Fencing: Wood: 6-foot tall cedar or pressure-treated pine (10–12 linear feet per side, depending on garden size). Pro tip: 💡 Cedar resists rot and pests—worth the splurge!
- ● Metal: Galvanized steel or aluminum (check local building codes for height/strength specs).
- ● Vinyl: Low-maintenance but pricier (pre-cut panels for easy DIY).
- ● Posts: 4x4 pressure-treated lumber (8–10 posts, spaced 6–8 feet apart).
- ● Concrete mix (5–6 bags, 60-lb each) for post anchors.
- ● Hardware: Galvanized screws/nails (2.5–3 inches long, 100+ pieces).
- ● Hinges and latch (1–2 sets) for gates.
- ○ Post caps (optional but stylish, 8–10 pieces).
- ● Post hole digger (or rented auger for deeper holes).
- ● Circular saw or miter saw (for precise cuts).
- ● Level (2–3 foot for accuracy).
- ● Drill/driver (cordless recommended).
- ● Measuring tape (25+ feet).
- ● Work gloves, safety goggles, and ear protection (non-negotiable!).
- ○ Optional upgrades: Staple gun (for wire mesh or chicken wire).
- ● Cordless impact driver (for heavy-duty screws).
- ● Laser level (for large or complex designs).
- ● Check local building codes—height, setback, and material rules vary! (🌡️ Call your city’s permit office to avoid fines.)
- ● Site prep: Clear vegetation, mark layout with stakes/spray paint, and call 811 to check for underground utilities.
- ● Weather window: Aim for dry, mild days (avoid extreme heat or rain).
Step-by-Step instructions for building a sturdy fenced garden
Here’s my go-to method for creating a durable, attractive fence that keeps pests out and plants protected.
🪴 Step 1: Plan and Mark Your Garden Layout
First, sketch your garden’s shape on paper—rectangular or curved, but keep it simple for easier fencing. I like to use stakes and string to outline the perimeter directly in your yard. Drive a wooden stake every 6-8 feet along the edges, then stretch mason line or twine between them to visualize the space.
Double-check measurements with a tape measure before digging. A 4-foot-tall fence works well for most gardens, but if you’re dealing with rabbits or deer, aim for 5-6 feet. Mark the corners with brightly painted stakes so you can see them clearly when digging post holes.
🌱 Step 2: Dig Post Holes and Set Corner Posts
Use a post hole digger or auger to dig holes 6 inches wider than your posts and 1/3 the depth of the fence height—so for a 4-foot fence, dig 18 inches deep. Place galvanized metal corner posts (or treated wood posts) into the holes first, ensuring they’re plumb (perfectly vertical) with a level tool. Tap them gently with a rubber mallet until they sit firmly.
Fill the holes with concrete mix up to 2 inches below ground level, then let it cure for 24 hours before proceeding. I like to add a small amount of water to the concrete while mixing—it makes it easier to pour and reduces air pockets. Use bracing stakes to hold the posts steady while the concrete sets.
☀️ Step 3: Install Railings and Attach Fence Panels
Once the corner posts are secure, attach horizontal railings (usually 2x4s or metal fence rails) with galvanized screws or lag bolts. Space them evenly—12-18 inches apart—and use a level to keep them straight. For a wooden fence, pre-assemble panels on the ground before lifting them into place. For vinyl or metal fencing, follow the manufacturer’s instructions for panel attachment.
Secure each panel to the posts with hidden hinges or screws, leaving a small gap (1/4 inch) between panels for expansion. If using chain-link, attach it with fence staples, stretching it taut but not too tight—you want it to sag slightly under wind. For wooden picket fences, pre-drill holes to prevent splitting when you screw them in.
✂️ Step 4: Add Finishing Touches and Reinforce
Once the fence is up, reinforce weak spots with extra bracing if needed—especially near gates or high-traffic areas. For a gate, use heavy-duty hinges and a latch mechanism that locks securely. I like to add gravel or landscape fabric at the base to prevent weeds and improve drainage.
Finally, seal wooden fences with outdoor wood sealant to protect against rot and pests. For metal fences, apply rust-resistant paint to extend their lifespan. Step back and admire your work—your garden is now safe from critters, wind, and wandering feet!
⏰ Step 5: Maintain and Inspect Regularly
Check your fence once a month for loose screws, sagging panels, or signs of wear. Tighten any wobbly sections immediately—a loose fence won’t last. In winter, shovel snow away from the base to prevent moisture buildup, and in summer, trim back any plants growing too close to avoid pest infestations.
If you notice rotting wood or rusted metal, replace affected sections right away. A well-maintained fence can last 10-20 years with minimal upkeep. This is the moment you’ll thank yourself for building it right—the first time a curious deer sniffs at the fence line and backs away!
Tips & tricks for building a sturdy fenced garden
Between us, these little details make the difference between a fence that lasts and one that falls apart in a year. Let me share what I learned the hard way.
Precision in Planning: When marking your layout in Step 1, I can't stress enough how important it is to use a laser level instead of just eyeballing it. Even a slight slope will cause your fence to lean over time. For curved sections, use a flexible garden hose to help visualize the shape before driving stakes. This saves you from having to dig up posts later if you realize your curve isn't smooth enough.
Concrete Mixing Secret: The 24-hour curing time for concrete in Step 2 is non-negotiable, but here's what nobody tells you—add a plasticizer additive (about 1 oz per 50 lbs of mix) to make the concrete more workable and reduce cracking. I also like to wet the hole slightly before pouring to create a better bond with the surrounding soil. This helps prevent posts from shifting over time.
Panel Attachment Pro Tip: In Step 3, when attaching panels, use galvanized washers under every screw or staple to prevent wood from splitting, especially with pressure-treated posts. For wooden fences, I've found that pre-drilling holes with a spiral bit (instead of a regular drill bit) creates cleaner holes that won't splinter. This makes a huge difference in how professional your finished fence looks.
Maintenance Hack: The once-a-month inspection in Step 5 is crucial, but I've developed a simple system to track it. Set a reminder on your phone for the 1st of every month with a note to "check fence." Then, when you're already outside doing garden tasks, just take 5 minutes to walk the perimeter. You'll notice problems early before they become major repairs—like that one loose screw that could turn into a sagging panel.
Pro Tips for Build A Fenced In Garden
- Between us, these little details make the difference between a fence that lasts and one that falls apart in a year. L...
- Precision in Planning: When marking your layout in Step 1, I can't stress enough how important it is to use a laser l...
- Concrete Mixing Secret: The 24-hour curing time for concrete in Step 2 is non-negotiable, but here's what nobody tell...
Frequently asked questions
Got questions about fencing your garden? You’re not alone! Here are answers to the most common concerns to help you plan like a pro.
What’s the best time of year to build a fenced-in garden?
The ideal time is spring or early fall—mild weather makes digging, setting posts, and working with materials easier. Avoid winter (frozen ground) or peak summer (extreme heat). If you’re in a dry climate, morning or evening installation prevents wood warping or concrete drying too fast.
Can I build a fence myself, or should I hire a pro?
Absolutely DIY-friendly! A basic wood or metal fence is manageable with the right tools (post hole digger, level, drill). Hire help if you’re dealing with uneven terrain, heavy materials (like stone), or local permits requiring professional installation. For most homeowners, a weekend project is totally doable!
What’s the cheapest fencing material for a garden?
Budget options include:
- Wood (cedar or pine): Affordable and customizable, but needs sealing.
- Vinyl: Low-maintenance but pricier upfront.
- Wire mesh (chicken wire): Super cheap for temporary or pet gardens.
- Salvaged materials: Check local reuse centers for old gates or fencing.
For long-term savings, wood or vinyl offer the best balance of cost and durability.
How do I keep animals (or kids!) from digging under the fence?
Burrowing critters or curious kids can be a headache! Prevent it with:
- An L-shaped metal plate buried 6–12 inches deep at the base of each post.
- A gravel trench (4–6 inches deep) filled with sharp rocks along the fence line.
- Extending the fence 6 inches below ground for a seamless barrier.
For pets, add a dig-proof apron (bendable metal or hardware cloth) to deter escape artists.
What’s the most common mistake when building a garden fence?
Skipping the leveling and alignment step! Uneven posts or gates lead to sagging, gaps, or a crooked look. Always:
- Check for level before setting concrete.
- Use a string line to keep panels straight.
- Pre-drill holes to avoid wood splitting.
Rushing this step is the #1 cause of shoddy fences—take your time!
Can I build a fence in rainy weather?
Not ideal! Wet ground makes digging harder, and concrete won’t set properly if too muddy. If you’re caught in a downpour:
- Work in short shifts during dry spells.
- Avoid setting posts in soggy soil—wait for a break.
- Cover materials (like wood) to prevent warping.
Plan ahead: Check the 10-day forecast and schedule around dry days!
Wrapping up and next steps
Building a fenced-in garden is a rewarding project that protects your plants, enhances privacy, and adds value to your home. With the right materials, tools, and a step-by-step approach, you can create a sturdy, long-lasting space tailored to your needs. 🌱✨
Now that you’re armed with knowledge, it’s time to roll up your sleeves and start planning! Begin by sketching your design, gathering supplies, and setting a realistic timeline.
Whether you’re a seasoned DIYer or a beginner, every small step brings you closer to a beautiful, functional garden oasis. Happy building—and enjoy your green retreat!