
Container Gardens
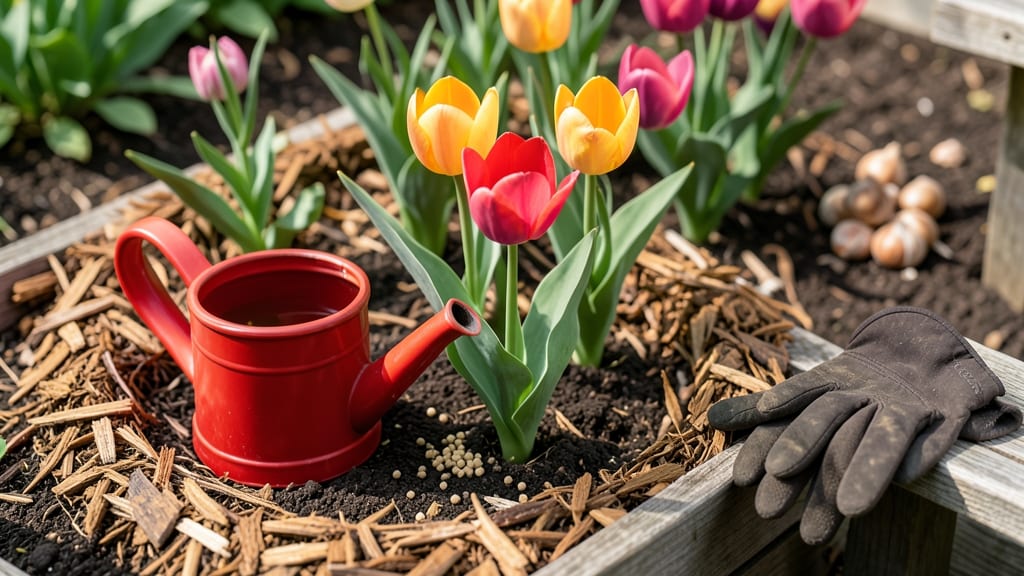
Caring for tulips outside means bold spring blooms that return year after year—if you follow the right steps. 🌷 I’ve learned the hard way that most people overwater or plant too shallow, which kills the bulbs before they even get a chance to bloom.
The secret lies in mimicking their natural habitat: well-draining soil, minimal fuss, and patience for the second year’s show. Tulips thrive in full sun (6+ hours daily) and soil that’s slightly dry between waterings—overwatering is their #1 enemy.
Plant bulbs 6-8 inches deep in fall, with the pointed end facing up, and space them 4-6 inches apart. A light layer of mulch helps protect them from winter’s harshest freezes while keeping rodents away.
By summer, the foliage might look sad, but never cut it back—those leaves feed the bulb for next year’s flowers. After blooming, let the stems die naturally, then trim them once they turn brown. The bulbs will rest underground, storing energy for another spring surprise.
This method works even in colder climates (zones 3-8), where tulips naturalize beautifully. The key is consistency: plant once, then let nature do the rest. Your garden will thank you with vibrant, reliable blooms for seasons to come.
📚 In This Guide
- What you need
- Instructions
- Tips and common mistakes
- Wrapping up and next steps
What you need
- ● Tulip bulbs: Choose disease-resistant varieties like ‘Darwin Hybrid’ or ‘Fosteriana’ for cold climates. Buy 10–20 bulbs (depending on desired coverage) from a reputable nursery.
- ● Well-draining soil: Mix 1 part garden soil with 1 part compost or sand (for sandy soils). Aim for a pH of 6.0–7.0.
- ● Organic fertilizer: Use a balanced bulb fertilizer (10-10-10) or a slow-release granular fertilizer (e.g., 5 lbs per 100 sq ft).
- ● Mulch: 2–3 inches of straw, wood chips, or shredded leaves to insulate bulbs in winter.
- ● Garden trowel or shovel: For planting and soil prep.
- ● Watering can or hose with a gentle nozzle: Tulips need 1–1.5 inches of water per week (avoid overhead spraying).
- ● Garden gloves: To protect your hands while handling soil and bulbs.
- ● Bulb food: A pre-planting bulb booster (e.g., bone meal) for extra nutrients.
- ● Soil moisture meter: To monitor watering needs without overdoing it.
- ● Pest deterrents: Diatomaceous earth or neem oil for slug/snail control.
- ● Decorative rocks or mulch rings: To keep mulch in place and add aesthetic appeal.
- ● Stakes or cages: For tall varieties (e.g., ‘Queen of Night’) to prevent flopping.
Step-by-Step guide to caring for tulips in your outdoor garden
Tulips thrive with the right balance of sunlight, soil, and seasonal care—here’s how to keep them blooming beautifully year after year.
🌱 Step 1: Plant Tulip Bulbs in Well-Draining Soil
Choose a sunny spot with 6+ hours of direct sunlight daily—tulips need plenty of light to develop strong blooms. Dig a hole about 6-8 inches deep, roughly 3 times the bulb’s height, and space bulbs 4-6 inches apart to allow roots to spread. Plant with the pointed end facing up (this ensures proper growth direction).
Use loose, well-draining soil—tulips rot quickly in soggy conditions. Amend heavy clay soil with 2-3 inches of compost to improve drainage. Gently cover the bulbs with soil and water lightly to settle everything in place. You’ll see green shoots emerge in 4-6 weeks—that’s your signal the bulbs are happy.
☀️ Step 2: Provide Consistent Watering and Sunlight
Water tulips once a week during the growing season (spring through early summer), aiming for 1 inch of water per week. Increase to 1.5 inches weekly if your area experiences dry spells. Water at the base to avoid wetting the leaves, which can encourage fungal diseases. You’ll know moisture is right when the top 2 inches of soil feel dry to the touch.
Tulips need full sun for vibrant blooms, but they’ll tolerate partial shade in hot climates. If leaves yellow or stems weaken, they’re getting too much heat—provide afternoon shade with a light cloth or nearby shrubs. Deadhead spent blooms (remove faded flowers) to redirect energy into next year’s growth.
✂️ Step 3: Let Foliage Die Back Naturally for Next Year’s Blooms
Never cut back tulip leaves until they turn completely yellow and crispy—this process feeds the bulb for next year’s flowers. If you remove leaves too soon, the bulb won’t store enough energy, and you’ll get weak or no blooms the following spring. Let foliage stay until 6-8 weeks after flowering, even if it looks unsightly.
Once leaves are fully brown and crunchy, you can trim them back to 1-2 inches above the soil line. This keeps the garden tidy while allowing the bulb to rest. In fall, after the first frost, add a 2-inch layer of mulch (like shredded leaves or straw) to insulate bulbs and protect them from freezing temperatures.
⏰ Step 4: Fertilize and Prepare for Winter Dormancy
Apply a balanced, low-nitrogen fertilizer (like 10-10-10) in early spring when shoots emerge, following package instructions. Avoid high-nitrogen fertilizers—they encourage leafy growth at the expense of blooms. A second feeding in early fall (after foliage dies back) helps bulbs store energy for next year.
Tulips are cold-hardy and don’t need winter protection in most climates, but in areas with extreme cold (-20°F or lower), add an extra 4 inches of mulch
Tips & tricks for perfect outdoor tulip care
Took me years of trial and error to learn these tricks—now your tulips will thrive like mine do!
Sunlight Strategy: While tulips love full sun, I've found they actually perform better in partial shade during the hottest summer months. If your area gets intense afternoon sun, provide light shade with a sheer fabric or nearby shrubs. This prevents the bulbs from overheating while still giving them enough light to bloom beautifully. The key is observing your tulips—if leaves start yellowing before blooming, they're getting too much heat.
Soil Secret: The 2-3 inches of compost mentioned in Step 1 isn't just about drainage—it's also about feeding those bulbs. I like to mix in a handful of bone meal (about 1 tablespoon per bulb) when planting. This gives them a phosphorus boost for stronger roots and more vibrant blooms next year. Just be careful not to overdo it—the bulbs don't need much extra food right away.
Watering Wisdom: That 1-inch weekly measurement is perfect, but I've learned to adjust based on rainfall. If you get more than 1 inch of rain in a week, skip watering entirely. And here's a trick: water in the morning instead of evening. This prevents fungal issues and gives the soil time to dry slightly between waterings, which tulips actually prefer. Wet foliage at night is a recipe for rot.
Winter Protection: About that -20°F mention—trust me, you'll notice the difference with proper insulation. In my zone 4 garden, I've had tulips come back year after year with perfect blooms because I add that extra 4 inches of mulch. But here's what nobody tells you: remove the mulch in early spring (around March) to prevent rot. The bulbs need to warm up gradually, and thick mulch can keep them too cold.
Pro Tips for Care For Tulips Outside
- Took me years of trial and error to learn these tricks—now your tulips will thrive like mine do!
- Sunlight Strategy: While tulips love full sun, I've found they actually perform better in partial shade during the ho...
- Soil Secret: The 2-3 inches of compost mentioned in Step 1 isn't just about drainage—it's also about feeding those bu...
Frequently asked questions
Got questions about keeping your tulips thriving outside? Here are some of the most common ones—plus quick answers to keep your blooms happy year-round!
Can tulips survive winter outdoors?
Yes! Tulips are cold-hardy perennials that thrive in winter dormancy. In USDA Zones 3–8, they’ll naturalize and return yearly. Just mulch after the first frost to protect bulbs from extreme cold ( Pro Tip: Use 2–3 inches of straw or shredded leaves for insulation).
When should I plant tulip bulbs for spring blooms?
For spring flowers, plant bulbs in fall (6–8 weeks before the ground freezes). Aim for late October to early November in most regions. Early planting gives roots time to establish before winter, ensuring robust blooms next year.
Why are my tulip leaves turning yellow?
Yellowing leaves can mean overwatering, nutrient deficiency, or fungal issues. Check drainage first—tulips hate soggy soil. If leaves yellow after blooming, it’s normal (the plant is storing energy for next year). For dark spots? Remove affected foliage and avoid wetting leaves when watering.
Can I grow tulips in containers?
Use well-draining pots (minimum 6 inches deep) with a mix of potting soil and perlite. Plant 3–5 bulbs per container, and bury them deeper than in-ground (top of bulb should be 2 inches below soil). Overwinter containers in a garage or cold frame if temps drop below 20°F.
How do I revive tulips that won’t bloom?
Non-blooming tulips often need more sunlight (6+ hours daily) or fertilizer. Feed bulbs in early spring with a balanced, low-nitrogen fertilizer (like 5-10-10). If blooms flop, stake tall varieties early. Pro Tip: Divide bulbs every 3–4 years to prevent overcrowding!
Wrapping up and next steps
Caring for tulips outside is all about patience, preparation, and a little seasonal love. 🌱 With the right soil, sunlight, and timing—plus a few tricks to protect them from winter’s chill—your tulips will reward you with vibrant blooms year after year. Don’t let their delicate petals fool you: these hardy beauties thrive with just a few simple steps!
Ready to level up your garden? Start by planning your next planting season—now’s the perfect time to sketch out your design, order bulbs, or even experiment with creative containers. Your future blooms will thank you! 🌸