
Tools
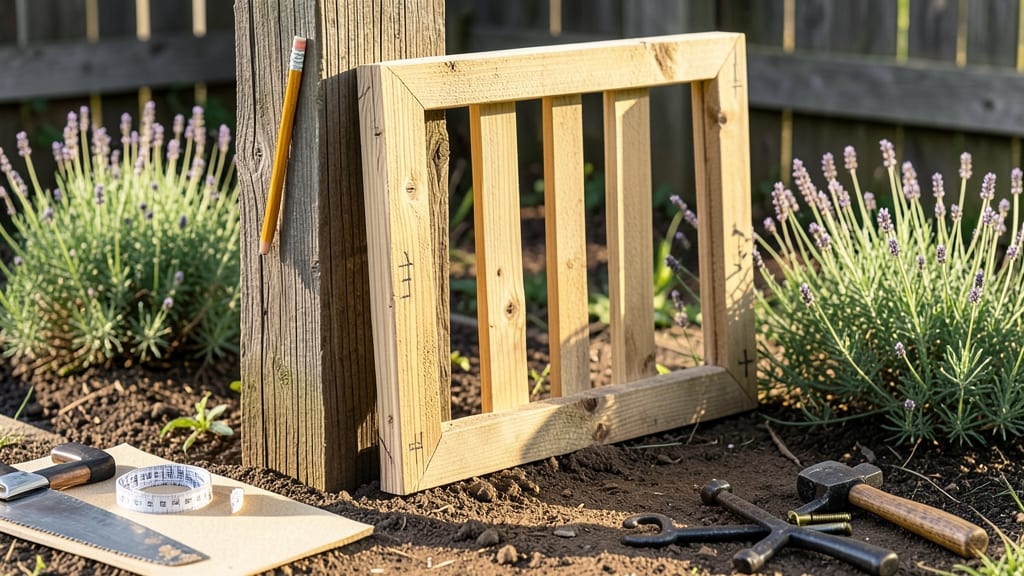
How to make a simple garden gate that feels like unlocking a secret entrance. ✨ I built my first gate in 90 minutes with scrap wood and a few basic tools—no fancy plans, no power tools, just solid construction that still holds strong after three seasons.
The beauty of this design is its flexibility: rustic with reclaimed wood, sleek with painted boards, or functional with lattice for climbing roses. You’ll need 4x4 posts, 2x4 rails, hinges, and a latch—nothing you can’t find at a hardware store for under $50.
The key is keeping the frame square and reinforcing the hinges for that satisfying, heavy-duty feel.
By the end, you’ll have a gate that frames your garden like a welcoming doorway. Paint it to match your fence, leave it natural for a cottage look, or add trellis for vines—it’s the finishing touch that makes a garden feel complete.
The best part? It’s built to last through years of daily use.
Works for pathways, entryways, or even dividing sections of your yard. Here’s how to make it happen without breaking the bank or your back.
📚 In This Guide
- What you need
- Instructions
- Tips and common mistakes
- Wrapping up and next steps
What you need
- ● 2x4 lumber: 4 pieces (8 ft long each) – for the gate frame and supports.
- ● 1x4 lumber: 6 pieces (8 ft long each) – for the gate slats or lattice design.
- ● Gate hinges: 2 heavy-duty hinges (3–4 inches long) – ensure they’re rust-resistant.
- ● Latch or hook: 1 (e.g., a simple hook latch or a magnetic catch).
- ● Exterior-grade screws: 2-inch and 3-inch screws (about 50 total).
- ● Wood glue: 1 small bottle – for extra reinforcement.
- ● Sandpaper: 80- and 120-grit – to smooth rough edges.
- ● Measuring tape, speed square, and pencil – for precise cuts.
- ● Drill with drill bits (1/8" and 3/16").
- ● C-clamps: 2–4 – to hold pieces in place while gluing.
- ● Stain or paint: Exterior-grade (e.g., spar urethane) – for weatherproofing.
- ● Decorative hardware: Wrought iron hinges or a vintage-style latch.
- ● Chain or rope: For a rustic, hanging gate look.
- ● Pressure-treated lumber: If your garden is prone to moisture.
- ● Pre-cut lattice panels: For a faster, pre-designed look.
Step-by-Step instructions for building a sturdy DIY garden gate
Here's the straightforward method I've used for years—no fancy tools, just solid construction.
🪴 Step 1: Gather Materials and Prep the Frame
Start with a 2x4 pressure-treated lumber for the frame—cut 2 vertical posts at 36 inches and 1 horizontal top rail at 48 inches. The bottom rail stays at 48 inches too, but leave the ends raw for now. Pre-drill ½-inch holes at each corner where the posts meet the rails to prevent splitting when you assemble.
Lay the top and bottom rails flat, then place the vertical posts at 12 inches from each end. Use a 3-inch exterior wood screw to secure them temporarily—just enough to hold the frame square while you check the diagonals with a tape measure. If they're equal, your frame is perfectly aligned.
✂️ Step 2: Assemble the Frame and Add Support
Drive 2½-inch exterior screws through the pre-drilled holes at each corner to lock the frame together. Now add 2 diagonal braces (cut from the same 2x4) running from the bottom inside corners to the top outside corners. This turns your gate into a triangle—far stronger than a simple rectangle.
For extra stability, attach 1x4 boards horizontally between the top and bottom rails, centered between the vertical posts. Space them 6 inches apart vertically. These create a lattice effect for climbing plants later and add rigidity to the structure.
💧 Step 3: Attach Hinges and Hardware
Position the gate frame where you want it in the opening, then mark the hinge locations on the existing fence post and the gate frame. Use a 3½-inch exterior hinge (heavy-duty for wind resistance) on each side. Pre-drill ⅜-inch holes into the fence post and gate frame before screwing them in—this prevents wood from cracking.
Leave a ¼-inch gap between the gate and fence post to prevent rubbing. Test the swing before fully tightening the screws. If it sticks, sand the edges slightly or adjust the hinge position until it moves smoothly. I like to add a latch (like a simple hook or magnetic catch) at the top corner for security.
☀️ Step 4: Finish and Weatherproof
Sand all edges with 80-grit sandpaper, then apply exterior wood stain or paint to protect against moisture. Let it dry completely before handling. For extra durability, coat the bottom rail with wood preservative—this prevents rot from ground contact.
Here's the thing—if you're using this gate for climbing plants, wait 2-3 weeks before attaching trellis wire. Let the wood settle and weatherproofing cure first. I've seen gates warp when vines are added too soon.
🪴 Step 5: Install and Test
Lift the gate into place and align the hinges with the marks you made earlier. Drive 4-inch deck screws through the hinge plates into the fence post—pre-drill again to avoid splitting. Give it a final swing test: it should open and close smoothly without wobbling.
For a polished look, add black metal brackets at the bottom corners to hide any gaps. These also protect the wood from moisture splashing up. Once installed, give the hardware a light coat of rust-proof spray to extend its life.
Tips & tricks for building a sturdy DIY garden gate
Here's what nobody tells you about building a gate that lasts—these tricks save time and frustration.
Precision Cuts: Always measure twice and mark your cuts with a pencil before using your saw. I learned this the hard way after cutting a 36-inch post that ended up being 35.5 inches—now I double-check every measurement. For the 48-inch rails, use a straightedge to ensure they're perfectly level before attaching the vertical posts at the 12-inch marks.
Diagonal Braces: The diagonal braces in Step 2 are non-negotiable for strength. Cut them at a 45-degree angle using a miter saw for clean, precise joints. If you don't have one, use a handsaw and a speed square to mark the angle first. These braces distribute weight evenly and prevent sagging over time.
Gap Management: That ¼-inch gap in Step 3 is critical—it prevents the gate from binding when wood expands in humidity. Use a feeler gauge or a business card to check the gap before tightening screws. If it feels tight, sand the edges slightly or adjust the hinge position until it swings freely.
Weatherproofing: Don't skip the wood preservative on the bottom rail in Step 4. I've seen untreated gates rot within a year from ground moisture. Apply the preservative after staining but before installing the gate. For extra protection, add a thin layer of silicone caulk along the bottom edge to seal any gaps.
Pro Tips for Make A Simple Garden Gate
- Here's what nobody tells you about building a gate that lasts—these tricks save time and frustration.
- Precision Cuts: Always measure twice and mark your cuts with a pencil before using your saw. I learned this the hard ...
- Diagonal Braces: The diagonal braces in Step 2 are non-negotiable for strength. Cut them at a 45-degree angle using a...
Frequently asked questions
Got questions about building your own garden gate?
You’re not alone! Here are answers to the most common queries to help you tackle this project with confidence.
What’s the cheapest way to make a simple garden gate?
Use reclaimed wood (like old pallets or fence scraps) or cedar for durability without breaking the bank. Skip hinges by attaching a swing arm with a post-mounted pivot—just a bolt and a sturdy metal rod. For hardware, opt for basic galvanized screws or lag bolts instead of expensive hinges.
How long does it really take to build a basic gate?
With pre-cut materials and a helper, you can assemble a 2- to 3-foot-wide gate in under 2 hours. Breakdown:
- 30 mins: Cutting/marking wood (if not pre-cut).
- 45 mins: Drilling holes and attaching hinges/latches.
- 30 mins: Sanding, painting, and testing the swing.
Can I use bamboo or branches instead of wood?
Yes! Bamboo works for lightweight gates (great for decorative or temporary setups), but reinforce with metal straps or wire for stability. For branches, bundle 3–4 sturdy ones with zip ties or ratchet straps, then attach to a wooden frame. Just ensure the material won’t rot or splinter quickly.
What if my gate won’t latch securely?
Check these fixes:
- Adjust the latch: Loosen screws, slide the latch higher/lower, then retighten.
- Check alignment: Ensure the gate frame is plumb (use a level) and hinges aren’t bent.
- Upgrade hardware: Swap a flimsy latch for a heavy-duty hook latch or add a cable lock for extra security.
How do I paint or seal a garden gate to last?
Start with a wood conditioner to prevent splintering, then apply two coats of outdoor paint or spar urethane. For rustic charm, stain with linseed oil or tung oil. Pro tip: Paint hinges and latches before attaching them to avoid drips!
Wrapping up and next steps
Building a simple garden gate is easier than you think—and now you’ve got the perfect DIY project to boost your outdoor space! With just a few materials and basic tools, you’ve created a sturdy, functional gate that adds charm and security to your yard. 🌿✨
Ready to take it further? Try customizing it with paint, latticework, or even a charming topper like a trellis for climbing plants. Your garden (and neighbors!) will thank you!