
Flowers
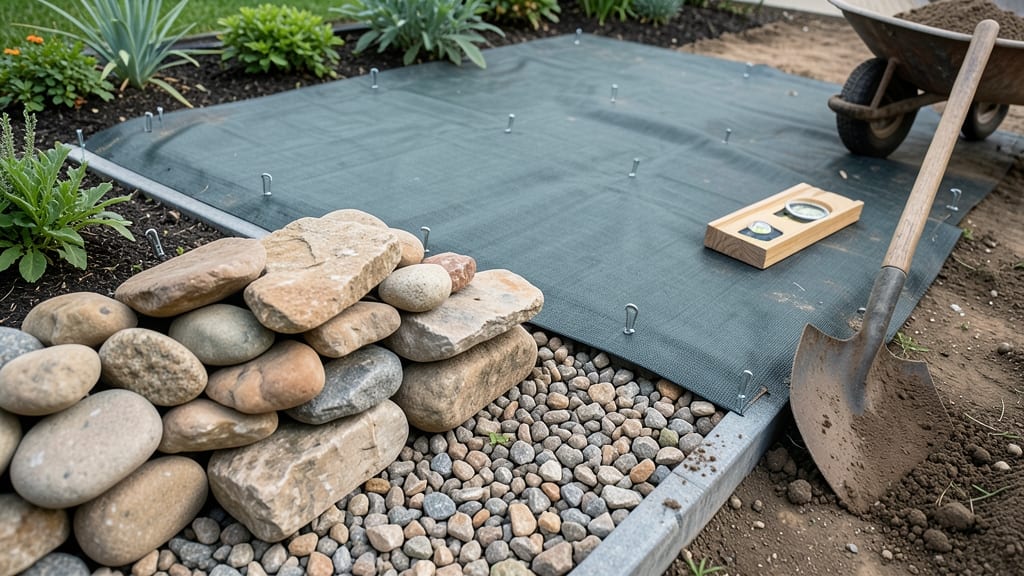
Building a stone flower bed on a slope turns tricky terrain into a showstopper. ✨ The key is terraced layers that control erosion while creating dramatic visual interest—no more muddy runoff or washed-out plants.
Start with a clear plan: mark your slope in 3-foot-wide horizontal tiers, using a level to keep them perfectly even. Heavy stones (like fieldstone or concrete blocks) form the edges, while smaller rocks fill gaps for stability.
Native plants with deep roots (like coneflowers or black-eyed Susans) anchor the soil naturally. By the end, you'll have a lush, multi-level garden that handles rain like a pro. The stones stay put, the soil stays in place, and your flowers thrive where others would struggle.
Works for any slope, from gentle inclines to steep hillsides. Let's get those layers looking intentional!
📚 In This Guide
- What you need
- Instructions
- Tips and common mistakes
- Wrapping up and next steps
What you need
- ● Flat stones or pavers: 10–15 stones per square foot (varies by size; 12"–18" diameter works well). Use a mix of sizes for a natural look.
- ● Gravel (crushed stone): 2–3 inches of ¾"–1" crushed gravel for drainage and base layer.
- ● Landscape fabric: A roll to prevent weeds and stabilize soil beneath stones.
- ● Topsoil or garden soil: 2–3 cubic feet per square foot of flower bed for planting.
- ○ Edging material: Plastic, metal, or stone edging (optional but recommended for clean lines).
- ● Shovel or spade (for digging and leveling)
- ● Wheelbarrow (for hauling soil and gravel)
- ● Rubber mallet (to tap stones into place)
- ● Level (to ensure terraces are even)
- ● String line and stakes (for marking terraces)
- ● Garden gloves and safety glasses (for protection)
- ○ Plate compactor (optional, for firming up gravel layers)
- ● Retaining wall blocks (if terraces need extra support)
- ● Mulch (to retain moisture and suppress weeds)
- ● Native plants or drought-resistant flowers (for low-maintenance beauty)
- ● Drip irrigation kit (for efficient watering on slopes)
Step-by-Step instructions for building a stone flower bed on a slope
Here's the method I use to create stable, beautiful terraces that prevent erosion while showcasing your favorite plants.
🪴 Step 1: Assess and Mark the Slope for Terraces
Start by walking the slope and identifying natural breaks or contours where you'll place your terraces. I like to use a 12-inch level to mark horizontal lines every 18-24 inches vertically—this creates gentle slopes that plants can handle without washing out. Use spray paint to mark the lines along the slope, then connect them with a garden hose stretched between stakes to visualize each terrace level.
Here's the thing—don't make terraces too wide. A 3-4 foot width is ideal because it prevents soil from slumping over time. If your slope is steeper than 30 degrees, consider adding a retaining wall at the bottom of each terrace for extra support. Measure twice before marking—once you start moving earth, you can't undo mistakes easily.
✂️ Step 2: Excavate and Create Terrace Edges
Using a shovel and mattock, dig along your marked lines to create a 6-8 inch deep trench for each terrace edge. The trench should be V-shaped with the base wider than the top—this helps channel water away from the terrace. I like to use landscape fabric (cut to fit the trench width) before adding stones to prevent soil from seeping through the gaps over time.
For the terrace edges, I recommend using flat, irregular stones (like flagstone or river rock) rather than round ones. Arrange them with the flat side facing outward and the rough side against the soil for better stability. Leave about 2 inches of space between stones at the bottom for drainage—this prevents water from pooling behind the wall.
💧 Step 3: Build Up Terraces with Soil and Drainage Layers
Start the first terrace at the bottom of the slope and work your way up. Fill each terrace with a 3-inch layer of coarse gravel (like ¾-inch crushed stone) to improve drainage. This is critical—without it, water will pool and erode your soil over time. Next, add 6 inches of high-quality topsoil, mixed with compost (about 20% of the volume) to give plants a nutrient boost right away.
I like to slope the soil very slightly (about 5 degrees) toward the center of the terrace so water drains toward a perforated drain pipe (if installed) or simply runs off the edges. Don't compact the soil too much—just firm it enough to hold shape. If your slope is very steep, consider adding geotextile fabric under the soil layer for extra erosion control.
🪴 Step 4: Install Stones for Retaining Edges
Now for the pretty part—securing the stones. Use medium to large stones (about 8-12 inches across) for the terrace edges, placing them flat side up and tightly interlocked. I like to stagger the stones so the gaps don't line up—this makes the wall stronger and looks more natural. For extra stability, especially on steep slopes, mortar the corners or use landscape adhesive to hold key stones in place.
Leave a 2-inch gap between the top of the stone edge and the soil level. This prevents water from overflowing during heavy rains. If you're using stepping stones as part of the design, place them after the soil is settled (about 2-3 weeks later) so they don't sink into the bed. Here's where it gets fun—arrange a few stones temporarily to visualize the look before finalizing.
🌿 Step 5: Plant and Maintain for Long-Term Stability
Wait 2-3 weeks before planting to let the soil settle. Choose drought-tolerant plants for the edges (like sedum, lavender, or ornamental grasses) and moisture-loving plants for the center of the terrace. I like to plant in small clusters rather than rows—it looks more natural and reduces erosion. Mulch with 3 inches of wood chips or gravel to suppress weeds and retain moisture.
After planting, water deeply but avoid heavy watering from above—it can wash away soil. Instead, use a soaker hose or drip irrigation to deliver water slowly at the base. Check the terraces after heavy rains to ensure water is draining properly. If you notice soil slumping over the edges, add more stones or reinforce the fabric—this is easier to fix early than after erosion sets in.
Tips & tricks for perfect stone flower beds on slopes
Building terraced stone flower beds takes patience, but these little adjustments will save you headaches and make your design last for years.
Leveling is Everything: That 12-inch level in Step 1 isn't just for show—it's your secret weapon against erosion. I've seen terraces fail when people eyeball the slope. For extra precision, use a string line with a plumb bob to double-check your horizontal marks before digging. The 18-24 inch vertical spacing between terraces is ideal because it creates gentle enough slopes for plants while preventing soil from slumping over time.
Stone Selection Matters: In Step 2 and Step 4, don't underestimate the importance of stone shape. Flat, irregular stones (like flagstone) interlock better than round river rocks. I learned this the hard way when my first attempt used smooth river rocks—they shifted during heavy rains. For the edges, look for stones with natural curves that can nestle together tightly. Pro tip: Soak your stones in water for 24 hours before installing to prevent them from absorbing moisture from your soil later.
Drainage is Non-Negotiable: The 3-inch gravel layer in Step 3 isn't just recommended—it's essential. Without it, water will pool and wash away your soil. I've seen terraces collapse after just one heavy rain because someone skipped this step. For extra insurance on steep slopes, consider adding a perforated drain pipe along the center of each terrace. And that 2-inch gap between stones and soil? It's not optional—it's what prevents water from overflowing during storms.
Plant Placement Strategy: In Step 5, resist the urge to plant immediately. Those 2-3 weeks waiting period lets the soil settle and prevents plants from sinking as the terraces compact. For the edges, choose plants with fibrous root systems like sedum or lavender—they'll help anchor the soil. In the center, moisture-loving plants will appreciate the slight slope you created toward the middle of each terrace. And that 3-inch mulch layer? It's not just for looks—it helps regulate soil temperature and prevents erosion from wind and rain.
Pro Tips for Build A Stone Flower Bed On A Slope
- Building terraced stone flower beds takes patience, but these little adjustments will save you headaches and make you...
- Leveling is Everything: That 12-inch level in Step 1 isn't just for show—it's your secret weapon against erosion. I'v...
- Stone Selection Matters: In Step 2 and Step 4, don't underestimate the importance of stone shape. Flat, irregular sto...
Frequently asked questions
Got questions about building a stone flower bed on a slope?
You’re not alone—this project has a few unique challenges! Below, we’ve rounded up the most common queries to help you tackle your terraced garden with confidence.
What’s the best time of year to build a stone flower bed on a slope?
The ideal time is early spring or fall when the ground is workable but not frozen or overly dry. Avoid planting flowers until after the last frost—usually late spring—so they have time to establish roots before winter. If you’re in a mild climate, you can build year-round, but rainy seasons may make the slope slippery.
Do I need to use retaining walls for every layer, or can I skip them?
Retaining walls are highly recommended for steep slopes (over 15°) to prevent erosion and soil slippage. For gentler slopes, you can use landscape fabric or gravel layers to stabilize the soil between terraces. If you skip walls, expect more maintenance to keep the layers in place.
How do I prevent water from pooling in the lower terraces?
Pooling happens when drainage isn’t proper. To fix it:
- Add a French drain (gravel-filled pipe) at the bottom of each terrace.
- Ensure the backfill soil is well-draining (mix in sand or perlite).
- Create a slight slope (1-2%) within each bed toward the drain.
Can I use just rocks (no soil) for the flower bed?
While a dry-stacked stone garden (like a Zen rock garden) is stunning, it won’t support most flowering plants. For a traditional flower bed, you’ll need at least 6-12 inches of soil per terrace. If you love the look of rocks, try interspersing them with soil pockets for plants—just ensure proper drainage!
What if my slope is too steep for terraces? Are there alternatives?
If your slope is too extreme for terraces (e.g., 45°+), consider:
- Stepped stone pathways with narrow plant pockets.
- Vertical gardens (hanging planters or wall-mounted beds).
- Native ground covers (like creeping thyme) to stabilize the slope naturally.
How do I keep weeds from taking over between the stones?
Weeds thrive in gaps! Prevent them with:
- A layer of landscape fabric under stones (leave edges exposed to sunlight).
- Mulch (gravel or bark) between stones to block light.
- Regularly pull weeds early before they seed.
Wrapping up and next steps
Building a stone flower bed on a slope doesn’t have to be overwhelming—with the right techniques, you can transform a tricky space into a stunning, functional garden. 🌿 By creating terraced layers, you’ve ensured proper drainage, stability, and a beautiful display for your favorite blooms.
Now, all that’s left is to step back, admire your handiwork, and enjoy the fruits of your labor!
Ready to take it further? Add colorful plants, mulch, or even solar-powered lights to elevate your flower bed. Or, if you’re feeling inspired, try your hand at another DIY project—like a rock garden or a raised bed. Happy gardening! 🌸