
Succulent
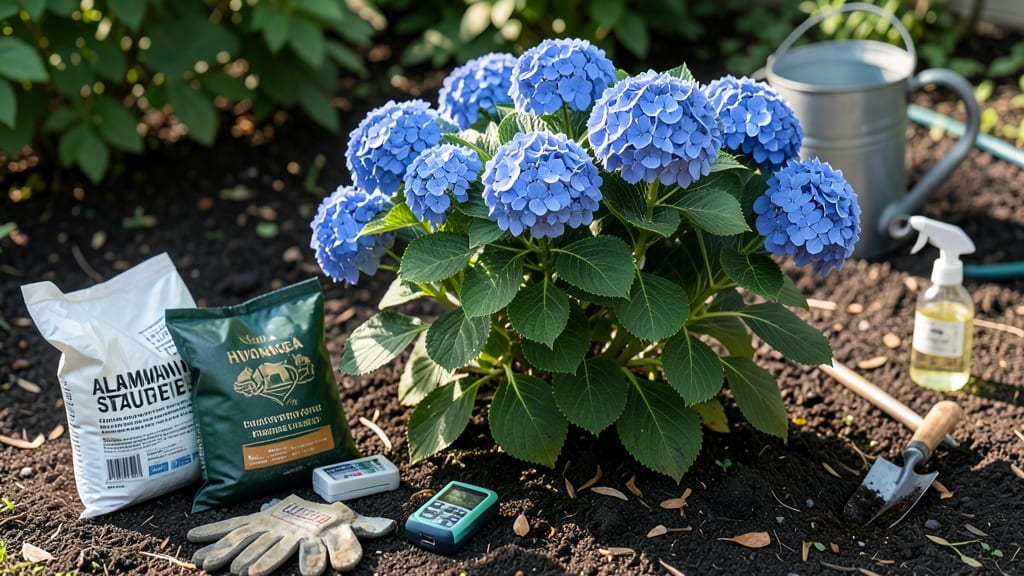
How to change hydrangea color to blue—it’s simpler than you think, and the results are stunning. The secret lies in soil pH—something most gardeners overlook. I’ve turned pink blooms into deep, rich blue using just two ingredients: aluminum sulfate and patience. It’s not magic, but science you can control.
Start by testing your soil’s pH—aim for 5.0 to 5.5 for true blue blooms. If your soil is neutral or alkaline, aluminum sulfate lowers pH when dissolved in water. Apply 1 to 2 tablespoons per plant in early spring, then water deeply. Repeat in late summer if needed.
Within weeks, you’ll notice new growth pushing through with those coveted blue hues. The key is consistency—hydrangeas respond slowly, but the transformation is worth it. Just avoid overdoing it; too much aluminum can harm roots.
This method works for mophead and lacecap varieties, but not for bigleaf hydrangeas grown from cuttings (they’re different chemistry). Perfect for gardeners who love a challenge and want blooms that pop against green foliage.
📚 In This Guide
- What you need
- Instructions
- Tips and common mistakes
- Wrapping up and next steps
What you need
- ● Hydrangeas: Varieties like Hydrangea macrophylla (mophead or lacecap) or Hydrangea serrata (responsive to soil pH). Ensure they’re healthy and established (at least 1–2 years old).
- ● Soil pH test kit: Digital or liquid test strips (e.g., Luster Leaf or MySoil) to confirm current pH (aim for 5.0–5.5 for blue blooms).
- ● Sulfur or aluminum sulfate: Aluminum sulfate: 1–2 lbs per 100 sq ft (e.g., Espoma or Southern Ag brands). ⚠️ Caution: Wear gloves—it’s corrosive!
- ● Elemental sulfur: 1–2 lbs per 100 sq ft (slower-acting but safer; e.g., Bonide or Down to Earth).
- ● Garden trowel or spade: For digging and mixing amendments into the soil (6–8 inches deep).
- ● Watering can or hose: With a gentle spray nozzle to avoid disturbing soil.
- ○ Compost or organic matter (optional but helpful): 1–2 inches of well-aged compost to improve soil structure (e.g., Miracle-Gro or homemade).
- ● pH buffer granules: Pre-mixed blends (e.g., Down to Earth Azalea/Camellia food) for convenience.
- ● Rain gauge or moisture meter: To monitor watering—hydrangeas need 1–1.5 inches of water weekly.
- ● Mulch (pine bark or pine needles): 2–3 inches to maintain acidic soil over time.
- ● Garden gloves: To protect hands from sulfur or aluminum sulfate.
- ● Calcium carbonate (lime): Only if you need to raise pH later (keep it handy for balance!).
Instructions for turning hydrangeas blue using acidic soil
Hydrangeas shift colors based on soil pH—here's how to create the perfect acidic environment for stunning blue blooms.
Test Your Current Soil pH
Before making changes, grab a soil pH test kit (available at garden centers) and collect samples from around your hydrangea's root zone. Dig about 2 inches deep and take 5-6 small scoops from different directions. Mix them in a clean container and follow the kit instructions to determine your current pH level.
Hydrangeas bloom blue when soil pH is between 5.0 and 5.5. If your reading is 6.0 or higher, you'll need to acidify the soil significantly. Record the exact pH—this tells you how much adjustment is needed. For example, a reading of 6.5 requires more aggressive treatment than 5.8.
Apply Sulfur or Aluminum Sulfate
For established hydrangeas, spread 1 pound of elemental sulfur or 1/2 pound of aluminum sulfate per 10 square feet of soil around the plant. Work it into the top 2-3 inches of soil using a garden fork. This lowers pH gradually over 2-3 months, giving roots time to adjust without shock.
For container-grown hydrangeas, mix 1 tablespoon of aluminum sulfate per gallon of potting mix. Water thoroughly after mixing to activate the chemical reaction. Avoid overdoing it—soil pH below 4.5 can damage roots and stunt growth. If you're unsure, start with half the recommended dose and retest in 6 weeks.
Use Organic Acidifiers for Gentle Adjustment
For a slower, more natural approach, incorporate pine needles, oak leaves, or peat moss into the soil. Spread a 2-inch layer of these materials around the base of the plant and lightly scratch them into the topsoil. As they decompose, they release organic acids that lower pH over time.
You can also use cottonseed meal or coffee grounds (from brewed coffee, not instant). Work 1/2 cup of cottonseed meal into the soil every 4-6 weeks during the growing season. Coffee grounds should be used sparingly—1/4 cup per plant—as they can compact soil if overused. Both methods take longer but are safer for delicate root systems.
Maintain Consistent Moisture and Mulch
Hydrangeas need consistent moisture to absorb pH adjustments effectively. Water deeply 2-3 times per week, ensuring the soil stays evenly moist but not soggy. Dry soil locks out nutrients, including the aluminum ions that produce blue blooms. You'll know moisture is right when the top 1-2 inches of soil feel damp but not waterlogged.
Apply a 2-3 inch layer of acidic mulch, such as pine bark or wood chips, around the plant's base. Keep mulch 2-3 inches away from the stem to prevent rot. This mulch slowly releases acids as it breaks down, helping maintain the ideal pH range. Refresh the mulch layer annually in early spring to sustain its effects.
Monitor and Adjust Over Time
Retest soil pH every 4-6 weeks during the growing season. Hydrangeas respond slowly to pH changes—it can take 6-12 months for color shifts to become fully visible. If blooms still aren't blue after a year, you may need to reapply sulfur or aluminum sulfate and retest.
Watch for signs of over-acidification, such as yellowing leaves, stunted growth, or brown leaf edges. These indicate pH levels may have dropped too low. If you see these symptoms, mix 1/2 cup of garden lime into the soil and water thoroughly to raise pH slightly. Balance is key—hydrangeas need acidic but not extreme conditions to thrive.
Tips & tricks for perfect hydrangea color transformation
Transforming hydrangeas from pink to blue requires patience and precision—here's how to avoid common pitfalls and maximize results.
Soil Sampling Strategy: When collecting soil samples in Step 1, focus on the root zone where hydrangea roots naturally spread. Avoid surface soil that may have been recently amended. For container plants, sample from multiple areas around the pot—soil pH can vary even within the same container. This ensures your test reflects the actual environment your hydrangea's roots are experiencing.
Chemical Application Technique: In Step 2, distribute elemental sulfur or aluminum sulfate evenly in concentric circles around the plant, working outward from the base. This creates a gradient effect where the center receives the highest concentration while outer areas get a lighter dose. For container plants, mix thoroughly after adding—uneven distribution can create pH hotspots that stress roots. Always water immediately after application to activate the chemical reaction.
Organic Acidifier Selection: For Step 3's organic options, pine needles work best for their consistent acidity, while oak leaves provide a slower release. If using coffee grounds, brewed grounds from dark roasts are most effective—avoid instant coffee, which lacks the organic acids. Remember that organic methods take longer (3-6 months) to show results compared to chemical amendments, but they're gentler on plant health.
Moisture Management: The 2-3 waterings per week in Step 4 should be deep enough to saturate the root zone (about 6-12 inches down). Use a moisture meter or dig down with a trowel to check—hydrangeas hate dry soil but also dislike waterlogged conditions. Mulch helps retain moisture, but don't let it sit directly against the stem to prevent rot. A 2-3 inch gap is crucial for airflow.
Pro Tips for Change Hydrangea Color To Blue
- Transforming hydrangeas from pink to blue requires patience and precision—here's how to avoid common pitfalls and max...
- Soil Sampling Strategy: When collecting soil samples in Step 1, focus on the root zone where hydrangea roots naturall...
- Chemical Application Technique: In Step 2, distribute elemental sulfur or aluminum sulfate evenly in concentric circl...
Frequently asked questions
Got questions about turning your hydrangeas blue? You’re not alone! Here are some of the most common queries—and straightforward answers—to help you achieve those stunning cobalt blooms with confidence.
How long does it take to see blue hydrangeas after changing the soil pH?
Patience is key! You’ll likely notice color changes within 4–6 weeks of adjusting soil acidity, but full results may take up to 2–3 months, especially for established plants. New growth (emerging after pruning) will reflect the pH shift first. Test soil pH again in 6–8 weeks to confirm progress.
Can I use vinegar to turn hydrangeas blue? Will it harm my plants?
Nope—vinegar is too harsh (it’s acidic but lacks the balanced nutrients hydrangeas need). Stick to soil amendments like aluminum sulfate or peat moss instead. Vinegar can burn roots or disrupt soil microbes. For a quick fix, dilute 1 part white vinegar in 1 gallon of water as a foliar spray (spray leaves, not soil), but monitor for leaf damage.
What’s the best time of year to adjust soil pH for blue hydrangeas?
Spring (after the last frost) or early fall (before winter dormancy) are ideal. Avoid summer heat or winter freezes, which stress plants. If your hydrangeas bloom on old wood (like H. macrophylla), amend soil in late winter so new growth reflects the pH change next season.
My hydrangeas turned purple instead of blue—what went wrong?
Purple blooms mean your soil pH is too neutral (around 6.0–6.5). To deepen the blue:
- Add more aluminum sulfate (follow package rates).
- Incorporate sphagnum peat moss into the top 6 inches of soil.
- Test soil pH again—aim for 5.0–5.5 for true blue.
Are there natural, organic ways to acidify soil for blue hydrangeas?
Try these eco-friendly alternatives:
- Pine needles or oak leaves: Spread a 2–3 inch layer around the base and mulch into the soil.
- Coffee grounds: Mix into the topsoil (use 1 cup per plant every few months).
- Composted pine bark: Amend soil with 2–3 inches in spring.
- Citrus peels: Bury chopped peels in holes around the plant (compost them in place).
What if my hydrangeas stay pink or green no matter what I do?
Some hydrangea varieties (like H. paniculata or H. arborescens) are genetically resistant to blue. Check your plant tags or consult a local nursery. If it’s a macrophylla type, ensure:
- You’re not overwatering (dilutes soil acidity).
- Soil isn’t compacted (restricts root access to amendments).
- You’re not using lime or wood ash (raises pH).
Wrapping up and next steps
Changing your hydrangeas to a stunning blue is easier than you think—just tweak the soil’s pH with a few simple steps! Remember, consistency is key: test your soil regularly, feed them with aluminum-rich amendments, and keep an eye on moisture levels.
With patience and care, your blooms will transform into breathtaking shades of blue in just a few weeks.
Ready to see the magic happen? Grab your soil test kit and get started—your garden’s blue revolution awaits! 🌸✨