
Propagation
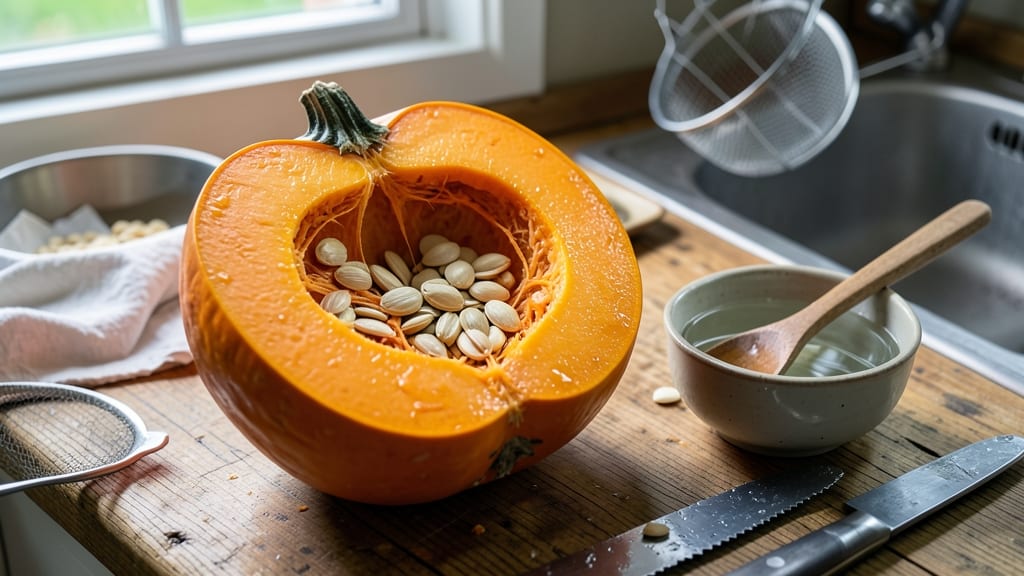
How to clean pumpkin seeds for planting turns kitchen scraps into next year’s harvest. 🌱 Last fall, I saved seeds from my giant sugar pumpkin—what started as a messy pile became the first sprouts of this season’s vines. The secret lies in thorough cleaning and proper drying to ensure strong germination.
You’ll need just a few simple supplies: a bowl of water, a fine-mesh strainer, paper towels, and a cool, dry spot for drying. The process takes about 30 minutes of active work, plus a few days of drying time.
Skipping these steps often leads to moldy seeds or poor sprouting—don’t let that happen to your hard-earned pumpkin!
After rinsing and scrubbing, you’ll end up with plump, clean seeds ready for storage. These seeds will sprout faster and grow into healthier plants than store-bought varieties. The satisfaction of growing your own pumpkins from saved seeds is unmatched—imagine the first vine curling up your trellis next spring!
This method works for any pumpkin variety, from small sugar pumpkins to massive jack-o’-lanterns. Store them in a sealed container in the fridge for up to 5 years, and you’ll always have fresh seeds on hand. Here’s how to make it happen without the guesswork.
📚 In This Guide
- What you need
- Instructions
- Tips and common mistakes
- Wrapping up and next steps
What you need
- ● Fresh pumpkin seeds: Harvest seeds from ripe, healthy pumpkins (avoid store-bought or treated seeds). Aim for 1–2 pounds (or ~2–4 cups) depending on your planting goals.
- ● Colander or fine-mesh strainer: A stainless steel or plastic strainer with small holes (¼ inch or less) to rinse seeds thoroughly.
- ● Large bowl or bucket: A non-reactive (glass, ceramic, or food-grade plastic) container for soaking and rinsing seeds (capacity: at least 2–3 gallons).
- ● Water: Enough to submerge seeds completely (lukewarm or cool water works best).
- ● Baking sheet or clean towel: A flat, unbleached surface for drying seeds (parchment paper is ideal).
- ● Paper towels or clean cloth: For patting seeds dry after rinsing.
- ● Small bowl or jar: For storing cleaned seeds (airtight container preferred).
- ○ Optional: A soft-bristled brush (like a toothbrush) for stubborn seed debris.
- ● Hydrogen peroxide (3%) or bleach solution: For disinfecting seeds (1 part peroxide or 1 tsp bleach per gallon of water).
- ● Food dehydrator or oven: For speeding up the drying process (set to 120–140°F if using an oven).
- ● Labeling tags: To mark seed varieties and dates (if storing multiple types).
- ● Gloves: If you prefer not to handle wet seeds directly.
Step-by-Step instructions for cleaning pumpkin seeds for planting
Here's how I turn messy pumpkin guts into fresh, ready-to-plant seeds—no fancy tools needed.
🌱 Step 1: Scoop and Rinse the Seeds
Cut open a mature pumpkin with a sharp knife and scoop out the stringy pulp and seeds into a large bowl. The seeds will be embedded in the fibrous material, so I use my hands to separate them—just squish the pulp between fingers until the seeds pop free. Rinse everything under cool water to wash away the sticky residue. You'll notice the seeds turn from slimy to clean as the pulp dissolves.
Don't worry if some seeds stick together—they'll separate as we scrub. I always rinse twice to ensure no pumpkin juice remains, which can rot seeds during storage. Drain well in a colander, shaking gently to remove excess water. Wet seeds won't dry properly, so thorough draining is key.
💧 Step 2: Scrub and Separate the Seeds
Spread the drained seeds on a clean kitchen towel or paper towels. I like to use a damp paper towel to gently rub each seed between my fingers, removing any remaining pulp. For stubborn bits, a soft toothbrush works wonders—just scrub lightly to avoid damaging the seed coat. You'll see the seeds go from dull to shiny as they clean up.
Separate any seeds that are cracked, shriveled, or still attached to long fibers—they won't sprout. Healthy seeds should feel firm and plump. If you're saving seeds from a favorite pumpkin variety, label them now with the type and date. I use small envelopes or a jar with a lid for organization.
☀️ Step 3: Dry the Seeds Thoroughly
Lay the cleaned seeds in a single layer on a baking sheet lined with paper towels. Place them in a warm, dry spot with good air circulation—like a sunny windowsill or a fan-cooled counter. The seeds need to dry completely, which takes about 3-5 days depending on humidity. You'll know they're dry when they feel lightweight and make a rattling sound when shaken in their container.
Don't rush the drying process—moisture trapped inside will cause mold. If your kitchen is humid, prop a fan nearby to speed things up. Once fully dry, store the seeds in a cool, dark place like a sealed jar or envelope. Properly dried seeds stay viable for 3-5 years, so this step is worth the patience.
⏰ Step 4: Test and Store for Planting
Before storing, do a quick viability test: Fill a glass with water and drop in 10 seeds. After 15 minutes, sinkers are good (they'll float if empty). If more than 50% float, your batch may have low germination—consider planting more seeds or saving fresh ones next year. For storage, I use a small glass jar with a tight lid, keeping it in a dark pantry until spring.
Label your jar with the pumpkin variety and year—next season, you'll forget which seeds you saved! When planting time comes, soak the seeds overnight in warm water before sowing. This simple step jumpstarts germination, giving you a head start on growing your own pumpkins.
Tips & tricks for perfect pumpkin seed cleaning
Here's what I've learned after saving seeds from dozens of pumpkins—these little tricks make all the difference for healthy, viable planting stock.
Pulp Removal Pro Tip: In Step 1, don't skip the double rinse—this is where most people go wrong. The second rinse removes the last traces of pumpkin juice that can cause mold during storage. I've seen batches turn moldy overnight because of missed residue. After draining, give the seeds one final shake over the sink to remove any lingering moisture.
Seed Selection Strategy: During Step 2, when you're separating healthy seeds, look for ones that are uniform in size and shape. The plumpest seeds from the center of the pumpkin usually produce the best plants. I discard any seeds with black spots or soft areas—they won't survive storage. For extra assurance, I run my fingers over each seed to check for hidden cracks that might not be visible.
Drying Time Hack: The 3-5 day drying period in Step 3 can feel like forever, but here's my trick: If you're in a hurry, place your baking sheet in a warm, sunny spot during the day and move it to a dry counter at night. The temperature fluctuation speeds up evaporation. Just make sure they're completely dry before storing—moisture is the enemy of long-term viability. You'll know they're ready when they rattle like marbles in their container.
Storage Wisdom: For the viability test in Step 4, I actually test 20 seeds instead of 10 to get a more accurate reading. If more than 50% float, I either plant those immediately or save only the sinkers for next season. For long-term storage, I add a small silica gel packet to my seed jars—it absorbs any remaining moisture and helps maintain viability for those 3-5 years.
Pro Tips for Clean Pumpkin Seeds For Planting
- Here's what I've learned after saving seeds from dozens of pumpkins—these little tricks make all the difference for h...
- Pulp Removal Pro Tip: In Step 1, don't skip the double rinse—this is where most people go wrong. The second rinse rem...
- Seed Selection Strategy: During Step 2, when you're separating healthy seeds, look for ones that are uniform in size ...
Frequently asked questions
How long do I need to dry pumpkin seeds before storing them?
Seeds should be completely dry (no moisture) before storage—aim for 5–7 days in a warm, well-ventilated spot (like a screen tray). Test by crushing a seed: if it snaps crisply, it’s ready! Humidity is the enemy, so avoid damp areas or plastic bags. Pro tip: Spread them thinly to speed up drying.
Can I plant pumpkin seeds straight from the pumpkin without cleaning?
Technically yes, but cleaning improves germination. Dirty seeds may rot or attract pests. If you’re in a hurry, rinse them quickly in water, pat dry, and plant within 24 hours—but for best results, follow the full cleaning process. Think of it like washing your hands before surgery—better safe than sorry!
What if my seeds start sprouting before I’m ready to plant them?
If seeds sprout too early, plant them immediately in moist soil or a damp paper towel. The taproot (first sprout) is delicate—handle gently! If storage conditions were too warm/humid, move seeds to a cool, dark place (like a fridge) to slow germination. No stress: even a 1-inch sprout can still thrive!
Are store-bought pumpkin seeds (like from a pie mix) good for planting?
Most store-bought seeds are hybridized for taste, not growth, so they may not produce true pumpkins. For planting, use seeds from heirloom or garden varieties. Save seeds from organic pumpkins (like those labeled for carving) for the best results. Label your seeds! Jot down the variety to avoid surprises next season.
How do I know if my stored seeds are still viable?
Test viability with the “float test”: Drop seeds in water—sinkers are good, floaters are dead. For a 90%+ success rate, store seeds in a sealed container with a desiccant packet in a cool (40–50°F), dark place. Most pumpkin seeds stay viable for 4–5 years, but germination drops after 2 years.
Wrapping up and next steps
Cleaning pumpkin seeds for planting is a simple yet rewarding process that sets the stage for a thriving harvest next season!
By following these steps—scrubbing, drying, and storing—you’ll ensure your seeds are healthy, viable, and ready to sprout when the time comes. Don’t let those seeds go to waste—your future garden (and maybe even a delicious snack!) is waiting.
Now that you’re armed with the know-how, grab those seeds and get started!
Whether you’re a seasoned gardener or a first-timer, every seed you save is a step toward a more sustainable and bountiful growing season. Ready to plant? Check out our next guide on how to sow pumpkin seeds for a foolproof growing experience! 🌱