
Flowers
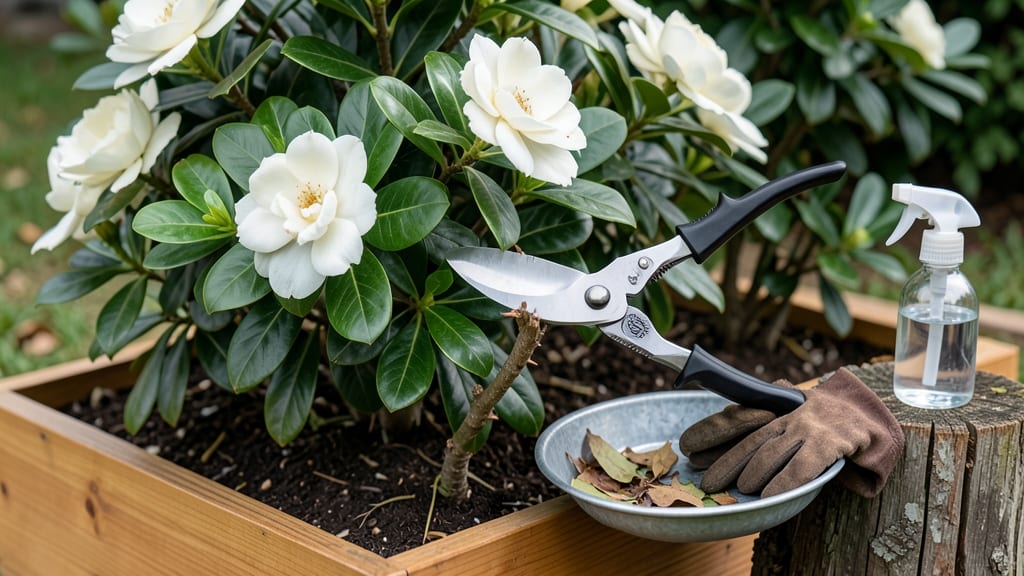
Cutting gardenia flowers wrong ruins the plant. ✂️ I’ve seen gardenias go from lush, fragrant bushes to sad, bare branches after one bad snip—so let’s get this right. The key is timing, technique, and knowing exactly where to cut to keep your plant blooming for years.
You’ll need just two things: clean, sharp pruners (sterilized with rubbing alcohol) and a steady hand. The best time to cut is right after a bloom fades—never while it’s still vibrant. Gardenias bloom on new growth, so pruning at the wrong time can stunt future flowers.
Think of it like giving the plant a haircut at the right moment to encourage more growth.
Make your cut just above a leaf node—that’s where new shoots will sprout. Angle the cut slightly downward to shed water, and avoid cutting into old wood or you’ll slow down regrowth.
After trimming, give your gardenia a deep watering and a light fertilizer to reward it for the stress of pruning. Within weeks, you’ll see fresh buds forming.
Pro tip: Never cut more than one-third of the plant at once, and skip pruning in late summer—this triggers new growth that won’t harden off before winter. With this method, your gardenia will stay bushy, fragrant, and full of blooms for seasons to come. Now go snip like a pro!
📚 In This Guide
- What you need
- Instructions
- Tips and common mistakes
- Wrapping up and next steps
What you need
Before you dive into cutting gardenia flowers like a pro, gather these essentials to ensure a smooth and successful process! Whether you're prepping for a bouquet or pruning your gardenia plant, having the right tools makes all the difference. Here’s your
Step-by-step instructions for cutting gardenia flowers
Here's how to harvest gardenias with perfect stems—keeping them fresh longer without harming the plant.
✂️ Step 1: Choose the Right Time and Flowers
Pick flowers in the morning when they're fully open but still firm to the touch. Avoid buds that haven't opened yet—they won't last as long. I always look for blooms with vibrant color and no signs of wilting. Gardenias at this stage have the most moisture in their stems, which means they'll stay fresh longer in your vase.
Check the stem for any signs of damage or disease. If you see small holes, brown spots, or sticky residue, skip that flower—it could spread problems to your other blooms. A healthy stem should feel crisp and slightly woody when you gently squeeze it.
✂️ Step 2: Make the Perfect Cut
Use sharp, clean pruning shears or a knife to make your cut. I like to hold the stem at a 45-degree angle, about 2 inches below the flower head. This angled cut gives the stem more surface area to absorb water, which is crucial for gardenias—they're thirsty flowers!
Make the cut clean and swift in one motion. Hesitation or a jagged cut will crush the stem's vascular tissue, causing the flower to wilt faster. If you're using shears, wipe them clean with rubbing alcohol between cuts to prevent spreading any potential bacteria.
💧 Step 3: Prepare the Stems Immediately
As soon as you cut the stems, place them in a bucket of lukewarm water for about 30 minutes. This hydrates the stems and helps them drink up water before you arrange them. Gardenias are particularly sensitive to air bubbles in their stems, so avoid shaking the bucket or letting the stems sit dry for too long.
While they're soaking, trim about ½ inch off the bottom of each stem with a fresh cut. This removes any blocked vessels that might prevent water uptake. You can also add a commercial flower food packet to the water if you have one—it contains sugars and acids that help gardenias thrive.
🌿 Step 4: Arrange in a Fresh Vase
Fill your vase with room-temperature water and add the flower food if you're using it. Arrange your gardenias with about 3-4 inches of stem submerged—this gives them plenty of water access. Change the water every 2 days to keep it fresh, and trim the stems again with a fresh cut each time you refresh.
Place the vase in a spot with bright, indirect light. Direct sunlight can cause the petals to fade faster, while too little light makes the blooms droop. A kitchen counter or bathroom near a window is usually perfect. You'll know you've done it right when the blooms stay perky for at least 5-7 days—sometimes even longer!
🌱 Step 5: Care for Your Gardenia Plant After Cutting
After harvesting, give your gardenia plant a little extra attention. Water it deeply to replace what you've removed, and check the soil—it should feel moist but not soggy about 1 inch down. Gardenias are sensitive to overwatering, so always let the top layer dry out slightly between waterings.
If you've taken more than a few flowers, consider fertilizing lightly with a balanced, acid-loving plant fertilizer to help the plant recover. I like to do this in the morning so the plant has time to absorb the nutrients before the heat of the day. With proper care, your gardenia will bounce back and produce even more beautiful blooms!
Tips & tricks for perfect gardenia flower harvesting
Here's what nobody tells you about keeping your gardenias fresh and your plant thriving after the cut.
The Morning Advantage: I've learned this the hard way after trying to harvest gardenias in the afternoon—morning flowers have the highest moisture content in their stems, which translates to longer vase life. The cooler temperatures overnight also mean less stress on the plant, so it recovers faster. If you absolutely must harvest later in the day, do it in the early morning hours when temperatures are still cool.
Tool Prep is Non-Negotiable: Before you even think about cutting, sanitize your tools with rubbing alcohol. I keep a small bottle handy and wipe down shears or knives between every 3-4 cuts. This prevents bacterial buildup that can clog stems and cause wilting. Also, make sure your tools are sharp—dull blades crush stems instead of making clean cuts, which is exactly what you don't want for these thirsty flowers.
Water Temperature Matters More Than You Think: That 30-minute soak in lukewarm water isn't just a suggestion—it's crucial. Too cold water shocks the stems, while hot water can cook them. Lukewarm (around 85-90°F) is perfect for immediate hydration. Pro tip: If you're in a hurry, you can reduce the soak time to 20 minutes, but don't skip it completely. The stems need that hydration boost before they hit your vase.
Light Placement Secrets: While bright indirect light is ideal, I've found that placing your vase near a north-facing window actually extends bloom life by about 24 hours. North light is consistent without the intensity that can fade petals. And here's a trick I picked up from florists: Rotate your vase 180 degrees every 2 days. This ensures all sides of the flowers get equal light exposure, preventing one-sided wilting.
Pro Tips for Cut Gardenia Flowers
- Here's what nobody tells you about keeping your gardenias fresh and your plant thriving after the cut.
- The Morning Advantage: I've learned this the hard way after trying to harvest gardenias in the afternoon—morning flow...
- Tool Prep is Non-Negotiable: Before you even think about cutting, sanitize your tools with rubbing alcohol. I keep a ...
Frequently asked questions
Got questions about cutting gardenia flowers? You’re not alone! Here are some of the most common concerns—and their answers—to help you master the art of harvesting these fragrant beauties without a hitch.
How do I know when a gardenia is ready to cut?
Pick gardenias when their buds are just about to open—typically 1-2 days before they fully bloom. Fully open flowers wilt faster, while unripe buds may not yield the best scent. Look for a slight softness at the base of the bud and a vibrant color shift (usually from pale green to creamy white or pale yellow).
What’s the best time of day to cut gardenias for longevity?
Early morning is ideal! Cutting gardenias between 5 AM and 8 AM ensures the stems are fully hydrated, and the blooms haven’t yet expended energy in the heat. Avoid cutting in the evening or after rain—stems absorb excess water, which can shorten vase life.
Can I cut gardenias with scissors, or do I need pruning shears?
While pruning shears (or sharp floral snips) are best for clean cuts, you can use clean, sterilized scissors in a pinch. Just ensure the blades are sharp to avoid crushing stems. For large gardenia bushes, shears make the job easier and reduce stress on the plant.
Why do my cut gardenias wilt so fast, even after proper cutting?
Wilting often stems from air bubbles in the stem or poor hydration. To fix this, recut the stem at a 45-degree angle under water, then place it in lukewarm (not hot) water with a floral preservative. Change the water every 2 days and trim ½ inch from the base to encourage uptake.
Will cutting gardenias harm the plant if I do it too often?
Not if done correctly! Gardenias are resilient and benefit from regular pruning to encourage new growth and more blooms. Avoid cutting more than 1/3 of the plant’s foliage at once, and always use clean tools to prevent disease. Focus on shaping rather than heavy harvesting.
Wrapping up and next steps
Mastering the art of cutting gardenia flowers ensures their beauty lasts longer—every snip counts! 🌸 With the right tools, clean cuts, and a touch of care, you’ll transform fresh blooms into stunning centerpieces or bouquets that stay vibrant for days.
Now that you’re equipped with the know-how, grab those shears and get creative! Try experimenting with different arrangements or share your newfound skills with fellow gardening enthusiasts.
Next step: Practice on a few stems, and soon you’ll be the go-to expert for gardenia care in your circle. Happy cutting! ✂️✨