
Tools
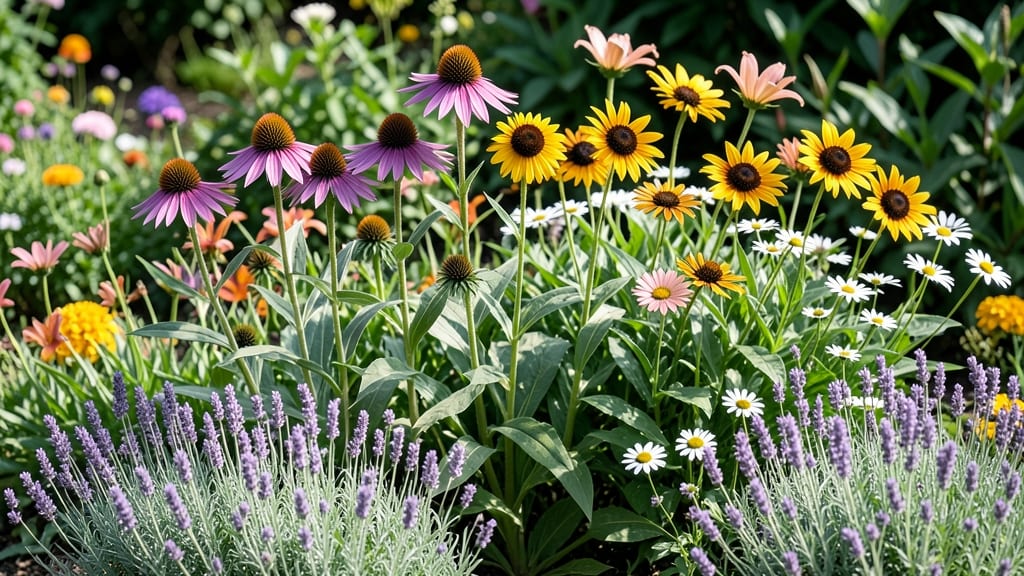
How to draw a flower garden sketch could change how you see your yard. ✨ I’ve turned blank paper into vibrant garden plans that actually work—no art degree required. The secret? Treating plants like shapes and colors first, then fitting them into real-world spacing. Start with graph paper or a free digital tool like SketchUp’s free version. Measure your space first (even eyeballing works), then sketch paths, beds, and focal points. My 3-foot rule for paths keeps them walkable without overwhelming the garden. By the end, you’ll have a sketch that shows bloom times, heights, and colors—plus exact planting spots. The best part? You’ll spot design flaws before digging a single hole. This works for containers, raised beds, or full yards. Let’s turn that blank page into a garden you’ll love walking through.
📚 In This Guide
- What you need
- Instructions
- Tips and common mistakes
- Wrapping up and next steps
What you need
- ● Drawing Paper: A sketchpad or sheet of 8.5" x 11" (21.5 cm x 28 cm) or larger, with a smooth finish (e.g., Strathmore 400 Series). Quantity: 1-2 sheets.
- ● Pencils: HB or 2B pencil for sketching outlines and light guidelines.
- ● 4B or 6B pencil for shading and darker details. Quantity: 2-3 pencils.
- ● Eraser: A kneaded eraser for precision and a vinyl eraser for bold corrections. Quantity: 1 of each.
- ● Sharpener: A handheld pencil sharpener or electric sharpener for quick touch-ups.
- ● Ruler: A 12-inch (30 cm) metal ruler for straight lines and measuring proportions.
- ● Fine-Liner Pens: 0.1 mm or 0.3 mm black fine-liners (e.g., Micron or Staedtler) for clean outlines.
- ○ Colored fine-liners (optional, for adding pops of color). Quantity: 2-3 black, 1-2 colored.
- ● Colored Pencils or Markers: A set of watercolor or prismacolor pencils (e.g., Crayola or Faber-Castell) for vibrant petals and foliage.
- ● Watercolor Set: A small set of student-grade paints (e.g., Winsor & Newton Cotman) for a watercolor effect. Quantity: 6-12 colors.
- ● Blending Tools: Tortillon or blending stumps for smooth gradients.
- ● Soft brush (size 2 or 4) for watercolor or ink washes.
- ● Reference Images: Printed photos or digital screenshots of flower gardens for inspiration.
- ● Lightbox or Tracing Paper: For transferring designs or lightening sketches.
- ● A quiet, well-lit workspace with a stable surface (e.g., desk or drawing table).
- ● Basic knowledge of shapes, lines, and shading (even simple sketches will work!).
- ● Patience and a playful mindset—flower gardens are all about experimentation and joy!
Step-by-Step instructions for drawing whimsical flower gardens
Let’s turn your sketchbook into a blooming paradise with just a few strokes and a dash of creativity.
🌱 Step 1: Sketch the Garden Layout with Light Guidelines
Start with a pencil and light hand—no need for perfection yet. Draw a simple horizon line to separate sky from earth, then add a winding path or two to frame your garden. I like to use short, curved lines for paths to keep things organic. Add a few small circles or ovals to mark where flower clusters will go—think of them as your "anchor points."
Keep your lines loose; this is just your roadmap. If you’re unsure where to place flowers, sketch a few random dots across the page and let them guide your design. The goal here is balance—some clusters near the path, others tucked into corners. You’ll refine details later, so don’t stress over precision now.
🌿 Step 2: Define Flower Shapes with Simple Forms
Now, turn those dots into flowers using basic shapes. For roses or peonies, draw rounded petals in layers—start with a circle for the center, then add overlapping teardrop shapes around it. For tulips or daffodils, use a cup shape with a pointed tip and a smaller circle inside. Butterflies? Just two wings with antennae—keep it playful!
Here’s the thing—your flowers don’t need to be identical. Mix sizes and shapes for a natural look. If a petal looks wonky, lean into it! Imperfections make gardens feel alive. Use a light blue pencil for guidelines, so you can erase them later without smudging your final lines.
☀️ Step 3: Add Depth with Shadows and Foliage
Bring your garden to life by adding shadows and leaves. Start by shading under flower clusters with soft strokes—think of sunlight coming from the top left (or wherever you placed your horizon line). Use a light gray pencil to create subtle gradients, darker near the base of the flower and fading toward the edges. This trick makes your flowers pop off the page.
Next, sketch leaves or stems in short, jagged lines. For grass, use wavy strokes that get shorter as they recede into the background. Don’t overthink it—real gardens are messy! A few stray leaves or a misplaced bloom will make your drawing feel authentic. If you’re using colored pencils, layer light greens first, then add darker shades for depth.
✂️ Step 4: Refine with Confident Lines and Details
Once you’re happy with your layout, go over your pencil lines with a fine-tip black marker or pen. Work in sections to avoid smudging. For flowers, add tiny details like veins on petals or texture in the centers. I like to use a white gel pen to highlight edges or add sparkle to petals—it’s a pro trick that makes your drawing glow.
Now’s the time to erase any remaining guidelines. Step back and check for balance—does one side feel too empty? Add a few more flowers or a bench along the path. If a shape feels off, tweak it now. Remember, gardens evolve, so don’t be afraid to make bold changes. Your sketchbook is your playground!
🪴 Step 5: Add Finishing Touches for Whimsy
Finally, let your personality shine. Add a butterfly or two, a bird perched on a branch, or a tiny garden gnome peeking from behind a bush. Use watercolor or colored pencils to add a wash of sky or a patch of sunlight filtering through the flowers. Even a few dotted highlights** can make your garden feel alive.
Step back and admire your work! The key to whimsical gardens is joy—so if your drawing leans more "cartoon" than realistic, that’s perfect. Frame it, gift it, or use it as a template for real-life planting. Your flower garden is ready to bloom on paper (and maybe in your yard too!).
Tips & tricks for perfect whimsical flower gardens
Here's what nobody tells you about creating magical landscapes that feel alive on paper.
Step 1 Foundation: The horizon line is your secret weapon—draw it slightly uneven to mimic natural landscapes. I always start with a gentle curve instead of a straight line, which instantly makes your garden feel more organic. This subtle trick prevents that "cartoonish" look while keeping everything balanced.
Shape Shortcuts: For Step 2, use your pencil's eraser end to sketch quick petal shapes. The rounded edge creates perfect teardrop forms for roses without needing perfect freehand strokes. I also recommend practicing basic flower shapes on scrap paper first—this builds muscle memory so your final drawing flows effortlessly.
Shadow Strategy: When adding shadows in Step 3, think of sunlight as coming from the upper left corner (unless you've placed your horizon differently). Use your pencil's side for soft shading—it creates smoother gradients than the tip. For extra depth, add a second layer of shadow slightly offset from the first to mimic how light wraps around objects in real life.
Final Touches: In Step 5, don't be afraid to add unexpected elements like a tiny birdhouse or a snail trail. These whimsical details make your garden feel inhabited. I always save these final touches for last—they're the icing on the cake that transforms a good drawing into a magical one.
Pro Tips for Draw Flower Garden
- Here's what nobody tells you about creating magical landscapes that feel alive on paper.
- Step 1 Foundation: The horizon line is your secret weapon—draw it slightly uneven to mimic natural landscapes. I alwa...
- Shape Shortcuts: For Step 2, use your pencil's eraser end to sketch quick petal shapes. The rounded edge creates perf...
Frequently asked questions
Got questions about bringing your flower garden sketches to life? Here are some common ones—and their answers—to help you draw with confidence!
What’s the best pencil grade for sketching flower gardens?
Start with an _HB_ pencil for light outlines and details, then use 2B-6B for shading and depth. Softer grades (like _4B_) work great for blending petals or foliage. Pro tip: Use a kneaded eraser to lift graphite gently for highlights!
How long does it take to draw a simple flower garden?
For beginners, a basic sketch (5-10 flowers + background) takes 30-60 minutes. Complex scenes with textures or multiple layers may need 1-2 hours. Practice speeds up the process—try timelapse sketches to build stamina!
Can I draw a flower garden digitally? If so, how?
Use apps like Procreate or Adobe Fresco with a stylus. Start with a sketch layer, then add color and textures. Brushes like "Watercolor" or "Dry Media" mimic traditional pencil strokes. Scan your hand-drawn work for a hybrid approach!
What if my flowers look too stiff or unrealistic?
Focus on organic curves—avoid rigid lines! Practice petal shapes by sketching from reference photos. Add subtle wiggly stems and varied leaf sizes to bring life to your garden. Layer light shading to soften edges.
Do I need fancy tools, or will basic supplies work?
Not at all! A pencil, eraser, and paper are enough to start. Upgrade later with fineliners (for details) or watercolor pencils (for color). Repurpose household items—old credit cards make great erasers, and coffee stains can add texture!
Wrapping up and next steps
Drawing a flower garden is all about playing with colors, shapes, and imagination—no experience needed! 🌸 With just a few simple strokes, you can transform a blank page into a vibrant, whimsical landscape. Remember, the key is to start small, practice often, and trust your creativity.
Now that you’re armed with tips and techniques, grab your sketchbook and sketch away! Try experimenting with different flowers, backgrounds, or even digital tools to refine your style. Every stroke is a step closer to mastering your dream garden—so keep creating, and enjoy the journey! 🌿✨