
Tools
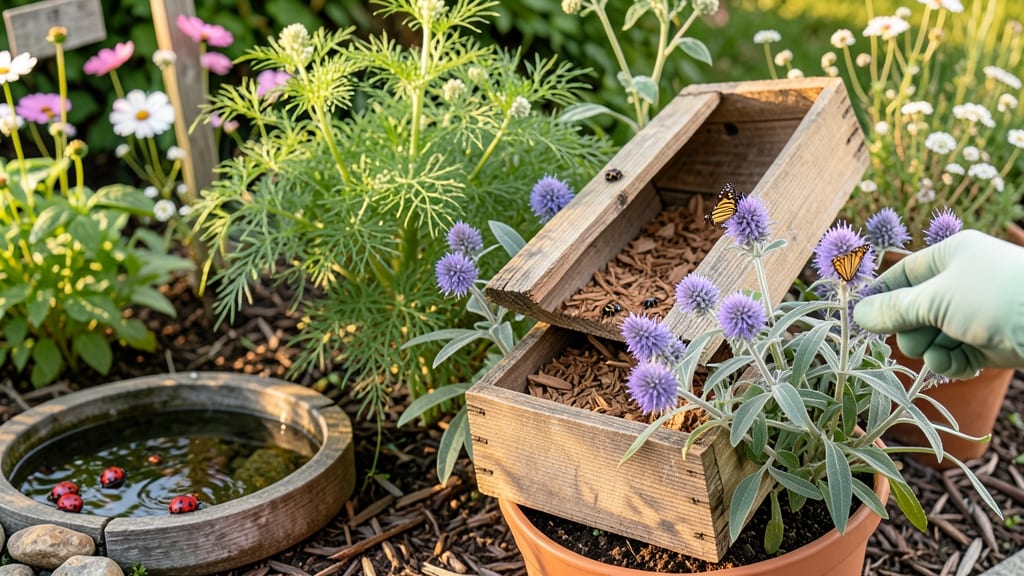
How to encourage ladybugs into your garden is the secret to turning your yard into a natural pest-control powerhouse. 🌿 I used to dread their absence until I discovered how simple it is to transform my garden into their five-star resort—just a few strategic plants and a few key adjustments can make your garden irresistible to them.
These beneficial bugs need three things: food, shelter, and water. Planting nectar-rich flowers like marigolds, dill, and yarrow keeps them fed year-round, while avoiding pesticides gives them a safe haven. Even a shallow dish of water with pebbles can make your garden a ladybug oasis they’ll never want to leave.
Once you create this welcoming environment, you’ll see more aphids disappearing overnight—naturally. Ladybugs can devour 5,000 pests in their lifetime, and their presence means fewer chemicals and healthier plants. The best part? This method works in any garden size, from containers to full yards.
Timing matters: introduce ladybugs in early morning or evening when temperatures are mild, and avoid releasing them during extreme heat or cold. Patience pays off—within weeks, you’ll have a thriving ladybug population working overtime to protect your garden.
📚 In This Guide
- What you need
- Instructions
- Tips and common mistakes
- Wrapping up and next steps
What you need
- ● Native flowering plants: 1-2 Marigolds (French or Mexican varieties)
- ● 1 Cosmos plant (per 10 sq ft of garden space)
- ● 1 Dill or Fennel plant (for aphid-attracting nectar)
- ● 1-3 Yarrow or Goldenrod plants (per 50 sq ft)
- ● Water source: 1 shallow dish (e.g., saucer or lid) filled with water + pebbles (to prevent drowning)
- ● OR a small birdbath with shallow edges (for larger gardens)
- ● Shelter options: 1-2 Ladybug houses (store-bought or DIY with a wooden box + straw)
- ● OR dense ground cover (e.g., clover or low-growing herbs)
- ● Purchased ladybug larvae or adults (from garden centers—organic & pesticide-free only!)
- ● Nectar-rich flowers: Calendula, Sunflowers, or Aster (for adult food)
- ● Pesticide-free garden: Avoid chemical sprays (ladybugs are sensitive!)
- ● Diatomaceous earth (food-grade, for aphid control—use sparingly)
Step-by-Step instructions for creating a ladybug-friendly garden
Here's how to transform your garden into a ladybug magnet using plants and habitat tweaks.
🌱 Step 1: Plant Ladybug-Favorite Flowers for Nectar and Shelter
Start with dill, fennel, and cosmos—these flowers provide both nectar and pollen, which adult ladybugs need to survive and reproduce. I plant dill in clusters along garden edges because its feathery foliage creates natural hiding spots. Ladybugs also adore marigolds and yarrow, so add these to sunny borders where aphids often gather.
Space plants 12-18 inches apart to ensure good airflow and visibility for ladybugs. Avoid heavy pesticides in these areas—even "organic" sprays can harm these beneficial insects. The key is to create a continuous bloom cycle from spring through fall, so ladybugs always have food. I rotate plants seasonally: cosmos in summer, alyssum in spring, and asters in fall.
☀️ Step 2: Add Water Sources and Sheltered Habitat
Ladybugs need shallow water sources, but they can't swim. Place saucer-style plant saucers filled with water and small pebbles at the bottom—this creates a landing platform. I position these near their favorite flowers so they don't have to travel far. A simple birdbath with slightly raised edges works too, but keep it shallow (1 inch deep max).
Create sheltered microhabitats by leaving leaf litter in garden corners or adding small brush piles. Ladybugs overwinter in these protected spots, and they'll return year after year. I also leave standing dead stems of perennials like coneflowers—they provide overnight hiding spots from predators like birds and spiders.
🌿 Step 3: Grow Host Plants for Ladybug Larvae
Adult ladybugs lay eggs on plants heavily infested with aphids, but larvae need specific host plants. Nasturtiums are my go-to because their broad leaves provide perfect egg-laying surfaces, and the plants attract aphids naturally. I plant nasturtiums in containers near aphid-prone roses—this creates a natural pest control loop.
Other great options include dandelions (yes, even the "weeds") and horehound. These plants thrive in sunny, disturbed soil and produce abundant aphids, which ladybug larvae devour. The secret is to avoid treating these plants with insecticides—even if they're covered in aphids, the ladybugs' larvae need that food source to develop.
🪴 Step 4: Create Year-Round Food Availability
Ladybugs are active from spring through fall, so I ensure continuous blooming plants in my garden. In early spring, I plant sweet alyssum and coriander—these provide early-season nectar when few other flowers are available. By mid-summer, cosmos and zinnia take over, and in fall, asters and goldenrod keep them fed.
For winter interest, I leave seed heads of perennials like black-eyed Susan and coneflower. These dried structures shelter ladybugs during cold months, and when spring arrives, the emerging aphids give larvae a fresh food source. The key is diversity—mix annuals, perennials, and even some "weeds" to create a buffet that lasts all season.
Tips & tricks for creating an irresistible ladybug habitat
These subtle adjustments will turn your garden into a ladybug paradise faster than you'd expect.
Seasonal Plant Rotation: In Step 1, when you're planning your spring, summer, and fall flowers, think about the ladybug life cycle. Early spring bloomers like sweet alyssum provide crucial nectar when adult ladybugs first emerge from overwintering. The 12-18 inch spacing you're using isn't just for aesthetics—it creates the perfect visibility for ladybugs to spot aphid infestations from a distance. I've noticed that when I plant cosmos in tight clusters, ladybugs take longer to discover the aphids hiding in the center.
Water Source Placement: For Step 2, position those saucer-style water sources within 3 feet of your ladybug-attracting plants. Ladybugs are lazy fliers—they prefer not to travel far for water. I've seen them completely ignore birdbaths placed more than 5 feet away, even when they're desperately thirsty. The pebble addition isn't just for safety—it also creates surface tension that helps them grip the water without drowning.
Larvae-Friendly Zones: When implementing Step 3, create dedicated "aphid farms" by planting nasturtiums in containers near your roses. The key is to let the aphids build up naturally—this gives ladybug larvae their first food source. I've found that when I treat these plants too aggressively, I actually reduce the ladybug population by starving their offspring. Think of it as creating a controlled ecosystem where the aphids serve a purpose.
Winter Prep Strategy: For Step 4's winter preparations, focus on leaving seed heads from perennials like black-eyed Susan. These structures provide critical insulation during freezing temperatures. I've observed that ladybugs cluster in these protected areas at temperatures below 32°F, and they'll often remain dormant there until spring. This overwintering behavior means they'll return to the same garden year after year if you provide these shelter spots consistently.
Pro Tips for Encourage Ladybugs Into Your Garden
- These subtle adjustments will turn your garden into a ladybug paradise faster than you'd expect.
- Seasonal Plant Rotation: In Step 1, when you're planning your spring, summer, and fall flowers, think about the ladyb...
- Water Source Placement: For Step 2, position those saucer-style water sources within 3 feet of your ladybug-attractin...
Frequently asked questions
Got questions about inviting ladybugs to your garden?
Here are answers to the most common ones to help you create a bug-friendly haven—without the bugs (or the stress)!
When is the best time to start attracting ladybugs?
Spring and early summer (March–June) are ideal! Ladybugs emerge from overwintering sites when temperatures hit 50–60°F (10–15°C). Plant nectar-rich flowers before they arrive to give them a welcome feast. If you miss the window, late summer (August–September) works too—just focus on providing shelter and food.
What if ladybugs don’t show up after I’ve planted everything?
Patience is key! Ladybugs may take 2–4 weeks to notice your garden. Try these troubleshooting steps:
- Check for predators: Ants or spiders might be scaring them off—use diatomaceous earth or barriers if needed.
- Add water: A shallow dish with pebbles and water gives them a drink.
- Buy adults: Purchase ladybugs online or from garden centers to kickstart your population.
Are ladybugs safe around pets or kids?
Yes! Ladybugs are harmless to humans and pets—they don’t bite or sting. Kids might find them fascinating (or squish them by accident), so explain they’re garden helpers. If your pet is curious, supervise interactions to avoid accidental harm to the bugs.
Can I attract ladybugs without planting flowers?
While flowers are the easiest lure, ladybugs also love:
- Herbs: Dill, fennel, and cilantro attract them with their aromatic leaves.
- Vegetable gardens: Aphid-infested plants (like roses or brassicas) act as a natural buffet.
- Ladybug houses: Purchase or DIY shelters (e.g., a small wooden box with holes) for overwintering.
Where can I buy ladybugs, and how do I release them?
Buy ladybugs from reputable suppliers (avoid wild-caught ones—they may carry diseases). Release them:
- Early morning or late evening (when it’s cool and humid).
- Directly onto aphid-infested plants—they’ll hunt immediately!
- Avoid releasing on windy days—they’ll fly away before settling.
Wrapping up and next steps
Encouraging ladybugs into your garden is a simple yet powerful way to boost your plants' health naturally! 🌱 With the right plants, habitats, and a little patience, you’ll soon see these tiny, beneficial allies hard at work.
Start small—plant a few ladybug-friendly flowers or set up a cozy shelter—and watch your garden thrive with fewer pests and more biodiversity.
Ready to take the next step? Pick one tip from this guide and try it this week—your garden (and the ladybugs!) will thank you. Happy gardening! 🌟