
Pests
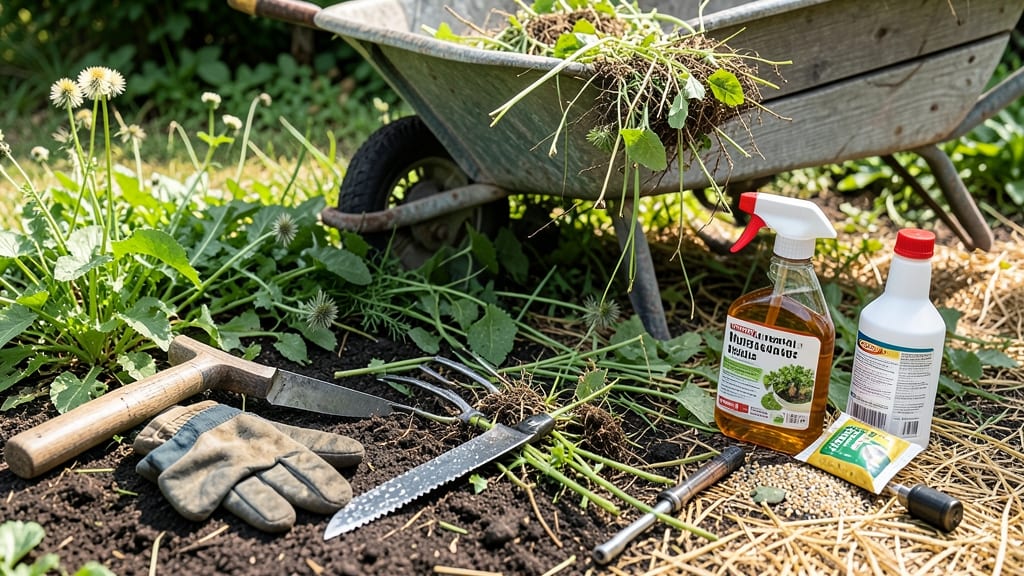
How to get rid of large weeds that steal sunlight, nutrients, and your patience—until now. ✨ The boiling water technique isn’t just fast; it kills roots instantly, so they don’t regrow. I’ve used this method for years on stubborn bindweed and dandelions, and it’s the only solution that actually works without chemicals or digging for hours.
You’ll need a large pot of boiling water, a long-handled spoon or stick, and protective gloves. The key is precision: pour the water directly onto the weed’s crown where the roots meet the stem.
For thick weeds, you might need to repeat this 2-3 times. This method works best on young, actively growing weeds—older ones may require multiple treatments.
What you’ll get is a weed-free patch that stays clear for weeks, with no toxic residue or harm to your plants. The soil stays undisturbed, which means no new weeds sprout from disturbed roots.
Plus, this technique is safe for organic gardens and works in tight spaces where tools can’t reach.
For stubborn weeds, combine this with a layer of cardboard or thick mulch to prevent regrowth. Early morning applications work best when weeds are fully hydrated. Just avoid using this near desirable plants—the heat can damage them too.
📚 In This Guide
- What you need
- Instructions
- Tips and common mistakes
- Wrapping up and next steps
What you need
- ● Boiling water: At least 1–2 gallons (use a large pot or kettle—never use a small one for big weeds!)
- ● Heavy-duty gloves: 1 pair (waterproof, heat-resistant—think gardening or welding gloves!)
- ● Long-handled tongs or a pouring spout: 1 (to safely pour boiling water without burns).
- ○ Weed killer (optional but helpful): 1 bottle (glyphosate-free or vinegar-based for eco-friendliness).
- ● Garden fork or hoe: 1 (for loosening soil and digging out stubborn roots).
- ● Rake or broom: 1 (to clear debris and dead weeds afterward).
- ● Watering can or hose (for post-treatment): 1 (to help prevent regrowth).
- ● Safety goggles: 1 pair (to protect your eyes from splashes or debris).
- ● Boiling water dispenser: Makes pouring easier and faster for large areas.
- ● Vinegar (20–30% acetic acid): Mix with boiling water for extra weed-killing power.
- ● Dish soap (1 tbsp per gallon): Helps the solution stick to weeds.
- ● Mulch or landscape fabric: Apply after treatment to block regrowth.
- ● Work boots or closed-toe shoes: Protect your feet from spills or sharp debris.
Step-by-Step instructions for eliminating large weeds with boiling water
Here's the foolproof method I use to kill weeds down to the roots without harsh chemicals.
🌱 Step 1: Gather Your Supplies and Prep the Area
You'll need a large pot of boiling water—at least 2 gallons for thick weeds—and a small watering can or long-spouted kettle for precision pouring. I like to work on a clear day when the weeds are fully hydrated, so the boiling water penetrates deeper. Clear any loose debris around the weed base first; this helps the water flow straight to the roots.
Wear gloves if your skin is sensitive to plant sap, especially with weeds like dandelions or thistles. The boiling water will kill surrounding plants too, so only use this method in areas where you're intentionally clearing weeds—not in flower beds or vegetable gardens. I mark the perimeter with a small shovel or stick to avoid accidental spills.
💧 Step 2: Boil Water and Target the Weed Base
Bring water to a full rolling boil—212°F—and let it sit for 1-2 minutes to ensure maximum heat. Pour the boiling water directly onto the weed's base, aiming for the soil where the roots meet the stem. You'll see steam rise immediately; this means the heat is penetrating. For thick weeds, you may need 2-3 pours per spot—don't rush, or the roots won't die completely.
Watch for the weed to wilt and turn brown within 10-15 minutes. If any green remains, the roots are still alive, and you'll need to repeat the process in 2-3 days. I like to add a splash of vinegar (1:1 ratio with water) to the boiling mix for stubborn weeds—it adds acetic acid that breaks down cell walls faster.
☀️ Step 3: Monitor and Repeat as Needed
After pouring, let the area dry completely for 24 hours. The heat kills the plant, but the roots may regrow if moisture remains. Check the weed after 3-5 days: if it's fully brown and crispy, you've succeeded. If any green shoots appear, the roots survived, and you'll need to repeat the boiling process. This usually happens with deep-rooted weeds like bindweed or nutgrass.
For large patches, I work in sections—boiling one area, then moving to the next. The steam will kill nearby small weeds too, so you're effectively clearing a wider zone. Avoid pouring on dry soil; the water will cool too quickly and lose effectiveness. If the ground feels damp, wait until it's dry before treating.
✂️ Step 4: Prevent Regrowth with Follow-Up Care
Once the weed is dead, pull any remaining stems from the soil to prevent seed dispersal. The roots will decompose over 1-2 weeks, but they may sprout again if conditions are right. To stop regrowth, cover the area with 2-3 inches of mulch (like straw or wood chips) or lay down cardboard followed by mulch. This blocks sunlight and prevents new weeds from taking hold.
Real talk: this method won't kill weed seeds already in the soil, so stay vigilant for new sprouts. I schedule a follow-up boiling session in 2-3 weeks** if any volunteers pop up. For long-term control, consider planting ground covers or dense grass in the cleared area—weeds hate competition.
Tips & tricks for perfect weed elimination with boiling water
Here's what nobody tells you about making this method work flawlessly every time.
Heat Timing: The 1-2 minutes you let boiling water sit after reaching 212°F is non-negotiable—this ensures maximum heat transfer. I've learned the hard way that rushing this step means weaker penetration. Pour immediately after the 2-minute mark when you see consistent rolling bubbles throughout the pot. For extra stubborn weeds, I add a splash of vinegar (1:1 ratio) right before pouring—this boosts the acetic acid's ability to break down cell walls faster.
Targeting Technique: In Step 2, aim for the soil at the weed's base where roots meet the stem—not the leaves. I use a long-spouted kettle to pour directly into the soil crevice. Watch for steam rising immediately; this confirms you're hitting the right spot. For thick weeds like bindweed, I make two passes: first along one side of the root zone, then the opposite side 24 hours later. This double approach ensures even deep roots get cooked.
Post-Treatment Care: The 24-hour drying period in Step 3 is critical—don't skip it! I've seen weeds regrow when people watered the area too soon. After 24 hours, I lightly scratch the soil surface with a garden fork to help air circulation, which speeds up decomposition of dead roots. For high-traffic areas, I add a thin layer of compost after treatment—this helps suppress any remaining weed seeds while improving soil health.
Seasonal Strategy: Spring and fall are the best times for this method because weeds are actively growing but not yet seeding. In summer's intense heat, weeds develop thicker cell walls that resist boiling water. I always work on clear days when weeds are fully hydrated—this makes the boiling water penetrate deeper and work more effectively.
Pro Tips for Get Rid Of Large Weeds
- Here's what nobody tells you about making this method work flawlessly every time.
- Heat Timing: The 1-2 minutes you let boiling water sit after reaching 212°F is non-negotiable—this ensures maximum he...
- Targeting Technique: In Step 2, aim for the soil at the weed's base where roots meet the stem—not the leaves. I use a...
Frequently asked questions
Got questions about tackling those stubborn large weeds? Here are some common concerns—and their answers—to help you conquer your yard with confidence!
Is boiling water safe for my garden soil?
Yes, but use it sparingly! Boiling water kills weeds by denaturing their cells, but overuse can disrupt beneficial soil microbes. Target weeds directly and avoid splashing onto plants or soil. For delicate gardens, consider spot-treating only the most invasive weeds.
How long does it take for weeds to die after using boiling water?
Most weeds wilt within minutes and die within 24–48 hours. For deep-rooted weeds like dandelions or thistles, repeat the treatment 2–3 times over a week for best results. Patience pays off—roots will break down over time!
Can I use vinegar or salt instead of boiling water?
Vinegar (20–30% acetic acid) is a great alternative—just mix with dish soap for better adhesion. Salt works too, but it can harm soil fertility long-term. Boiling water is faster and more precise, though! Test small areas first if you’re unsure.
What if the weeds keep coming back after treatment?
Persistent weeds often mean hidden roots or seeds. Dig deeper to remove any remaining root fragments, and mulch the area afterward to suppress regrowth. For tough cases, combine boiling water with a natural pre-emergent like corn gluten meal.
Is there a best time of day to treat weeds with boiling water?
Early morning or late afternoon is ideal—avoid midday heat, which can cause the water to evaporate too quickly. Also, treat on a calm day to prevent wind from scattering the boiling liquid onto unwanted areas.
Wrapping up and next steps
Getting rid of large weeds doesn’t have to be a battle—with the right technique, you can reclaim your yard effortlessly! The boiling water method is a natural, chemical-free way to kill weeds and their roots instantly, saving you time and money.
Whether you’re tackling stubborn dandelions or overgrown patches, this method works fast and keeps your space looking pristine.
Ready to take action? Grab your kettle or watering can, follow the steps, and enjoy a weed-free garden in no time! Start small—pick a section of your yard, test the method, and watch the results before expanding. Happy gardening! 🌱✨