
Size
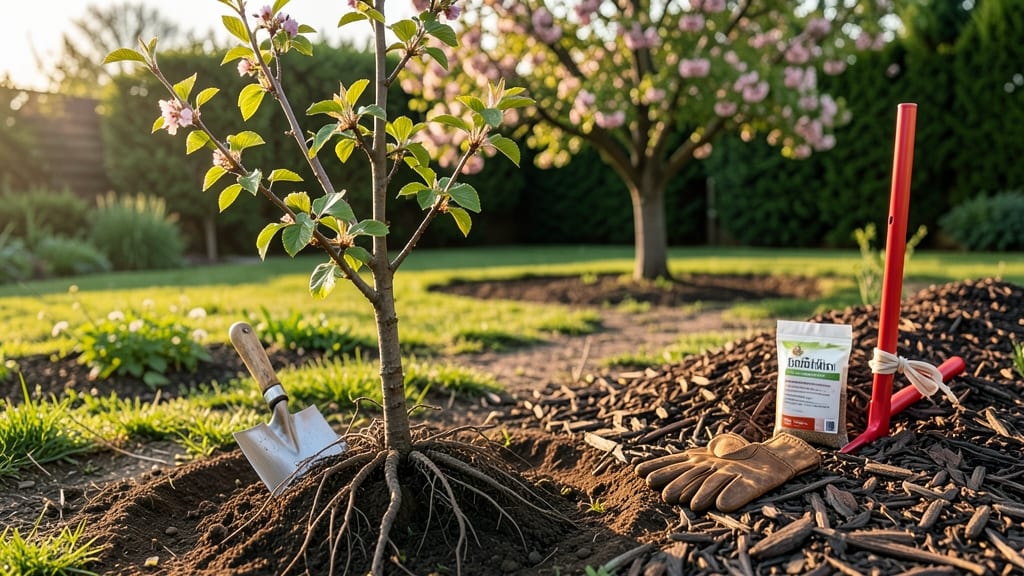
How to grow cherries at home starts with a single tree. 🌱 I planted my first cherry tree three years ago—now it’s heavy with fruit—and the secret isn’t luck, but patience and the right conditions. Sweet, juicy cherries aren’t just for orchards; with the right variety and care, you can grow them in your backyard or even large containers.
You’ll need space (cherry trees need 15-20 feet of room), well-draining soil, and full sun—at least 6-8 hours daily. Dwarf varieties work for containers, while standard trees thrive in-ground.
The key is choosing between sweet cherries (like ‘Stella’ or ‘Rainier’) or tart varieties (like ‘Montmorency’), depending on your taste and climate zone.
By summer, you’ll be harvesting clusters of vibrant red or deep purple fruit. The process takes time—it can take 3-5 years for a tree to bear—but the reward is worth it. Fresh cherries straight from your tree taste nothing like store-bought, with a burst of flavor that’s hard to beat.
Whether you’re growing in a small yard or a large garden, cherries are a rewarding challenge. With proper pruning, pest control, and a little patience, you’ll soon be enjoying homegrown fruit that’s sweeter than anything you’ve ever bought.
📚 In This Guide
- What you need
- Instructions
- Tips and common mistakes
- Wrapping up and next steps
What you need
- ● Cherry Trees: Choose between sweet cherries (like Bing or Rainier) or sour/tart cherries (Montmorency). Buy 2-4 trees (for cross-pollination) from a reputable nursery. Dwarf varieties (6-8 ft tall) are ideal for containers or small yards.
- ● Well-draining soil: A mix of 50% topsoil, 30% compost, and 20% perlite/sand (for containers). Test soil pH (aim for 6.0-6.5).
- ○ Containers (optional): 15-20 gallon pots with drainage holes for dwarf varieties. Use fabric grow bags if root-prone.
- ● Fertilizer: Balanced 10-10-10 fertilizer (spring/fall) + organic compost (year-round). Avoid high-nitrogen fertilizers.
- ● Mulch: 2-3 inches of wood chips or straw to retain moisture and suppress weeds.
- ● Pruning tools: Sharp pruning shears (for small branches)
- ● Hand pruning saw (for thicker branches)
- ● Disinfectant (rubbing alcohol or bleach solution)
- ● Watering supplies: Drip irrigation system or soaker hoses (for deep watering)
- ● Watering can (for containers)
- ● Pest control: Neem oil spray
- ● Insecticidal soap
- ● Bird netting (to protect ripe fruit)
- ● Tree supports: Stakes or cages for young trees in windy areas.
- ● Soil moisture meter: To monitor watering needs (especially in containers).
- ● Slow-release fertilizer tablets: For container-grown trees.
- ● Garden gloves: To protect your hands during pruning.
- ● Reflective mulch: Helps deter pests in warm climates.
Step-by-step instructions for cultivating cherry trees
Here's how to bring homegrown cherries to your table—starting with the right varieties and conditions.
🌱 Step 1: Select and Prepare the Right Cherry Varieties
Choose sweet cherry varieties like 'Stella' or 'Lapins' for home growing—they're self-pollinating and produce reliably. Sour cherries like 'Montmorency' need a pollinator partner planted nearby. I always pick disease-resistant rootstock for my climate zone to avoid fungal issues later.
Order bare-root trees in late winter or early spring from a reputable nursery. Soak the roots in lukewarm water for 4-6 hours before planting to rehydrate them. This step is critical—dry roots struggle to establish quickly, leading to stunted growth.
🪴 Step 2: Plant in Full Sun with Well-Draining Soil
Dig a hole twice as wide as the root ball but no deeper. Cherry trees need full sun (6-8 hours daily) and sandy loam soil with a pH of 6.0-7.0. Amend heavy clay soil with compost and coarse sand to improve drainage—waterlogged roots cause root rot, which is fatal.
Place the tree so the graft union sits 2-3 inches above soil level. This ensures future fruiting branches develop properly. Backfill with native soil, firm gently, then water deeply to eliminate air pockets. Mulch with 3-4 inches of wood chips, keeping it 6 inches away from the trunk to prevent rot.
☀️ Step 3: Prune for Structure and Airflow
Prune in late winter or early spring before buds swell. Remove dead, crossing, or inward-growing branches first—these compete for energy and block sunlight. I always cut back to an outward-facing bud to encourage open growth, which prevents disease by improving airflow.
Shape the tree into an open-center vase form by selecting 4-6 main scaffold branches spaced evenly around the trunk. Thin out weak branches to leave strong, vigorous limbs—this sets the foundation for heavy fruit production later. Sterilize pruners with rubbing alcohol between cuts to prevent bacterial spread.
💧 Step 4: Water Deeply and Fertilize Strategically
Water once a week during the first growing season, providing 1-2 gallons per tree until the soil is 12 inches deep and moist. Overwatering stresses young trees, while underwatering causes shallow roots. You'll know it's right when the soil feels damp but not soggy 6 inches down.
Apply a balanced 10-10-10 fertilizer in early spring and again after harvest. Avoid high-nitrogen fertilizers—they promote leafy growth at the expense of fruit. I also add mycorrhizal fungi to the soil to boost root health and nutrient uptake, which translates to sweeter cherries.
✂️ Step 5: Thin Fruit and Protect Against Pests
When cherries form in years 3-5, thin clusters to 6-8 inches apart to prevent overcrowding. This ensures larger, sweeter fruit and reduces stress on the tree. Remove mummified fruit after harvest to prevent fungal spores from overwintering—this is where brown rot often starts.
Monitor for cherry fruit flies and aphids with yellow sticky traps. Spray with neem oil or horticultural oil in early spring to smother overwintering pests. I also wrap tree trunks with tree guard in late winter to prevent rodent damage—a common issue in my area.
Tips & tricks for perfect cherry tree cultivation
Real talk: Growing cherries requires patience, but these pro moves will set you up for success from day one.
Root Rehydration Secret: That 4-6 hour soak for bare-root trees isn't just about hydration—it's about waking up dormant roots. I use a bucket of lukewarm water with a splash of seaweed extract (optional) to kickstart growth. The water should feel warm to your wrist, not hot. After soaking, gently rinse roots to remove any nursery soil that might inhibit root expansion.
Soil Science Matters: The 6.0-7.0 pH range is critical, but don't stress if your soil tests slightly off. A simple amendment of pelletized lime (for acidic soil) or sulfur (for alkaline soil) can adjust pH before planting. I always test my soil 2 weeks before planting—it gives me time to make adjustments. For heavy clay soils, mix in composted manure (not fresh!) to improve structure while adding organic matter.
Pruning Precision: When shaping your open-center vase form, focus on creating that 4-6 scaffold branches with a 45-degree angle from the trunk. This angle maximizes sunlight exposure and air circulation. I mark my cuts with masking tape before making them—it helps visualize the final structure. Remember, you're building a framework that will support decades of fruit production, so take your time with this step.
Watering Wisdom: That weekly watering guideline assumes average rainfall of 1-1.5 inches per week. In drought conditions, increase to twice weekly, but always check soil moisture 6 inches down. I use a soil moisture meter for accuracy—it's worth the investment. The key is deep watering that encourages roots to grow downward rather than staying shallow.
Pro Tips for Grow Cherries At Home
- Real talk: Growing cherries requires patience, but these pro moves will set you up for success from day one.
- Root Rehydration Secret: That 4-6 hour soak for bare-root trees isn't just about hydration—it's about waking up dorma...
- Soil Science Matters: The 6.0-7.0 pH range is critical, but don't stress if your soil tests slightly off. A simple am...
Frequently asked questions
Got questions about growing cherries at home? You’re not alone—here are answers to the most common ones to help you succeed!
How long does it take for a cherry tree to bear fruit?
A young cherry tree typically takes 3–5 years to produce fruit, depending on the variety and growing conditions. Dwarf varieties may fruit sooner (2–3 years), while standard trees can take up to 7 years. Patience pays off—healthy trees reward you with sweet rewards!
Can I grow cherries in containers, or do I need a backyard?
Yes! Dwarf cherry varieties (like ‘Stella’ or ‘Balaton’) thrive in large containers (15+ gallons) with proper drainage. Place them in full sun and use well-draining potting mix. Just ensure the pot is stable—cherry trees can get heavy!
Do cherry trees need winter protection?
Most cherry trees are hardy, but young trees or tender varieties (like sweet cherries) benefit from winter care. Mulch the base with straw or wood chips, wrap the trunk with burlap, and avoid pruning late in the season. Cold-hardy sour cherries (like ‘Montmorency’) handle frost better.
What pests or diseases should I watch for?
Cherry trees can attract aphids, Japanese beetles, or borers. Watch for leaf spots, cankers, or wilting branches—signs of fungal issues. Use neem oil for pests, prune affected branches, and ensure good airflow to prevent disease. Regular checks keep your tree healthy!
Can I eat cherries straight from the tree, or do I need to wait for ripeness?
Cherries ripen on the tree—pick them when they’re deep red (sweet cherries) or dark red (sour cherries) and slightly soft to the touch. Overripe cherries bruise easily, so harvest gently. Pro tip: Taste one first—sweetness varies by variety!
What’s the best fertilizer for cherry trees?
Use a balanced, slow-release fertilizer (like 10-10-10) in early spring, then switch to a high-nitrogen formula (like 12-4-8) after harvest. Avoid over-fertilizing—too much can harm roots. Organic options like compost or worm castings work well too!
Wrapping up and next steps
Growing cherries at home is a rewarding journey that combines patience, care, and a touch of creativity! 🌱 Whether you’re cultivating sweet cherries in containers or nurturing tart varieties in your backyard, the key is to start with the right variety, provide proper sunlight and soil, and stay consistent with watering and pruning.
With time, you’ll enjoy the sweet taste of homegrown fruit—literally plucked from your own trees!
Now that you’re armed with the know-how, why not take the next step? Pick a spot in your garden or balcony, grab your tools, and get planting! Your future self (and your taste buds) will thank you. 🍒✨