
Propagation
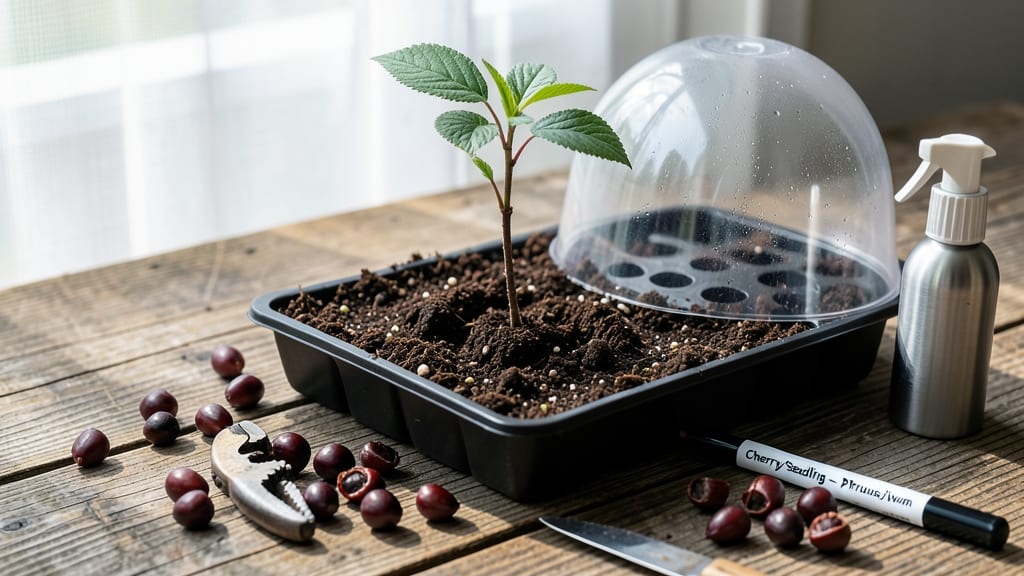
How to grow cherry seeds from pits—there’s nothing quite like that first crack of a seedling breaking through soil after months of waiting. It feels like magic. Growing cherry trees from pits isn't just rewarding—it's a patient gardener's triumph over store-bought limitations. The key? Cold-stratification, a natural process that mimics winter's work to coax seeds awake.
You'll need only three essentials: fresh pits, a damp paper towel, and your fridge's crisper drawer. No fancy equipment—just time and a little science. Most seeds sprout within 4-8 weeks of proper stratification, though some stubborn ones take twice that.
The payoff? Trees that bear fruit in 5-7 years, true to the parent tree's genetics.
Once sprouted, seedlings need bright light and well-draining soil to grow strong. I've learned the hard way that rushing this step leads to leggy, weak plants. But with consistent moisture and patience, you'll watch those first true leaves unfurl—proof you're growing something extraordinary.
The real challenge comes when they're ready for pots. Transplant carefully, and within a year, you'll have a sturdy young tree. This method works for sweet cherries, tart cherries, even wild varieties—just be prepared for the wait. Every gardener should try it at least once.
📚 In This Guide
- What you need
- Instructions
- Tips and common mistakes
- Wrapping up and next steps
What you need
- ● Cherry pits: 5–10 fresh, firm pits from sweet or tart cherries (avoid hybrid varieties like Bing).
- ● Paper towels or damp sand: Enough to cover pits completely (about 2–3 sheets per batch).
- ● Plastic bag or airtight container: A resealable bag or small Tupperware (8x10 inches or larger).
- ● Refrigerator: A standard fridge set to 35–40°F (2–4°C) for cold stratification.
- ● Planting pots or seed trays: 3–4 inch pots with drainage holes (or a seed-starting tray).
- ● Well-draining potting mix: A blend of 50% peat moss and 50% perlite or sand (sterilized if possible).
- ● Spray bottle: For gentle watering to keep soil moist (not soggy!).
- ○ Heat mat (optional but helpful): A seedling heat mat (70–75°F) to speed up germination.
- ● Growth hormone gel: Like Rootone to boost root development.
- ● Humidity dome: To maintain moisture during early growth.
- ● Grow lights: LED or fluorescent bulbs for 12–16 hours/day if natural light is weak.
- ● pH test kit: To ensure soil pH is between 6.0–7.0 (cherries prefer slightly acidic to neutral soil).
- ● Notebook & pen: To track stratification dates and germination progress!
Step-by-step instructions for growing cherry trees from pits
Cold-stratification transforms those stubborn pits into thriving seedlings—here's how to break dormancy the right way.
Extract and Clean the Cherry Pits
Remove the pits from ripe cherries and rinse them thoroughly under cool water to remove any remaining fruit flesh. Let them air-dry completely for 24 hours on a paper towel—this prevents mold from forming during stratification. I always work with fresh pits from organic fruit since store-bought varieties often contain fungicides that inhibit germination.
Inspect each pit for cracks or soft spots, which indicate rotting. Discard any damaged pits immediately—they won't germinate and may contaminate your batch. Store the good ones in a labeled paper envelope until you're ready to stratify. The key here is patience: only use pits that are completely dry and firm to the touch.
Cold-Stratify the Pits for 3-4 Months
Place the dried pits in a sealed plastic bag with a damp paper towel—just enough moisture to keep the towel damp but not soggy. I like to use a quart-sized freezer bag for about 10-15 pits at a time. Seal the bag and refrigerate it at 35-40°F for 90-120 days. This mimics winter conditions and breaks the seed's dormancy.
Check the bag every 4-6 weeks to ensure the paper towel remains moist. If it dries out, add a few drops of water and reseal. During this time, the pits will soften slightly—you'll notice a slight give when pressed gently. This is your signal that stratification is working. Never skip this step; without cold treatment, most cherry pits will remain dormant indefinitely.
Plant Stratified Pits in a Controlled Environment
Fill small 3-4 inch pots with a sterile seed-starting mix (avoid garden soil—it's too dense). Plant 1-2 pits per pot at a depth of 1 inch, spacing them 1 inch apart. Gently press the soil around them to ensure good contact. I use biodegradable pots to avoid transplant shock later.
Place the pots in a warm, bright location (around 70°F) with indirect light. A seedling heat mat set to 75°F can speed up germination. Keep the soil consistently moist but never waterlogged—you'll know it's right when the top inch feels damp to the touch. Germination typically takes 4-8 weeks, but some stubborn pits may take longer.
Transplant Seedlings to Larger Pots
Once seedlings reach 3-4 inches tall and develop their first true leaves (not the initial seed leaves), transplant them to 5-6 inch pots with fresh potting mix. Handle them carefully—their roots are delicate. I like to harden them off for 1 week before moving outdoors by placing them in a sheltered spot for 1-2 hours daily, gradually increasing exposure.
Cherry seedlings grow slowly at first, so don't rush them. Keep them in pots for at least 1 growing season before transplanting outdoors. Choose a location with full sun and well-draining soil. The first year is critical—they need consistent moisture and protection from strong winds, which can stress young trees.
Overwinter Young Trees for Stronger Growth
If transplanting outdoors in their first year, protect young cherry trees with mulch (2-3 inches) around the base to insulate roots. Water deeply before the first frost and cover the soil with straw or leaves to retain moisture. In colder climates, wrap the trunk with burlap to prevent sunscald. I've found that trees overwintered this way develop stronger root systems and better fruit production later.
Resist the urge to fertilize heavily during the first year—young trees need time to establish. Instead, focus on consistent watering and pruning dead branches in early spring. Patience is key; it can take 3-5 years before a cherry tree grown from seed produces fruit. But the wait is worth it for the satisfaction of growing a tree from a simple pit.
Tips & tricks for perfect cherry seed germination
These practical insights will help you navigate the patience game of growing cherry trees from pits—where timing and technique make all the difference.
Drying is Non-Negotiable: The 24-hour drying period in Step 1 isn't just about preventing mold—it's about creating the ideal moisture balance for stratification. I've learned the hard way that even slightly damp pits can rot during the 90-120 day cold treatment. Place your pits on a clean paper towel in a single layer, and rotate them halfway through the drying process to ensure even exposure to air.
Stratification Temperature Matters: While the 35-40°F range works, I've found that consistency within this window is more important than hitting the exact midpoint. If your fridge runs cooler (around 33°F), you might need to extend the 90-120 day period slightly—just monitor for the telltale softening of the pits. Place a thermometer inside the bag to track temperatures, especially if using a less precise refrigerator.
Germination Timing Variations: The 4-8 week germination window can feel like forever, but don't be tempted to intervene. Some pits need the full 8 weeks, while others may sprout in just 3. The key is maintaining that 70°F warm environment with consistently moist soil. I've had success using a simple seedling heat mat set to 75°F—it creates the perfect balance between warmth and humidity without requiring constant monitoring.
Transplanting with Care: When handling those delicate 3-4 inch seedlings in Step 4, I've found that using a small spoon to lift them from the soil preserves more root structure than fingers. After transplanting to 5-6 inch pots, give them a gentle shake to encourage root spread into the new soil. This small step can make the difference between a thriving seedling and one that struggles to establish.
Pro Tips for Grow Cherry Seeds From Pits
- These practical insights will help you navigate the patience game of growing cherry trees from pits—where timing and ...
- Drying is Non-Negotiable: The 24-hour drying period in Step 1 isn't just about preventing mold—it's about creating th...
- Stratification Temperature Matters: While the 35-40°F range works, I've found that consistency within this window is ...
Frequently asked questions
Got questions about growing cherry trees from pits? You’re not alone—this method takes patience and precision! Here are answers to the most common queries to help you succeed.
How long does it take for cherry pits to germinate after cold stratification?
With proper cold stratification (60–90 days in moist peat or a fridge), germination typically begins 3–6 months later after sowing. Some pits may sprout faster (as early as 2–3 months), while others take longer. Consistency in moisture and warmth (70–75°F) speeds things up!
Can I skip cold stratification and plant cherry pits directly in soil?
Nope! Cherry pits require cold stratification to break dormancy. Planting them directly in warm soil will likely result in zero germination. If you’re impatient, try a shortcut like soaking pits in water for 24 hours before stratification—but cold treatment is still critical for success.
Will a cherry tree grown from a pit produce edible fruit?
Probably not! Most seed-grown cherries are wild-type and produce small, tart, or bitter fruit. For sweet, reliable cherries, grafted trees (from nurseries) are the way to go. Save the pit-growing for ornamental trees or experimental fun!
Why are my cherry seeds rotting instead of sprouting?
Overwatering or poor drainage is the usual culprit. Ensure your pits are in a well-draining medium (like a mix of peat and perlite) and only keep them moist, not soggy. Fungal issues can also strike—use sterile soil and avoid overcrowding pits in containers.
How do I know if my cherry seedling is healthy?
A healthy seedling has bright green leaves, sturdy stems, and no yellowing or wilting. Check for strong root growth (gently tug—if soil resists, roots are thriving!). Slow growth? It might need more light or nutrients. Pests like aphids? Spray with soapy water if needed!
Wrapping up and next steps
Growing cherry trees from pits is a rewarding journey that combines patience with nature’s magic—especially when you master cold stratification for reliable germination. 🌱 While results may take time (sometimes over a year!), each sprouted seed is a tiny promise of future fruit, shade, or even a stunning landscape tree. Don’t let setbacks discourage you! Track your progress, adjust conditions as needed, and celebrate small victories like that first green shoot.
Ready to turn your kitchen scraps into a thriving tree? Plant your stratified pits in well-draining soil and give them the love they need—soon, you’ll be harvesting your own cherries (or admiring their blossoms!).
For extra inspiration, explore cherry tree care tips or join gardening forums to share your progress. Happy growing!