
Size
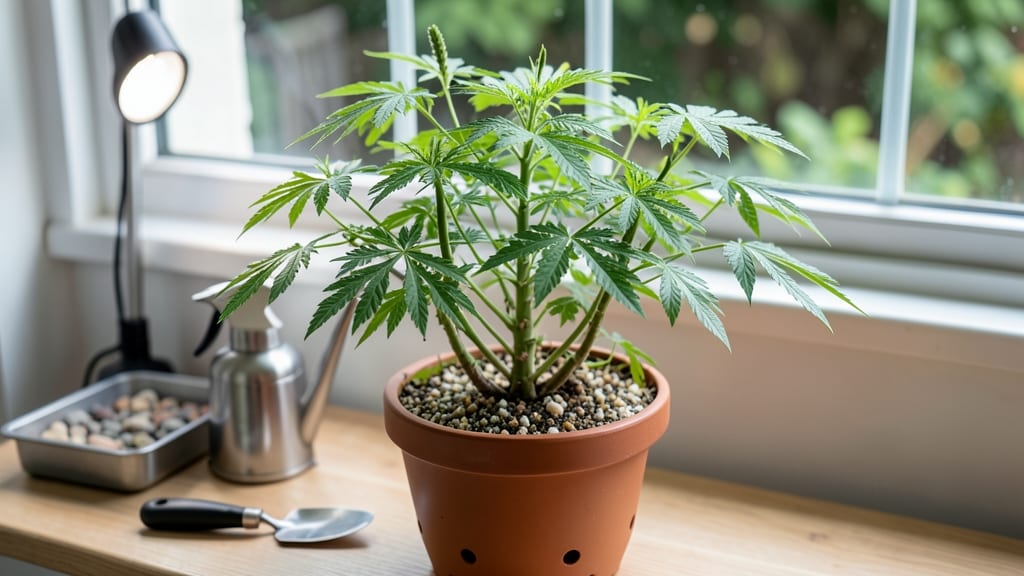
How to grow a moringa tree indoors could soon turn your kitchen into a superfood powerhouse. 🌱 Moringa trees shoot up 3 feet in just 3 months, and with the right indoor setup, you’ll harvest nutrient-packed leaves year-round—no greenhouse needed. I’ve grown mine in a sunny corner for two years, and the trick isn’t complicated: light, warmth, and a little patience.
The key is mimicking its tropical roots without overcomplicating things. You’ll need a 5-gallon container with drainage, well-draining soil mix (think cactus blend with compost), and a bright spot near a south-facing window.
Moringa thrives on neglect—water only when the top inch feels dry, and avoid soggy soil like the plague. Too much water is the #1 killer, but once you get the rhythm, it’s shockingly low-maintenance.
By month 3, you’ll pinch back the top leaves to encourage bushier growth, and within 6 months, you’ll have a harvestable plant. The leaves taste like a mix of spinach and asparagus, packed with 7x more vitamin C than oranges and 4x the calcium of milk.
Even if you’re new to indoor gardening, moringa’s forgiving nature makes it a perfect starter plant.
Here’s the best part: this works in apartments, offices, or sunrooms—anywhere with consistent light. Just watch for spider mites (wipe leaves with soapy water) and keep it warm. Ready to grow your own superfood powerhouse? Let’s get started with the essentials.
📚 In This Guide
- What you need
- Instructions
- Tips and common mistakes
- Wrapping up and next steps
What you need
- ● Moringa seeds or cuttings: 1–3 seeds (or a small cutting from a mature plant). Look for organic, non-GMO seeds for best results.
- ● Pot: 1–2 small pots (4–6 inches in diameter) with drainage holes. Use terracotta or fabric pots for optimal airflow.
- ● Well-draining potting mix: 1 bag (5–10 quarts) of a light, airy blend like cactus/succulent mix or a 50/50 mix of peat moss and perlite.
- ● Watering can or spray bottle: With a fine rose nozzle for gentle hydration.
- ○ Grow lights or sunny windowsill: A full-spectrum LED grow light (optional but ideal) or a south-facing window (6+ hours of sunlight daily).
- ○ Humidity tray or pebble tray: (Optional) To maintain moisture, especially in dry climates.
- ● Fertilizer: A balanced liquid fertilizer (10-10-10 or 20-20-20) or organic compost tea (diluted).
- ○ Pruning shears: Small, sharp scissors for trimming (optional but helpful for shaping).
- ● Temperature: Ideal range: 70–85°F (21–29°C). Avoid drafts or cold windows.
- ● Humidity: 40–60%. Moringa thrives in humid conditions—mist leaves occasionally or use a pebble tray.
- ● Light: Bright, indirect light (or 12–16 hours of grow light daily if indoors).
- ● Water: Keep soil consistently moist but not soggy. Water when the top inch feels dry.
- ● Seed germination hack: Soak seeds in warm water for 24 hours before planting to speed up sprouting! 🌱
- ● Pot upgrade: Move to a larger pot (8–12 inches) once your moringa reaches 6–12 inches tall.
- ● Prune for bushiness: Pinch back the top leaves when the plant is 6 inches tall to encourage fuller growth.
Step-by-Step instructions for growing moringa tree indoors
Here's how to coax a fast-growing moringa tree indoors using simple supplies and bright light.
🌱 Step 1: Start with Seeds or Young Cuttings
Moringa seeds germinate quickly, but I prefer using 3-4 inch cuttings from a healthy branch for faster results. If starting with seeds, soak them in warm water for 12 hours to soften the hard outer shell—this speeds up germination by 2-3 days. Plant 1-2 seeds per 4-inch pot at a depth of ½ inch, pressing gently into moist potting mix. The reason we don't bury seeds deeper is that moringa roots need oxygen to establish quickly.
For cuttings, dip the base in rooting hormone and plant at a 45-degree angle in a pot with well-draining mix. Cover the pot with a clear plastic bag to maintain humidity, but leave it slightly open to prevent rot. You'll see roots form within 2-3 weeks if the cutting stays consistently moist but not soggy. Watch for new growth at the base—this is your signal roots have taken hold.
☀️ Step 2: Position in Bright, Indirect Light
Moringa thrives on 6-8 hours of bright, indirect light daily. A south-facing window works best, but avoid direct midday sun, which can scorch tender leaves. If your space lacks natural light, supplement with a grow light positioned 6-12 inches above the plant. You'll know the light is right when leaves stay deep green and new growth appears every 2-3 weeks.
Rotate the pot a quarter turn weekly to prevent the tree from leaning toward the light source. Leggy growth (long, thin stems with sparse leaves) means your moringa isn't getting enough light. If this happens, move it closer to the light or increase grow light hours to 10-12 hours daily. Real talk: moringa is forgiving, but it won't grow fast without adequate light.
💧 Step 3: Water and Fertilize for Rapid Growth
Water when the top inch of soil feels dry, which for moringa usually means every 2-3 days in warm conditions. Overwatering is the fastest way to kill a moringa—roots rot quickly in soggy soil. I use a moisture meter to check, but stick your finger in the soil as a backup. Water deeply until it drains from the bottom, then empty the saucer to prevent root suffocation.
Feed with a balanced liquid fertilizer (10-10-10) every 4-6 weeks during active growth. You'll see faster leaf production and thicker stems within 2-3 weeks of fertilizing. Moringa is a heavy feeder, so don't skimp—this is how you get that fast growth everyone talks about. In winter, cut back to fertilizing every 8-10 weeks as growth slows naturally.
✂️ Step 4: Prune and Harvest for Bushier Growth
Pinch back the tips of new growth when stems reach 6-8 inches tall to encourage branching. This step is critical—if you skip it, your moringa will grow tall and leggy with few leaves. Use clean scissors to snip just above a leaf node, where new branches will sprout. You'll see multiple side shoots emerge within 1-2 weeks, creating a fuller, bushier tree.
Harvest leaves by snipping the youngest, most tender growth—these are the most nutrient-dense. Never take more than ⅓ of the plant at once, or you'll stunt its growth. Moringa regrows quickly, so you can harvest every 2-3 weeks once established. The more you prune and harvest, the faster the tree produces new leaves—this is how you keep it compact and productive indoors.
🪴 Step 5: Repot as Needed for Long-Term Health
Moringa grows surprisingly fast indoors, so expect to repot every 6-12 months as roots fill the container. Choose a pot just 2 inches larger in diameter than the current one—bigger isn't better, as moringa prefers snug quarters. Spring is the best time to repot, when the tree is entering active growth. Gently loosen roots and trim any that are circling the pot before transferring to fresh potting mix.
After repotting, hold off on fertilizing for 2-3 weeks to let roots recover. You'll notice new growth within 3-4 weeks if the transplant went well. Moringa is drought-tolerant once established, but it rewards consistent care with rapid growth. The key is balancing light, water, and pruning—get that right, and you'll have a productive indoor tree in no time.
Tips & tricks for growing moringa indoors
These insider tricks will help you accelerate your moringa's growth and avoid common pitfalls that slow down progress.
Rooting Hormone Tip: For cuttings in Step 1, I recommend using a high-quality rooting hormone with both auxin and mycorrhizal fungi. The fungi component helps establish a symbiotic relationship with roots, which can cut the 2-3 week rooting time by half. If you don't have rooting hormone, cinnamon powder works as a natural alternative—just dip the cutting base in it before planting. The key is keeping that 45-degree angle consistent while maintaining moisture without drowning the cutting.
Light Optimization Strategy: In Step 2, when positioning your grow light 6-12 inches above, I've found that 8-10 inches works best for most indoor setups. You'll notice faster leaf production when the light intensity is strong enough to cast a slight shadow on your hand when held below it. For maximum efficiency, use a timer to provide the 6-8 hours of light during daylight hours and supplement with 2-4 hours of grow light in the evening if natural light is limited. This mimics natural daylight cycles and prevents leggy growth.
Watering Technique: The top inch dry rule in Step 3 is perfect, but here's what I do differently: I water in the morning so the soil has all day to dry out. Moringa roots are surprisingly sensitive to waterlogged conditions, so always empty that saucer after watering. For faster results, I use room-temperature water—cold water can shock the roots and slow growth. You'll see a noticeable difference in growth rate when you maintain this consistent moisture balance without overwatering.
Pruning and Harvesting: When pinching back growth in Step 4, I recommend using your fingers to gently pinch rather than cutting with scissors for the first few prunes. This reduces stress on the plant and encourages more vigorous branching. For harvesting, always cut just above a leaf node—this is where new growth will emerge. The more aggressive you are with pruning (within reason), the bushier your tree will become. I harvest about 10-15 leaves at a time from my established plants every 2-3 weeks without seeing any growth slowdown.
Pro Tips for Grow Moringa Tree Indoors
- These insider tricks will help you accelerate your moringa's growth and avoid common pitfalls that slow down progress.
- Rooting Hormone Tip: For cuttings in Step 1, I recommend using a high-quality rooting hormone with both auxin and myc...
- Light Optimization Strategy: In Step 2, when positioning your grow light 6-12 inches above, I've found that 8-10 inch...
Frequently asked questions
Got questions about growing moringa indoors?
You’re not alone! Here are answers to the most common concerns—from speedy growth to troubleshooting—so you can cultivate your own superfood with confidence.
How long does it take for a moringa tree to grow indoors?
With ideal conditions (bright light, warmth, and consistent care), your moringa seedling can sprout in 7–14 days and reach 3–5 feet tall in 3–6 months. Pruning encourages bushier growth, so you’ll see harvestable leaves in as little as 2–3 months! Patience pays off—this fast grower rewards quick attention.
Can I grow moringa indoors without sunlight?
Moringa is a sun-loving plant, so it thrives best near a south-facing window (6+ hours of direct light daily). If natural light is scarce, supplement with a grow light (LED or fluorescent, 12–16 hours/day). Without enough light, growth slows, and leaves may turn pale or yellow. A sunny windowsill or grow tent is your best bet!
What’s the easiest way to harvest moringa leaves indoors?
Harvest leaves by pinching off the youngest, tender growth (avoid over-pruning—never take more than 1/3 of the plant at once). Use clean scissors or fingers to snip leaves just above a leaf node. For continuous harvests, trim every 2–4 weeks. Pro tip: Morning harvests yield the most nutrients!
Why are my moringa leaves turning yellow or dropping?
Yellowing leaves usually signal overwatering, underwatering, or nutrient deficiency. Check soil moisture—it should stay lightly damp but not soggy. Brown edges? Too much salt or fluoride in water (use filtered or rainwater). Dropping leaves? It might be stress from temperature shifts (keep temps between 70–90°F). Adjust care and monitor for improvement!
Can I grow moringa from seeds or cuttings indoors?
Both work! Seeds are easiest for beginners (soak overnight for faster germination). Cuttings (from a healthy stem) root in water or soil with a rooting hormone—great if you have a moringa plant nearby. Seeds take 1–2 weeks to sprout, while cuttings root in 2–4 weeks. Choose based on your patience and available materials!
Wrapping up and next steps
Growing a moringa tree indoors is a rewarding journey that brings a nutrient-packed superfood right to your kitchen window! With the right light, soil, and care, you can enjoy fresh leaves packed with vitamins, proteins, and antioxidants—all while adding a touch of green to your space. 🌱✨
Now that you’re equipped with the know-how, why not take the next step? Start with a single seedling, monitor its growth, and soon you’ll be harvesting your own homegrown moringa. Happy growing—and happy snacking!