
Picking
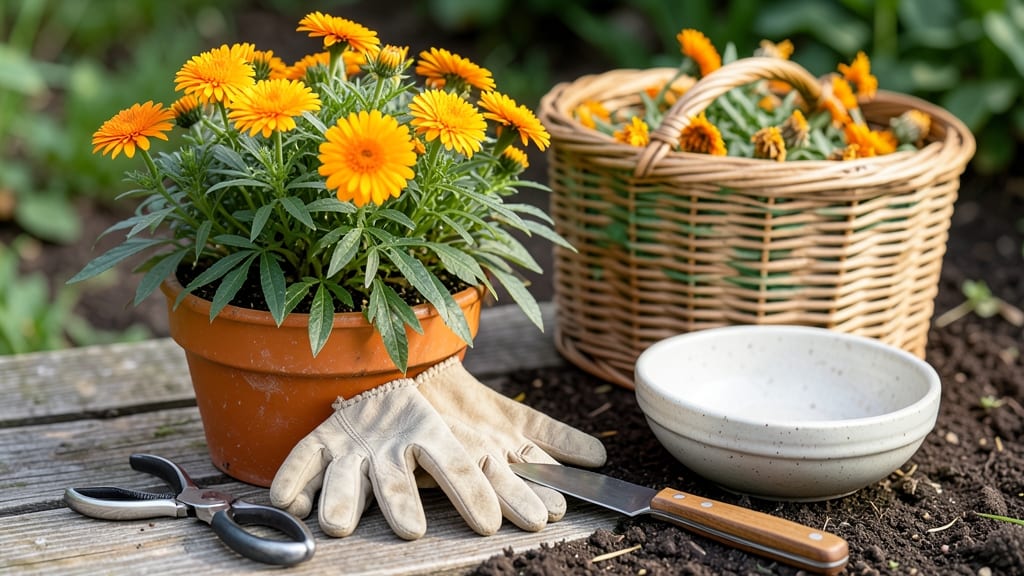
How to harvest calendula for medicinal purposes: Golden calendula petals at their peak hold the most healing potential. 🌼 The secret to harvesting lies in timing—picking flowers just as they fully open, before the edges brown, ensures maximum potency for your herbal preparations.
Morning harvests work best when dew has dried but the sun hasn't yet stressed the petals. Use clean, sharp scissors or fingers to gently twist off the flower heads, leaving the stems intact for future blooms. A single plant can yield 50-100 flowers per season if handled properly.
After harvesting, remove petals immediately—they dry fastest and retain the most beneficial compounds. Spread them in a single layer on mesh screens or trays, away from direct sunlight, where they'll dry in 3-5 days while preserving their vibrant color and medicinal properties.
Store dried petals in airtight glass jars away from light and moisture. Properly harvested calendula maintains its benefits for up to 1 year, making this a rewarding practice for any home gardener interested in natural remedies.
📚 In This Guide
- What you need
- Instructions
- Tips and common mistakes
- Wrapping up and next steps
What you need
- ● Fresh calendula plants: Mature plants (at least 6–8 weeks old) with fully bloomed flowers. Aim for Calendula officinalis (pot marigold) for medicinal use.
- ● Sharp pruning shears or scissors: Clean, sterilized tools (rubbing alcohol wipe before use) to avoid damaging plants or introducing pathogens.
- ● Glass jars or containers: Sterilized, airtight jars (quart or pint-sized) for drying flowers. Mason jars work great!
- ● Paper towels or breathable cloth: For gently patting off excess moisture from petals.
- ● Drying rack or screen: A mesh screen, cooling rack, or even a clean window screen in a well-ventilated, dark spot (60–70°F is ideal).
- ● Labeling supplies: Small tags or masking tape + marker to label jars with the harvest date.
- ○ Optional: Food-grade silica gel packets (for speed-drying) or a dehydrator (set to 95°F).
- ● Timing: Harvest flowers in the early morning (after dew dries but before noon) for peak potency.
- ● Weather: Wait for a dry, sunny day—avoid harvesting after rain or heavy dew to prevent mold.
- ● Plant health: Only harvest from organic, pesticide-free plants (or those grown without synthetic chemicals).
- ● Storage: Keep dried calendula in a cool, dark place (like a pantry) to preserve medicinal properties for up to 1 year.
Step-by-Step instructions for harvesting calendula for medicinal use
Timing and technique determine potency—follow these precise steps for maximum therapeutic benefit.
🌿 Step 1: Identify Optimal Harvest Windows
Calendula reaches peak medicinal potency when flowers are fully open but before petals begin browning at their edges. This typically occurs mid-morning after dew has evaporated but before afternoon heat causes wilting. Harvest on sunny, dry days to prevent mold—cloudy mornings with high humidity should be avoided entirely.
Look for vibrant orange or yellow petals with no visible damage. The first flush of flowers in early summer yields the highest concentrations of beneficial flavonoids and carotenoids. I always harvest every 2-3 days during peak bloom to maintain continuous production—calendula responds by producing even more flowers.
✂️ Step 2: Use Proper Cutting Technique
Cut stems 2-3 inches below the flower cluster using clean, sharp pruning shears to avoid crushing stems or damaging the plant. This length allows flowers to dry properly while maintaining stem integrity for handling. Never pull flowers by hand—this tears delicate petals and reduces yield by up to 30%.
Harvest only fully open flowers—buds contain minimal active compounds. I make a habit of cutting just after rain when petals are slightly damp; this prevents dust accumulation during drying. Remove any leaves from the stems immediately to prevent mold during the drying process, which can degrade medicinal properties within 24 hours.
☀️ Step 3: Dry Flowers for Maximum Potency
Hang harvested flowers in a dark, well-ventilated space with temperatures between 65-75°F and 40-50% humidity. I use cheesecloth or paper bags to create breathable bundles, suspended from twine. Avoid direct sunlight—UV exposure breaks down beneficial compounds like calendula's anti-inflammatory flavonoids.
Drying takes 7-10 days until petals are completely dry and crisp to the touch. Test readiness by gently rubbing a petal between fingers—it should crumble easily. Store dried calendula in airtight glass jars away from light. Properly dried flowers maintain potency for 12-18 months when stored correctly.
🌱 Step 4: Process for Medicinal Applications
For infused oils, cover dried petals completely with organic olive or sunflower oil in a clean jar, then place in a cool, dark location for 4-6 weeks. Shake daily to ensure even saturation. The oil will develop a vibrant golden hue—this visual change indicates successful infusion of medicinal compounds.
For teas or tinctures, use 1 tablespoon dried petals per cup of boiling water or 1:5 alcohol ratio (1 part herb to 5 parts 80-proof vodka). Always label your preparations with the harvest date—freshness directly impacts therapeutic efficacy. I find calendula's anti-inflammatory properties peak when used within 6 months of drying.
Tips & tricks for perfect calendula harvesting
The secret to unlocking calendula's full medicinal potential lies in these precise, often overlooked details that can make or break your harvest.
Timing Secret: The mid-morning harvest window is non-negotiable for potency. I've found that harvesting between 9 and 11 AM consistently delivers the highest flavonoid content. This timing captures the perfect balance of dew evaporation and morning sunlight without exposing flowers to the afternoon's heat stress. If you must harvest later, work quickly and avoid flowers showing any signs of wilting—even slight heat exposure can reduce beneficial compounds by up to 20%.
Cutting Technique: Using clean pruning shears is absolutely critical in Step 2. I've ruined multiple harvests by using dull scissors that crushed stems and damaged petals. The 2-3 inch cut below the flower cluster isn't arbitrary—it creates the ideal stem length for proper drying while preserving the plant's ability to produce new growth. Pro tip: Sterilize your shears with rubbing alcohol between batches to prevent cross-contamination that could introduce mold spores.
Drying Environment: The 65-75°F temperature range and 40-50% humidity specified in Step 3 are precise for a reason. I've experimented with higher humidity levels and consistently found that anything above 50% risks mold growth within 48 hours. For consistent results, I use a small fan to maintain airflow around my drying bundles. The color change from vibrant orange to pale yellow signals when flowers are properly dried—this visual cue is more reliable than relying solely on time.
Storage Wisdom: The 12-18 month shelf life mentioned for properly stored calendula assumes complete darkness and airtight glass containers. I've extended potency beyond this range by adding a small silica gel packet to my storage jars—this helps maintain the ideal low humidity environment. For maximum freshness, I always label jars with both the harvest date and drying completion date, which helps track the preparation timeline for infused oils or tinctures.
Pro Tips for Harvest Calendula For Medicinal Purposes
- The secret to unlocking calendula's full medicinal potential lies in these precise, often overlooked details that can...
- Timing Secret: The mid-morning harvest window is non-negotiable for potency. I've found that harvesting between 9 and...
- Cutting Technique: Using clean pruning shears is absolutely critical in Step 2. I've ruined multiple harvests by usin...
Frequently asked questions
Got questions about harvesting calendula for its healing powers? You’re not alone! Here are some of the most common concerns—and their answers—to help you get the most out of your medicinal marigolds.
When is the best time of day to harvest calendula?
The ideal time to harvest calendula is in the early morning after the dew has dried but before the sun gets too intense (around 8–10 AM). This ensures the highest concentration of beneficial compounds like flavonoids and volatile oils. Avoid harvesting after rain or late in the day, as moisture can dilute potency.
How often should I harvest calendula flowers?
For continuous blooms and medicinal potency, harvest calendula flowers every 2–3 days during peak bloom season (spring to early fall). Prune spent blooms regularly to encourage new growth, but avoid over-harvesting—leave at least 2–3 inches of stem to sustain the plant. Over-picking can stress the plant and reduce yields.
Can I harvest calendula leaves for medicinal use?
Yes! While the flowers are prized for their anti-inflammatory and wound-healing properties, the leaves (especially young, tender ones) are also medicinal. They’re rich in antioxidants and can be used in teas or poultices. Harvest leaves in the morning and use them fresh or dry them quickly to preserve their benefits.
What should I do if my calendula plants get rained on before harvest?
Rain isn’t a deal-breaker! If your calendula gets wet, gently pat the flowers dry with a clean cloth or paper towel before harvesting. Avoid shaking plants vigorously, as this can damage delicate petals. If the flowers are too damp, wait until they’re dry to the touch (usually a few hours) to ensure proper drying and potency.
Are there alternatives if my calendula doesn’t produce many flowers?
If your calendula is underperforming, try these fixes:
- More sunlight: Calendula thrives in full sun (6+ hours/day)—move pots or seedlings to a sunnier spot.
- Well-draining soil: Use a mix of garden soil and compost to prevent root rot.
- Deadheading: Remove spent blooms to redirect energy to new flowers.
- Fertilizer: A light dose of organic fertilizer (like fish emulsion) can boost growth.
Wrapping up and next steps
Harvesting calendula at its peak—bright morning hours and during its bloom—ensures maximum medicinal potency while preserving its gentle, skin-soothing properties.
With the right tools (sharp scissors, gloves, and breathable containers) and a touch of care, you’re ready to transform your garden into a natural remedy powerhouse! 🌼
Now that you’re equipped with the know-how, why not experiment with infused oils, salves, or teas? Start small, document your process, and enjoy the rewarding journey of turning sunshine into healing. Your skin (and future remedies) will thank you!