
How To
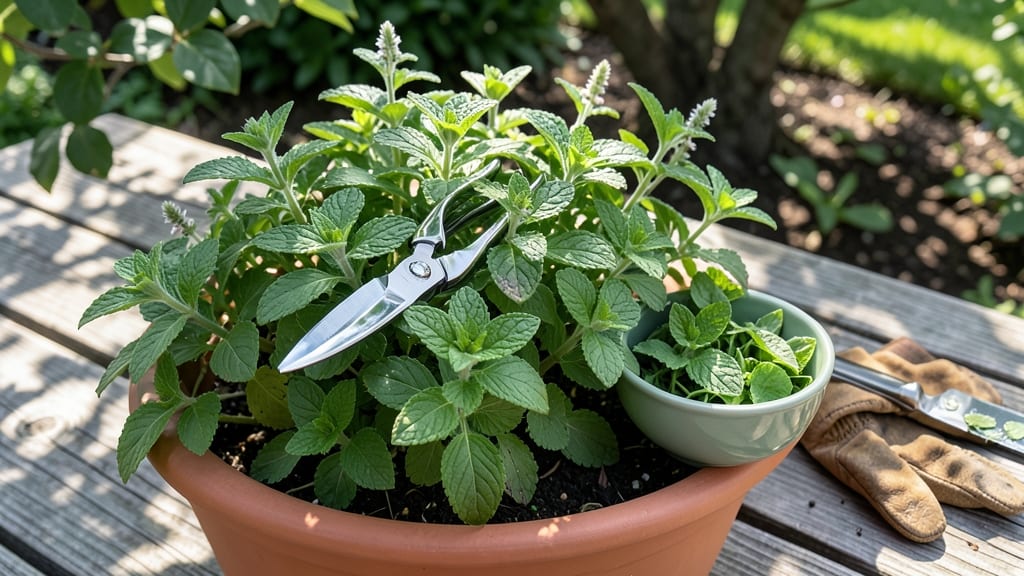
Harvesting fresh mint at the right time transforms your garden into a flavor factory—imagine plucking leaves that burst with that signature cool, crisp aroma instead of bitter, woody stems.
The key to unlocking maximum flavor lies in timing, and I’ll show you exactly when and how to snip your 🌿 mint for the best results.
Most gardeners miss the prime window because they don’t know the signs of peak readiness—like fully unfurled, vibrant green leaves or that unmistakable minty scent when crushed. If you’ve ever pulled a stem only to be disappointed by weak flavor, you’re not alone.
The good news? With the right techniques, you can harvest mint all season long without sacrificing future growth.
In this guide, I’ll walk you through the step-by-step process, from the best time of day to cut (morning, for maximum potency) to the proper tools and techniques that keep your mint bushy and thriving.
You’ll also discover how to store your harvest so it stays fresh for weeks—whether you’re drying it for teas or freezing it for cooking.
Ready to turn your mint plant into a never-ending supply of fresh, aromatic leaves? Let’s dive in and make sure every harvest is your best one yet.


When to harvest mint for maximum flavor and leaf size
Harvesting mint at the right time transforms your garden into a flavor factory. The best moment to pick mint is when the leaves are fully unfurled and vibrant green, typically 60-90 days after planting.
This ensures the strongest minty aroma and largest leaves for your favorite recipes or teas.
Mint thrives in warm weather, so aim to harvest between June and September for outdoor plants. If growing indoors, you can harvest year-round as long as you provide bright indirect light and consistent moisture.
Morning is the ideal time to harvest because the essential oils in mint are most concentrated after the dew has dried but before the heat of the day sets in.
Look for these key signs that your mint is ready: leaves should be flat and broad, not curled, and the plant should emit a powerful minty scent when crushed. Avoid harvesting when leaves are small or still curling—they won’t have developed their full flavor yet.
Seasonal timing matters too. In spring, mint grows slowly, so wait until the plant reaches at least 6 inches tall before harvesting.
In summer, you can harvest more frequently as the plant grows faster, but never take more than one-third of the plant at once to avoid stressing it.
Indoor mint plants have a different rhythm. Since they’re not exposed to seasonal changes, you can harvest every 4-6 weeks throughout the year, as long as you’re providing 6-8 hours of light daily.
Use a grow light if natural light is insufficient, as this keeps your mint productive all year.
Overlooking the right harvest time can lead to bitter, woody stems or stunted growth. If you harvest too early, the leaves may lack flavor, while harvesting too late can encourage the plant to bolt and flower, reducing leaf production. Always prioritize leaf maturity over plant size.
🌿 Mint Harvest Readiness
Step-by-step guide to harvesting mint without damaging the plant
Harvesting mint correctly is all about timing and technique—if you cut too much or too soon, you’ll stunt your plant’s growth and end up with bitter, woody stems. The key is to trim strategically while leaving enough foliage to fuel regrowth.
I’ve harvested mint for years, and I’ve learned that patience and precision pay off with a bushier, more productive plant every time.
Before you grab your pruners, gather your tools: sharp pruning shears (or clean scissors), a clean container for storing harvested leaves, and gardening gloves if your mint has spread aggressively.
Avoid dull blades—they crush stems and invite disease. I always sanitize my tools with rubbing alcohol before and after harvesting to keep my mint healthy and pest-free.
Now, let’s talk when to harvest. The best time is morning, after the dew has dried but before the sun gets too intense. This ensures your leaves are hydrated and flavorful.
If you must harvest later in the day, do it in the late afternoon to avoid stressing the plant with midday heat. Pro tip: Never harvest mint after a heavy rain—wet leaves bruise easily and attract fungal issues.
Step-by-Step Mint Harvesting Guide
- 🌿 Locate the growth point: Identify the healthiest stems with fully unfurled leaves (at least 3-4 inches tall). These are your best candidates for harvesting.
- ✂️ Cut at a 45-degree angle: Use your pruners to trim just above a leaf node (the point where leaves meet the stem). This encourages new growth from that node.
- 🌱 Leave 2-3 inches of growth: Never remove more than one-third of the plant at once. Aim to leave at least 2-3 inches of stems with leaves to keep the plant thriving.
- 💧 Water thoroughly afterward: After harvesting, give your mint a deep watering to help it recover. This is especially important if you’ve trimmed a lot in one session.
- 🌿 Repeat every 4-6 weeks: Regular harvesting stimulates bushier growth. If you wait too long, your mint may become woody and less flavorful.
One mistake I see often is harvesting flowers. If your mint starts to bloom, snip off the flower buds immediately. Flowering signals the plant to shift its energy from leaf production to seed-making, which means smaller, less flavorful leaves.
I always keep an eye out for those tiny flower spikes and remove them as soon as they appear.
Signs you’re over-harvesting include yellowing leaves, stunted growth, or bare stems. If your mint looks stressed, scale back and let it recover. A healthy mint plant should bounce back within 2-3 weeks of proper care.
For container-grown mint, be extra cautious—smaller pots have limited resources, so they’re more vulnerable to over-harvesting.
Finally, store your freshly harvested mint properly to preserve its flavor. Rinse the leaves under cool water, pat them dry, and store them in an airtight container in the fridge for up to 10 days.
For long-term storage, consider freezing or drying—I’ll cover those methods in the next section! 🌱
Step-by-step guide to harvesting mint without damaging the plant
Harvesting mint correctly is all about timing and technique—if you cut too much or too soon, you’ll stunt your plant’s growth and end up with bitter, woody stems. The key is to trim strategically while leaving enough foliage to fuel regrowth.
I’ve harvested mint for years, and I’ve learned that patience and precision pay off with a bushier, more productive plant every time.
Before you grab your pruners, gather your tools: sharp pruning shears (or clean scissors), a clean container for storing harvested leaves, and gardening gloves if your mint has spread aggressively.
Avoid dull blades—they crush stems and invite disease. I always sanitize my tools with rubbing alcohol before and after harvesting to keep my mint healthy and pest-free.
Now, let’s talk when to harvest. The best time is morning, after the dew has dried but before the sun gets too intense. This ensures your leaves are hydrated and flavorful.
If you must harvest later in the day, do it in the late afternoon to avoid stressing the plant with midday heat. Pro tip: Never harvest mint after a heavy rain—wet leaves bruise easily and attract fungal issues.
Step-by-Step Mint Harvesting Guide
- 🌿 Locate the growth point: Identify the healthiest stems with fully unfurled leaves (at least 3-4 inches tall). These are your best candidates for harvesting.
- ✂️ Cut at a 45-degree angle: Use your pruners to trim just above a leaf node (the point where leaves meet the stem). This encourages new growth from that node.
- 🌱 Leave 2-3 inches of growth: Never remove more than one-third of the plant at once. Aim to leave at least 2-3 inches of stems with leaves to keep the plant thriving.
- 💧 Water thoroughly afterward: After harvesting, give your mint a deep watering to help it recover. This is especially important if you’ve trimmed a lot in one session.
- 🌿 Repeat every 4-6 weeks: Regular harvesting stimulates bushier growth. If you wait too long, your mint may become woody and less flavorful.
One mistake I see often is harvesting flowers. If your mint starts to bloom, snip off the flower buds immediately. Flowering signals the plant to shift its energy from leaf production to seed-making, which means smaller, less flavorful leaves.
I always keep an eye out for those tiny flower spikes and remove them as soon as they appear.
Signs you’re over-harvesting include yellowing leaves, stunted growth, or bare stems. If your mint looks stressed, scale back and let it recover. A healthy mint plant should bounce back within 2-3 weeks of proper care.
For container-grown mint, be extra cautious—smaller pots have limited resources, so they’re more vulnerable to over-harvesting.
Finally, store your freshly harvested mint properly to preserve its flavor. Rinse the leaves under cool water, pat them dry, and store them in an airtight container in the fridge for up to 10 days.
For long-term storage, consider freezing or drying—I’ll cover those methods in the next section! 🌱