
Tools
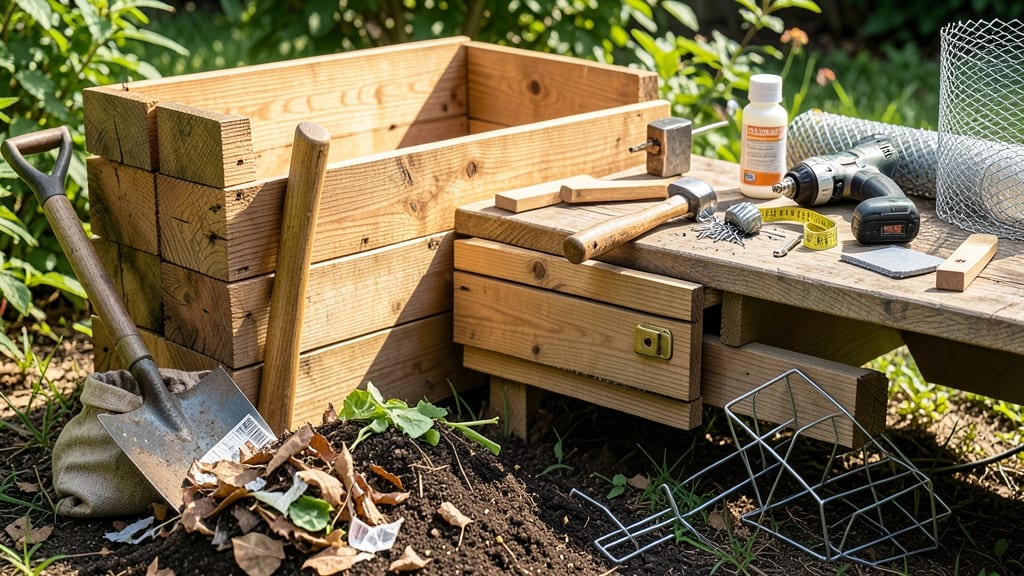
Building a wooden compost bin transforms kitchen scraps into garden gold. 🌱 I spent years struggling with flimsy bins that collapsed or rotted—until I designed this sturdy, weather-resistant version that still holds up after five seasons.
The key is simple: cedar or redwood for longevity, proper ventilation, and a design that keeps critters out while letting air in.
You’ll need basic tools—a saw, drill, and screws—and a few hours on a weekend. Reclaimed wood cuts costs and adds rustic charm, while a simple slatted design ensures airflow without sacrificing durability.
The result? A bin that lasts years, breaks down scraps efficiently, and blends seamlessly into any garden layout. No more digging through soggy piles or watching compost pile up and fail.
By the end, you’ll have a system that turns food waste into rich compost in 3-6 months, cutting your garden’s fertilizer costs by half. The bin’s sturdy construction means no more collapsing sides or warped wood—just reliable, long-term performance.
Plus, it fits neatly into garden workflows, keeping composting organized and efficient.
Whether you’re a beginner or a seasoned gardener, this design adapts to any yard size. The secret lies in the details: angled slats for drainage, a removable lid to keep pests out, and placement tips that maximize airflow. Let’s get building—your garden’s future soil is waiting!
📚 In This Guide
- What you need
- Instructions
- Tips and common mistakes
- Wrapping up and next steps
What you need
- ● Wood: 1–1.5 inches thick (cedar or redwood recommended for durability; avoid pressure-treated wood). Quantity depends on bin size, but a 4x4-foot bin typically needs: 4 pieces of 2x4 lumber (8 ft long) for framing
- ● 4 pieces of 1x4 or 1x6 lumber (8 ft long) for slats or panels
- ○ 2–4 pieces of 4x4 posts (4 ft long) for corners (optional but sturdy!)
- ● Exterior screws or nails: 2.5–3 inch deck screws (galvanized or stainless steel to prevent rust; ~50–75 screws for a standard bin).
- ● Hinges: 2–4 heavy-duty hinges (for a lid or swing-out door; 3-inch hinges work well).
- ○ Latch or hasp: 1–2 to secure the lid (optional but practical!).
- ● Wood glue: Exterior-grade for extra reinforcement (e.g., Titebond III).
- ● Drill bits: 1/8-inch and 3/16-inch for pilot holes and screws.
- ● Measuring tape and pencil (for precise cuts!).
- ● Circular saw or miter saw (for clean, angled cuts).
- ● Drill/driver (cordless preferred for ease!).
- ● Speed square or clamping square (for accurate angles).
- ● Clamps (2–4; pipe clamps are ideal for large pieces).
- ● Sandpaper or electric sander (80–120 grit to smooth edges).
- ● Level (to ensure your bin stands straight!).
- ● Safety gear: Gloves, safety glasses, and ear protection (if using power tools).
- ● Ventilation holes: Drill 1/4-inch holes in the sides or lid for airflow (use a hole saw or spade bit).
- ● Non-slip pads or gravel under the bin to improve drainage and stability.
- ● Paint or stain: Exterior-grade sealant to protect wood (e.g., spar urethane).
- ● Compost thermometer (to monitor heat levels for faster decomposition!).
- ● Pre-cut lumber kit: Some hardware stores sell pre-cut compost bin kits—great for beginners!
Step-by-Step instructions for building a sturdy wooden compost bin
This method delivers a compost bin that lasts seasons—no wobbly corners or collapsing sides.
🪴 Step 1: Gather Materials and Prep Wood for Longevity
Use cedar or redwood lumber (both resist rot naturally) for all components—2x4s for framing, 1x6s for slats. Cut four 4-foot-long side panels, two 3-foot-long end panels, and four 2-foot-long cross braces. Sand all edges smooth to prevent splinters and speed up assembly. I always pre-drill holes for screws to prevent wood from splitting when tightened.
For durability, treat the wood with non-toxic wood preservative (like linseed oil) and let it dry completely. This step prevents premature rot from moisture—especially critical for bins that will hold damp compost. Arrange the cut pieces on a flat surface to visualize the 4-foot by 3-foot bin dimensions before assembly.
✂️ Step 2: Assemble the Frame for Stability
Start by attaching the two end panels vertically using 3-inch deck screws and a power drill. Space screws 12 inches apart for maximum strength. Add the top and bottom cross braces (2-foot lengths) to each end panel, creating a rectangular frame. Double-check that all corners form 90-degree angles—this prevents the bin from warping over time.
Next, attach the side panels to the frame using 2.5-inch screws at 16-inch intervals. Reinforce the corners with corner braces for extra stability. I like to use L-brackets here—they distribute weight evenly and keep the bin from bowing outward under heavy compost loads. Test the frame’s stability by gently pressing down on each corner.
🪴 Step 3: Add Slatted Sides for Aeration and Easy Turning
Attach 1x6 slats horizontally across the side panels, spacing them 1 inch apart to allow airflow while keeping compost contained. Use 2-inch screws to secure them to the frame. The slats should run vertically on the front and back for easy access to turn compost, while the sides can have horizontal slats for structural support. Leave the back panel solid to prevent animals from digging in.
For the front panel, I add a hinged door using two 1x6 boards and two hinges. This lets you access compost without spilling. Secure the door with a latch to keep pests out. The hinges should be positioned 6 inches from the top and bottom of the panel for balanced weight distribution.
💧 Step 4: Add a Removable Lid and Finishing Touches
Construct a lid using 1x6 boards to match the bin’s dimensions. Attach it with hinges on one side and a latch on the opposite side for easy opening. The lid should extend 2 inches beyond the bin’s edges to shield compost from heavy rain. Paint or stain the lid with weather-resistant sealant to protect it from moisture.
Finally, add non-slip pads (like rubber feet) to the bottom of the bin to protect your garden surface and prevent shifting. I also drill small drainage holes in the bottom frame—this lets excess liquid (called "compost tea") drain out while keeping solids contained. Place the bin on a level surface and fill it with cardboard scraps or straw to start the composting process.
⏰ Step 5: Site and Maintain for Long-Term Use
Position the bin in partial shade to prevent overheating while still allowing airflow. Place it at least 5 feet from your house to avoid attracting pests. I like to keep a small shovel and spray bottle nearby—turning compost every 2-3 weeks speeds up decomposition, and a light spray of water keeps it moist without becoming soggy.
Check the bin’s stability after the first heavy load—if it wobbles, add internal cross supports or anchor it to the ground with stakes. With proper care, this bin will last 5+ years, giving you a reliable system for turning kitchen and yard waste into rich soil. The key is consistent airflow and moisture control—neglect either, and you’ll end up with a smelly mess instead of nutrient gold.
Tips & tricks for building a sturdy wooden compost bin
Between us, these small details make all the difference between a compost bin that lasts and one that collapses under its own weight. Here's what I've learned after building three versions myself.
Material Selection: Cedar and redwood are your best bets for natural rot resistance, but if you're on a budget, pressure-treated pine works too—just avoid chemically treated lumber that could leach into your compost. I've found that pre-drilling screw holes in Step 1 prevents splitting, especially with harder woods like oak. Use a bit slightly smaller than your screw diameter to avoid stripping the wood during assembly.
Structural Reinforcement: In Step 2, don't skimp on the corner braces. I've seen bins that looked sturdy until loaded with wet compost—then the corners bowed outward. For extra peace of mind, add diagonal cross braces (2x4s cut at 45-degree angles) inside the frame before attaching the side panels. These hidden supports create a truss-like structure that handles weight far better than just the top and bottom braces.
Slat Spacing Strategy: The 1-inch spacing for slats in Step 3 is perfect for airflow, but here's the trick: alternate the slat placement between the front and back panels. On the front, space them 1.5 inches apart near the hinged door—this makes it easier to reach in and turn compost without getting your hands caught. The back panel can stay at 1-inch spacing since you won't be accessing it as frequently.
Long-Term Maintenance: That 5-foot distance from your house in Step 5 isn't just about pests—it's about airflow. I've noticed that bins placed closer to buildings (especially on the north side) can develop moldy spots from poor circulation. For extra protection, add a small mesh screen (like hardware cloth) to the bottom of the hinged door—this keeps critters out while still allowing airflow to the compost below.
Pro Tips for Make A Wooden Compost Bin
- Between us, these small details make all the difference between a compost bin that lasts and one that collapses under...
- Material Selection: Cedar and redwood are your best bets for natural rot resistance, but if you're on a budget, press...
- Structural Reinforcement: In Step 2, don't skimp on the corner braces. I've seen bins that looked sturdy until loaded...
Frequently asked questions
Got questions about building your wooden compost bin? Here are some of the most common ones—plus quick, practical answers to keep your project on track!
How long does it take to build a wooden compost bin?
A simple DIY wooden compost bin can be built in 1–3 hours, depending on your skill level and design complexity. Basic 4x4-foot bins with pre-cut lumber take less time, while custom or multi-chamber designs may require extra effort. Plan for 2–4 hours if you’re new to woodworking or need to source materials.
What’s the best wood to use for a compost bin?
Opt for cedar, redwood, or pressure-treated lumber—these resist rot and pests best. Avoid untreated pine or softwoods, as they’ll degrade faster from moisture. If using cedar or redwood, seal the wood with a non-toxic sealant to extend its life. Pro tip: Drill drainage holes in the bottom to prevent soggy wood!
How often should I turn the compost in a wooden bin?
Turn your compost every 1–2 weeks to speed up decomposition and prevent odors. In a wooden bin, aeration is key—use a compost aerator or a sturdy stick to mix layers. If your bin smells bad, it’s likely too wet; add dry leaves or straw to balance moisture.
Can I make a compost bin without spending money?
Use free or repurposed materials like:
- Old pallets or scrap wood (check local listings or construction sites)
- Cinder blocks or bricks (stacked in a square)
- Wire mesh or chicken wire (for a no-wood option)
How do I keep pests (like rats or flies) out of my wooden compost bin?
Pests love compost, but you can deter them with these tricks:
- Use a tight-fitting lid or burlap cover
- Avoid meat/dairy/fatty foods (stick to plant scraps)
- Buried bins or surrounding a trench with hardware cloth help too
- Add diatomaceous earth (food-safe) around the bin’s base
Wrapping up and next steps
Building your own wooden compost bin is a rewarding project that not only reduces waste but also enriches your garden naturally! With the right materials and a little patience, you’ve got everything you need to create a durable, eco-friendly setup.
Now that you’re equipped with the knowledge, it’s time to roll up your sleeves and turn scraps into soil gold! 🌱
Ready to take the next step? Start by gathering your tools and materials, then follow the steps above—your garden (and the planet) will thank you! Happy composting!