
Planting
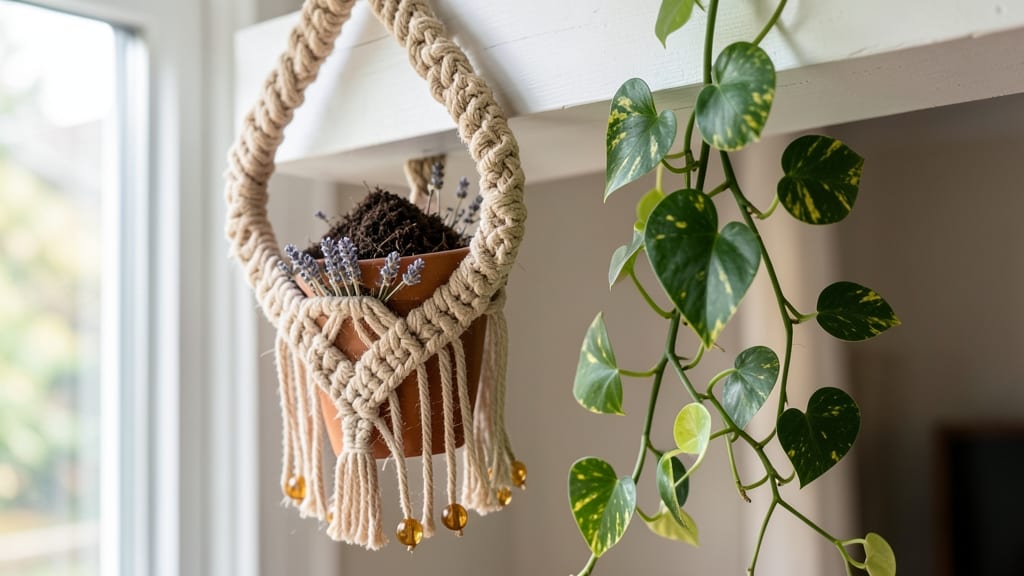
How to make a hanging plant holder with macramé transforms plain rope into a lush vertical garden that adds texture and charm to any space. 🌿 I’ve turned my balcony into a cascading green oasis using just a few basic knots and some sturdy rope—no fancy tools required. The best part? You can customize the size, shape, and plant combinations to match your garden’s vibe, whether that’s boho, modern, or rustic.
This project starts with just three supplies: 3/8-inch cotton rope, a wooden dowel (or even a sturdy branch), and a pair of sharp scissors. The knots themselves are simple—just square knots and half-hitches—but they create a strong, decorative base for your plants.
For outdoor use, opt for UV-resistant rope to keep it looking fresh all season long, and always tie it securely to prevent sagging under the weight of trailing foliage.
By the end, you’ll have a custom hanging planter that holds trailing plants like pothos, ferns, or even cascading flowers. The key is spacing the knots evenly so the plants have room to grow without overcrowding.
Hang it where it gets 4-6 hours of sunlight (depending on your plant choices), and watch your vertical garden thrive in just a few weeks.
Pro tip: Add a ceramic saucer underneath to catch water drips, and consider doubling the rope thickness for heavier plants like string of pearls. The possibilities are endless—mix textures with leather strips, paint the dowel, or even weave in beads for a unique touch.
Ready to turn rope into greenery? Let’s get started!
📚 In This Guide
- What you need
- Instructions
- Tips and common mistakes
- Wrapping up and next steps
What you need
- ● Macramé cord: 3–4 mm thick (about 10–15 feet total). Cotton or jute works best for durability.
- ● Wooden dowel or stick: ½–1 inch thick, 12–18 inches long (for the base). Sand it smooth for comfort.
- ● Scissors: Sharp fabric scissors to trim cords cleanly.
- ● Measuring tape or ruler: For precise knot spacing (aim for 3–4 inch gaps between knots).
- ● Plant pot: A lightweight, breathable pot (3–6 inches in diameter) that fits your chosen plant.
- ● Wood stain or paint (to customize your dowel’s look).
- ● Beads or charms (for decorative accents—thread them onto cords before knotting!).
- ● Spray adhesive (to secure frayed ends neatly).
- ● A second dowel (for wider, more stable designs).
Step-by-Step instructions for crafting a macramé hanging plant holder
Here's how I create sturdy, stylish hangers that hold plants beautifully while adding texture to any space.
🪴 Step 1: Gather Your Materials and Tools
You'll need 4 feet of ¼-inch thick cotton rope (natural or jute works best for durability), a wooden dowel (about 6 inches long and ½-inch thick), a scissors, and a measuring tape. I like to use a metal ring (about 3 inches in diameter) for the hanger loop—it distributes weight evenly and prevents fraying. If you don't have one, a sturdy keychain ring works too.
Lay everything out before you start. The dowel will serve as the base for your plant holder, and the rope will create the intricate macramé knots that give it structure. Trust me, having everything prepped saves frustration later when you're mid-project.
🧵 Step 2: Create the Hanger Loop and Attach the Dowel
Start by cutting two pieces of rope, each 24 inches long. Fold one piece in half to create a loop, then tie a square knot around the metal ring. This will be your hanger loop. Repeat with the second piece of rope, tying it 2 inches below the first knot to create a double loop—this adds extra strength and prevents the dowel from slipping.
Next, take four pieces of rope, each 36 inches long. Fold each in half and tie a lark’s head knot around the dowel, spacing them evenly. These knots will hold the dowel securely while leaving enough rope to create the macramé pattern. Space them about 1 inch apart from each other along the dowel’s length.
🌿 Step 3: Form the Macramé Base and Plant Pocket
Now, take the four 36-inch ropes and separate them into two pairs. For each pair, tie a double half-hitch knot around the dowel, about 3 inches apart. This creates the base of your plant holder. Next, take two additional pieces of rope, each 18 inches long, and tie them between the pairs of ropes using spiral knots. This forms the bottom of the holder where your plant will sit.
Here’s where it gets fun—use two more pieces of rope, each 24 inches long, to create the plant pocket. Tie them vertically between the base knots using square knots, spacing them about 2 inches apart. This pocket will cradle your plant’s pot securely. Adjust the tension so it’s snug but not too tight—you want your plant to sit comfortably without wobbling.
✂️ Step 4: Add Decorative Knots and Secure the Structure
To add texture and strength, create four diagonal knots between the vertical ropes. Use two pieces of rope, each 36 inches long, and tie them in an X pattern between the top and bottom knots. This not only looks great but also reinforces the holder. Trim any excess rope evenly to about ½ inch above the knots for a clean finish.
Finally, take the remaining rope and tie a gathering knot at the top, just below the hanger loop. This pulls all the ropes together neatly and adds a polished touch. Double-check that the dowel is centered and the plant pocket is stable. If it feels wobbly, add an extra knot or two for support.
🌱 Step 5: Test and Hang Your Plant Holder
Before adding your plant, give the holder a gentle tug to ensure all knots are secure. If any feel loose, tighten them immediately. Place a small pot (about 4-6 inches in diameter) into the pocket to test the fit. The pot should sit snugly but not be forced—if it’s too tight, loosen the knots slightly.
Once you’re happy with the fit, hang your creation! I like to use it in a bright, indirect-light spot—like near a window or under a shelf—to let my plants thrive while adding a boho-chic touch to the room. Watch your plants grow lush and full as they drape beautifully from their new home.
Tips & tricks for perfect macramé hanging plant holders
Here's what nobody tells you about creating plant holders that last—and look stunning.
Rope Selection Matters: Natural jute or cotton rope is your best bet for durability, but if you're working with a heavier plant, consider using 3/8-inch thick rope instead of the standard ¼-inch. Thicker rope handles weight better and adds extra texture. I've found that jute rope holds knots slightly better than cotton, especially when exposed to moisture.
The Technique That Changed Everything: When tying your double half-hitch knots in Step 3, keep the tension even on both sides. Uneven tension creates weak spots that can unravel over time. A quick trick: hold the rope with your dominant hand while using your non-dominant hand to pull the working end—this helps maintain consistent pressure. This is especially important for the plant pocket where most weight will rest.
Knot Reinforcement: For extra durability, add a second layer of knots to your hanger loop and dowel attachment points. In Step 2, after your initial square knot around the ring, tie a double fisherman's knot underneath it. This prevents the loop from slipping, especially when hanging heavier pots. Trust me on this—it's worth the extra 2 minutes of work.
Make-Ahead Strategy: You can absolutely make your plant holders ahead of time and store them in a dry place until needed. The knots will hold up perfectly for weeks, but avoid storing them in direct sunlight or damp areas. If you're making multiple holders, consider wrapping them in a breathable fabric to protect the knots during storage. This is a great way to create gifts or decor in advance.
Pro Tips for Make Hanging Plant Holder
- Here's what nobody tells you about creating plant holders that last—and look stunning.
- Rope Selection Matters: Natural jute or cotton rope is your best bet for durability, but if you're working with a hea...
- The Technique That Changed Everything: When tying your double half-hitch knots in Step 3, keep the tension even on bo...
Frequently asked questions
Got questions about crafting your dream hanging plant holder?
Here’s a quick guide to the most common queries—so you can skip the guesswork and dive right into creating your lush vertical garden!
What materials can I use if I don’t have macramé cord?
No macramé cord? No problem! Try jute twine, thick yarn, or even repurposed fabric strips (like old jeans or towels). For a modern look, opt for leather straps or woven rope. Just ensure your material is sturdy enough to hold your plants and won’t fray easily.
How long does it take to make a basic hanging plant holder?
For a simple beginner-friendly design, expect to spend 30–60 minutes. If you’re practicing knots for the first time, add an extra 15–30 minutes. Pro tip: Watch a few tutorial videos first to speed up the process!
Can I use these holders for heavy plants like monstera or pothos?
For heavier plants, double up the cord thickness (use two strands instead of one) or add a wooden dowel or metal ring at the top for extra support. Always test the holder with your plant before hanging it long-term.
What if my knots keep coming undone?
Loose knots are usually a sign of uneven tension or weak cord. Try tightening gradually as you work, or switch to a thicker, more durable material. For extra security, knot the ends together after completing the design to lock everything in place.
How can I personalize my hanging plant holder?
Get creative! Add beads, tassels, or painted designs to the cord for a boho-chic vibe. For a rustic touch, braid in dried flowers or small shells. Just avoid overloading—keep the focus on your plants!
Wrapping up and next steps
Creating your own macramé hanging plant holder is a rewarding way to bring greenery into your space while adding a touch of handmade charm! 🌿 With just a few supplies and some basic knots, you’ve got everything you need to craft a stylish and functional piece.
Whether you’re a beginner or looking to refine your skills, this project is perfect for adding a little nature to any room.
Now that you’re inspired, why not try experimenting with different colors, textures, or even combining materials? Grab your rope, pick your favorite plants, and let your creativity grow—literally! Happy crafting! ✨