
Blooming
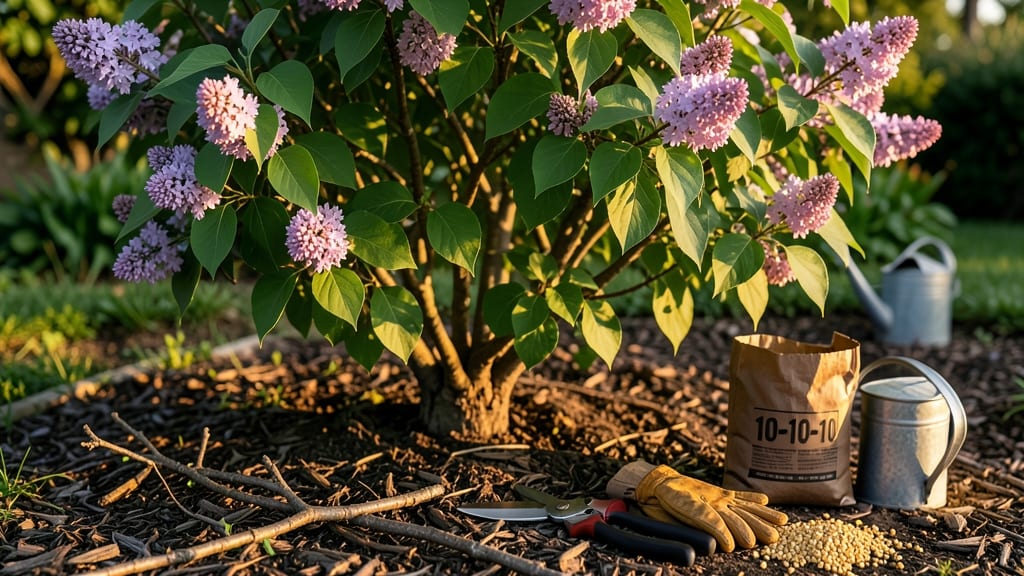
Your lilacs are begging for a second chance. ✨ That stubborn lack of blooms? It’s usually a pruning mistake, not a plant problem. I’ve turned around dozens of woody lilacs by fixing just two things: when I prune and how I feed them.
The secret’s in the timing—cut at the wrong moment, and you’ll wait years for flowers.
Most gardeners prune lilacs in early spring, but that’s the worst time. You need to wait until right after the blooms fade—late May or June in most zones.
Pair that with a balanced fertilizer (high in phosphorus) and you’ll see buds forming by next spring. Over-fertilizing? That’s another common killer—too much nitrogen means leaves over blooms.
Within a year, you’ll have clusters of fragrant purple blooms that last weeks. The key is patience: lilacs are slow to recover, but once they do, they’ll reward you with nonstop fragrance for decades. Even old, neglected bushes can bounce back with the right care.
Here’s the game-changer: prune older wood first (the thicker stems) to encourage new growth where the buds form. And skip the heavy gloves—lilacs hate wet soil. Drainage matters more than you think. Let’s get those blooms back!
📚 In This Guide
- What you need
- Instructions
- Tips and common mistakes
- Wrapping up and next steps
What you need
- ● Pruning shears or loppers – Sharp, clean tools (sterilized with rubbing alcohol) to avoid disease spread. Size: 6-8" blades for thick stems.
- ● Gloves – Heavy-duty gardening gloves to protect hands from thorns and sap.
- ● Balanced, slow-release fertilizer – Look for a 10-10-10 or 20-20-20 NPK ratio (e.g., Miracle-Gro Shake ’n Feed). Quantity: 1 lb per 100 sq ft.
- ● Organic compost or mulch – Type: Well-aged compost or wood chips. Quantity: 2-3 inches spread around the base.
- ● Watering can or hose with a gentle spray nozzle – For deep, even hydration.
- ○ Pruning sealant (optional) – Use: Only for large cuts to prevent disease (e.g., Tanglefoot Tree Wound Pruning Seal).
- ● Sunlight access – Lilacs thrive in full sun (6+ hours/day). Choose a spot with minimal shade.
- ● Well-draining soil – Amend heavy clay soil with compost to improve aeration.
- ● Timing – Prune right after blooming (late spring/early summer) and fertilize in early spring or fall.
- ● Patience – Lilacs may take 1-2 years to rebound fully after heavy pruning.
Step-by-Step guide to encourage lilacs to bloom year after year
Here's the method I've used to transform sparse lilacs into fragrant, flower-filled shrubs—no magic, just smart care.
🌱 Step 1: Prune Correctly After the First Bloom
Wait until after your lilacs finish blooming in spring before pruning—this ensures next year's buds form properly. Cut back only the old wood (last year's growth) by about one-third of its length. You'll see these stems are thicker and woody compared to newer growth.
Use clean, sharp pruners to make cuts at a 45-degree angle just above a bud or branch junction. Avoid cutting into the center of the shrub—this creates a "donut hole" that blocks airflow and invites pests. Real talk: If your lilacs haven't bloomed well, they're probably overcrowded from poor pruning.
☀️ Step 2: Provide Full Sun and Proper Airflow
Lilacs need at least 6 hours of direct sun daily to set abundant blooms. If yours are in shade, move them or prune surrounding trees. You'll see the difference in just one season—more sunlight means more energy for flowers instead of leaves.
Thin out any dense branches to improve airflow. When you can see light through the center of the shrub, you're on the right track. I know it seems counterintuitive to remove foliage, but this prevents fungal diseases that weaken plants and reduce flowering.
💧 Step 3: Water Deeply During Drought and Dry Spells
Water lilacs deeply once a week during dry periods, aiming for 1-2 inches of water. You'll know you've watered enough when the soil feels moist 6 inches down. Shallow watering encourages weak roots that can't support heavy blooms.
Mulch around the base with 2-3 inches of organic mulch (like shredded bark) to retain moisture and regulate soil temperature. Keep mulch 6 inches away from the trunk to prevent rot. Overwatering is just as bad as underwatering—your lilacs will tell you by dropping buds.
✂️ Step 4: Fertilize in Early Spring for Strong Growth
Apply a balanced, slow-release fertilizer (like 10-10-10) in early spring as new growth begins. Follow package instructions for amounts—too much fertilizer burns roots and reduces blooms. You'll see fresh, vibrant leaves within weeks, which means the plant is storing energy for flowers.
For extra fragrance, add a handful of bone meal (high in phosphorus) around the root zone in late winter. This boosts bloom production without encouraging too much leafy growth. I've found lilacs respond best to light, regular feeding rather than heavy doses.
⏰ Step 5: Watch for Bud Formation in Late Summer
Lilac flower buds form on current year's growth in late summer (August-September). If you prune at this time, you'll remove next year's blooms. Look for small, rounded swellings along the stems—these are your future flowers.
Protect these buds from late-season frosts by wrapping young shrubs in burlap if your climate dips below 20°F. Mature lilacs handle cold better, but new growth is vulnerable. You'll know you're doing it right when you see plump buds by early spring—each one holds a fragrant bloom.
Tips & tricks for encouraging lilacs to bloom year after year
These simple adjustments will help you transform your lilacs into fragrant, flower-filled shrubs that come back stronger every season.
The Pruning Angle Matters: When you cut back old wood in Step 1, make sure your pruners are sharp and clean—dull blades crush stems, inviting disease. The 45-degree angle isn't just for looks; it helps water run off the cut, preventing rot. If you're unsure where to cut, look for the small bump where a bud or branch grows out—this is your target spot. I've seen lilacs recover beautifully when pruned this way, but they struggle when cuts are too close to the trunk or jagged.
Sunlight Strategy: The 6 hours of direct sun in Step 2 is non-negotiable for vibrant blooms. If your lilacs are in partial shade, try moving them to a sunnier spot or prune nearby trees to let more light reach them. You'll notice the difference within a single growing season—more sunlight means more energy for flowers instead of just leaves. For extra fragrance, position your lilacs where you can enjoy their scent from a patio or garden bench.
Watering Wisdom: Those 1-2 inches of water per week in Step 3 should penetrate 6 inches deep—this encourages strong root growth that supports heavy blooms. Use a rain gauge or tuna can to measure water accurately. I've found that morning watering prevents fungal issues, and mulching with 2-3 inches of organic material keeps moisture consistent. The key is steady hydration, not soggy soil—your lilacs will thank you with fewer dropped buds.
Frost Protection: When protecting buds below 20°F in Step 5, burlap is your best friend. Wrap young shrubs loosely and leave room for airflow—tight wrapping can trap moisture and cause rot. Mature lilacs handle cold better, but new growth is delicate. You'll know you're doing it right when you see plump buds by early spring, each one promising a fragrant bloom. This simple step has saved my lilacs from winter damage multiple times.
Pro Tips for Make Lilacs Bloom
- These simple adjustments will help you transform your lilacs into fragrant, flower-filled shrubs that come back stron...
- The Pruning Angle Matters: When you cut back old wood in Step 1, make sure your pruners are sharp and clean—dull blad...
- Sunlight Strategy: The 6 hours of direct sun in Step 2 is non-negotiable for vibrant blooms. If your lilacs are in pa...
Frequently asked questions
about making lilacs bloom—because every gardener deserves a fragrant, thriving bush! Here are answers to the most common questions to help you troubleshoot and succeed.How do I know if my lilac is healthy enough to bloom?
A healthy lilac has dark green, glossy leaves and brown, woody stems (not soft or mushy). If your bush is leafing out but not blooming, it may need more sunlight (6+ hours/day), proper pruning, or a balanced fertilizer. Yellowing leaves? Check for pests or overwatering!
Why aren’t my lilacs blooming this year?
Lilacs bloom on old wood, so aggressive pruning in spring can delay flowers. Other culprits: poor soil, drought stress, or over-fertilizing with nitrogen (which promotes leaves over blooms). Try feeding in early spring with a low-nitrogen, high-phosphorus fertilizer (like 5-10-10) to encourage flowers.
Can I make lilacs bloom later in the season?
Lilacs typically bloom in late spring, but you can extend their season by:
- Planting late-blooming varieties like ‘Miss Canada’ or ‘Dwarf Korean.’
- Avoiding heavy pruning after mid-summer—this removes next year’s flower buds!
- Using slow-release fertilizer in early spring to support gradual growth.
What’s the difference between pruning for blooms vs. shaping?
Prune for blooms by cutting dead or overcrowded stems right after flowering (late spring). For shaping, prune in early summer—but never cut more than 1/3 of the plant at once! Lilacs bloom on last year’s growth, so avoid heavy pruning in fall/winter. Pro tip: Use sterilized shears to prevent disease!
Do lilacs need special care in hot or cold climates?
Lilacs are hardy (zones 3–7), but extreme heat or cold can stress them. In hot climates, mulch to retain moisture and water deeply but infrequently. In cold areas, protect young plants with winter mulch (straw or leaves). If blooms freeze before opening, they won’t return—prune after the last frost to avoid damage.
Wrapping up and next steps
With the right care, your lilacs can burst into lush, fragrant blooms year after year! Remember: prune strategically in late winter or early spring, feed with balanced fertilizer (or organic alternatives), and ensure proper sunlight and drainage.
A little patience and consistency go a long way—soon, your garden will be filled with that iconic, sweet scent. 🌸
Ready to transform your lilacs? Start today—grab your pruners, check your soil, and watch your garden thrive! Need more tips? Explore our full guide or share your progress with fellow gardeners. Happy blooming! 🌿✨